Mushroom Bot! (Detailed Making-Of Process)
Greetings!
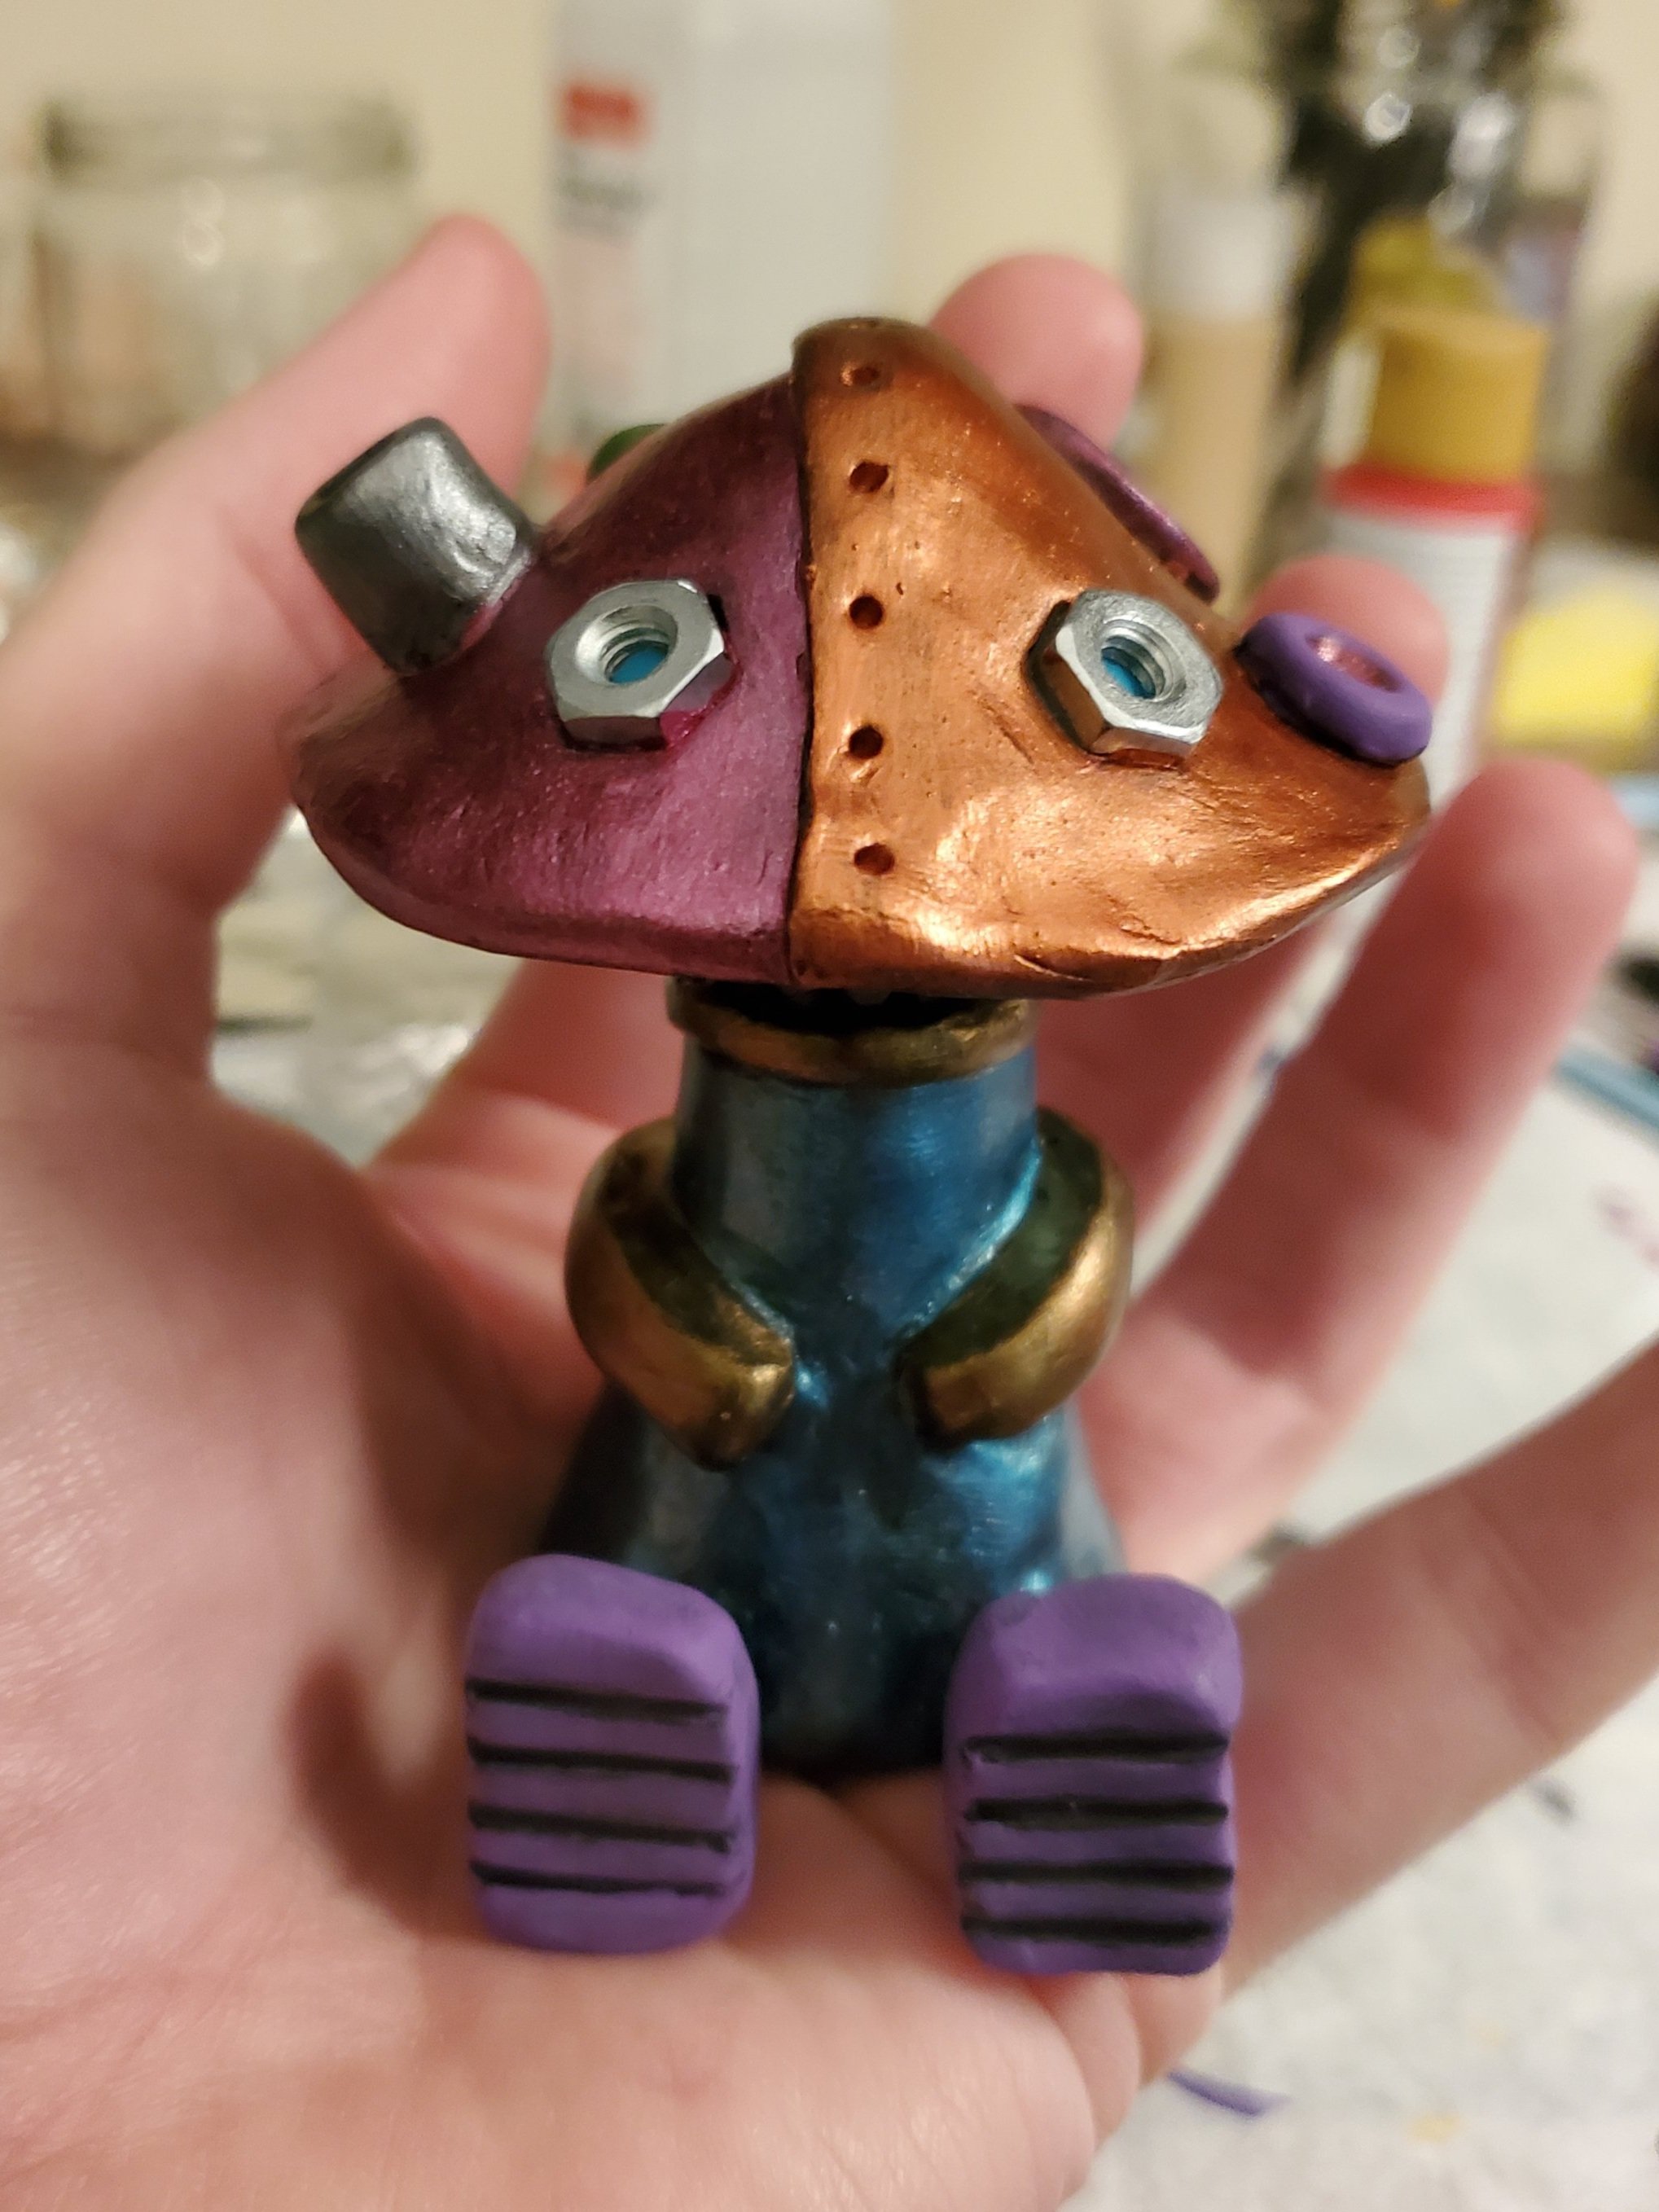
I just made this adorable little Mushroom Bot! (It’s available in my shop until sold)
In my other blog posts I usually show some making-of pictures, but today I thought I’d spend a little more time detailing out what I did.
Starting with Foil and a Sketch

Wanting to make a sculpture, I went back through my robot idea sketches and found this cute little guy.
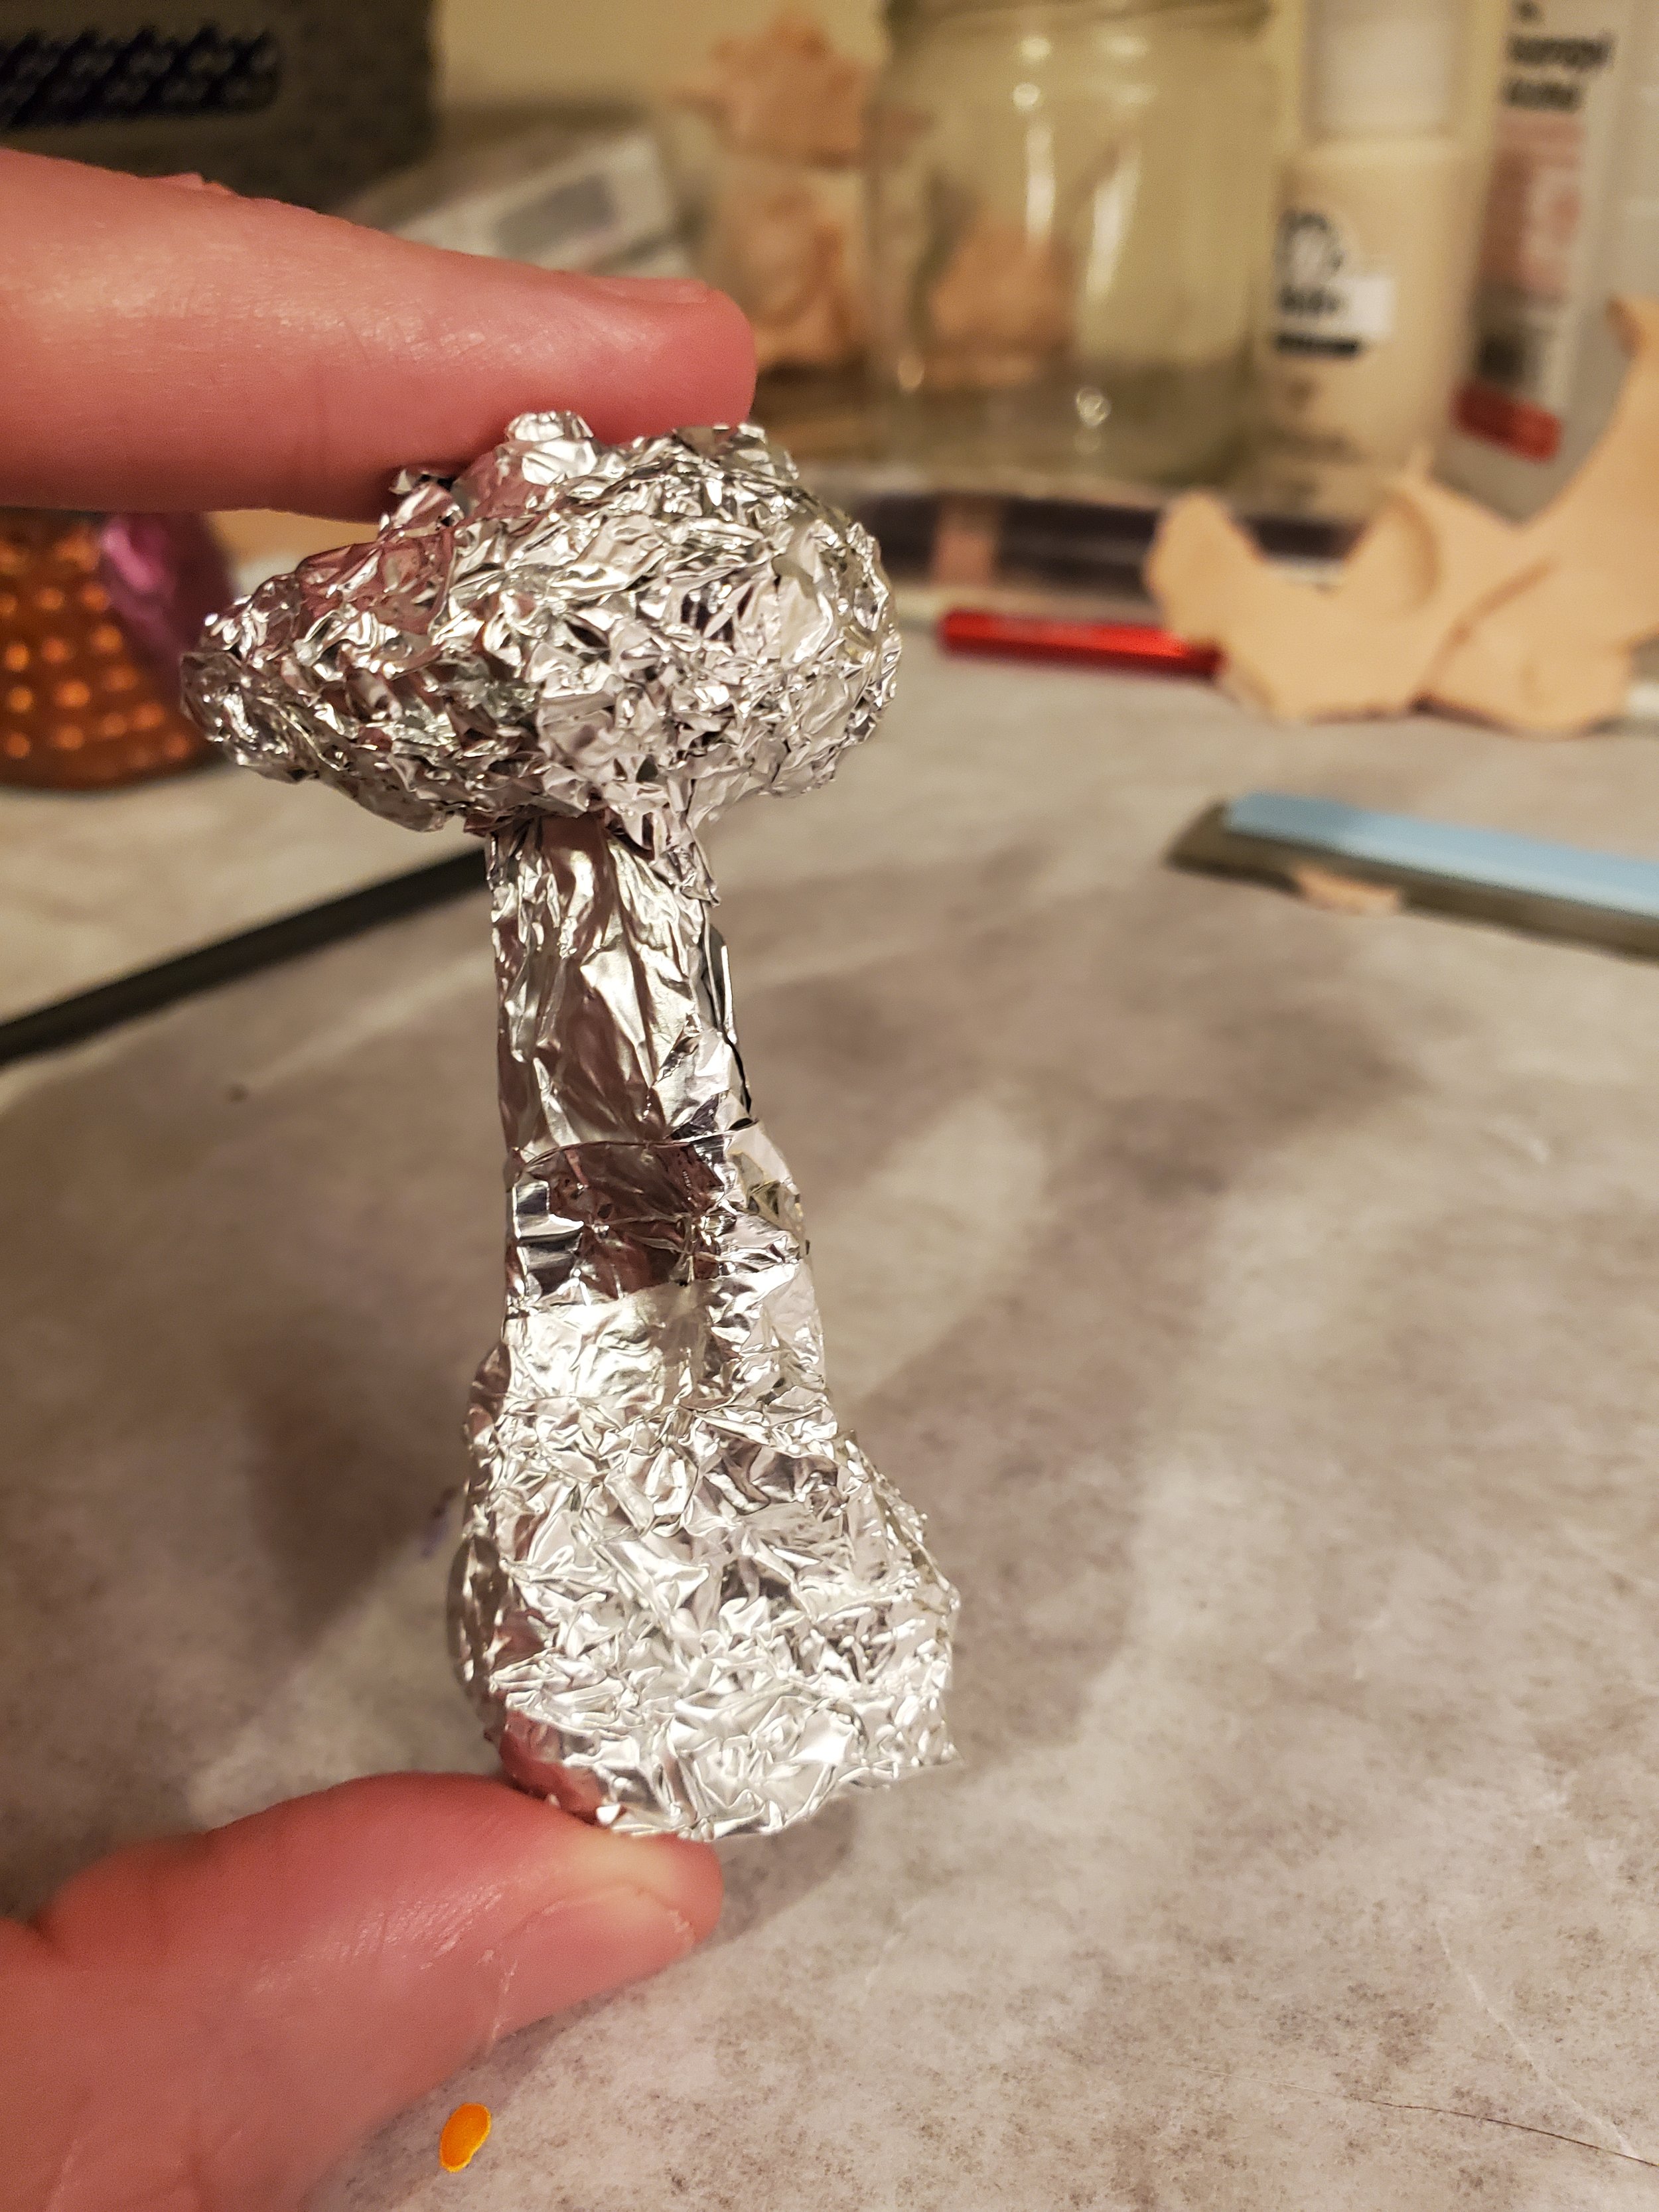
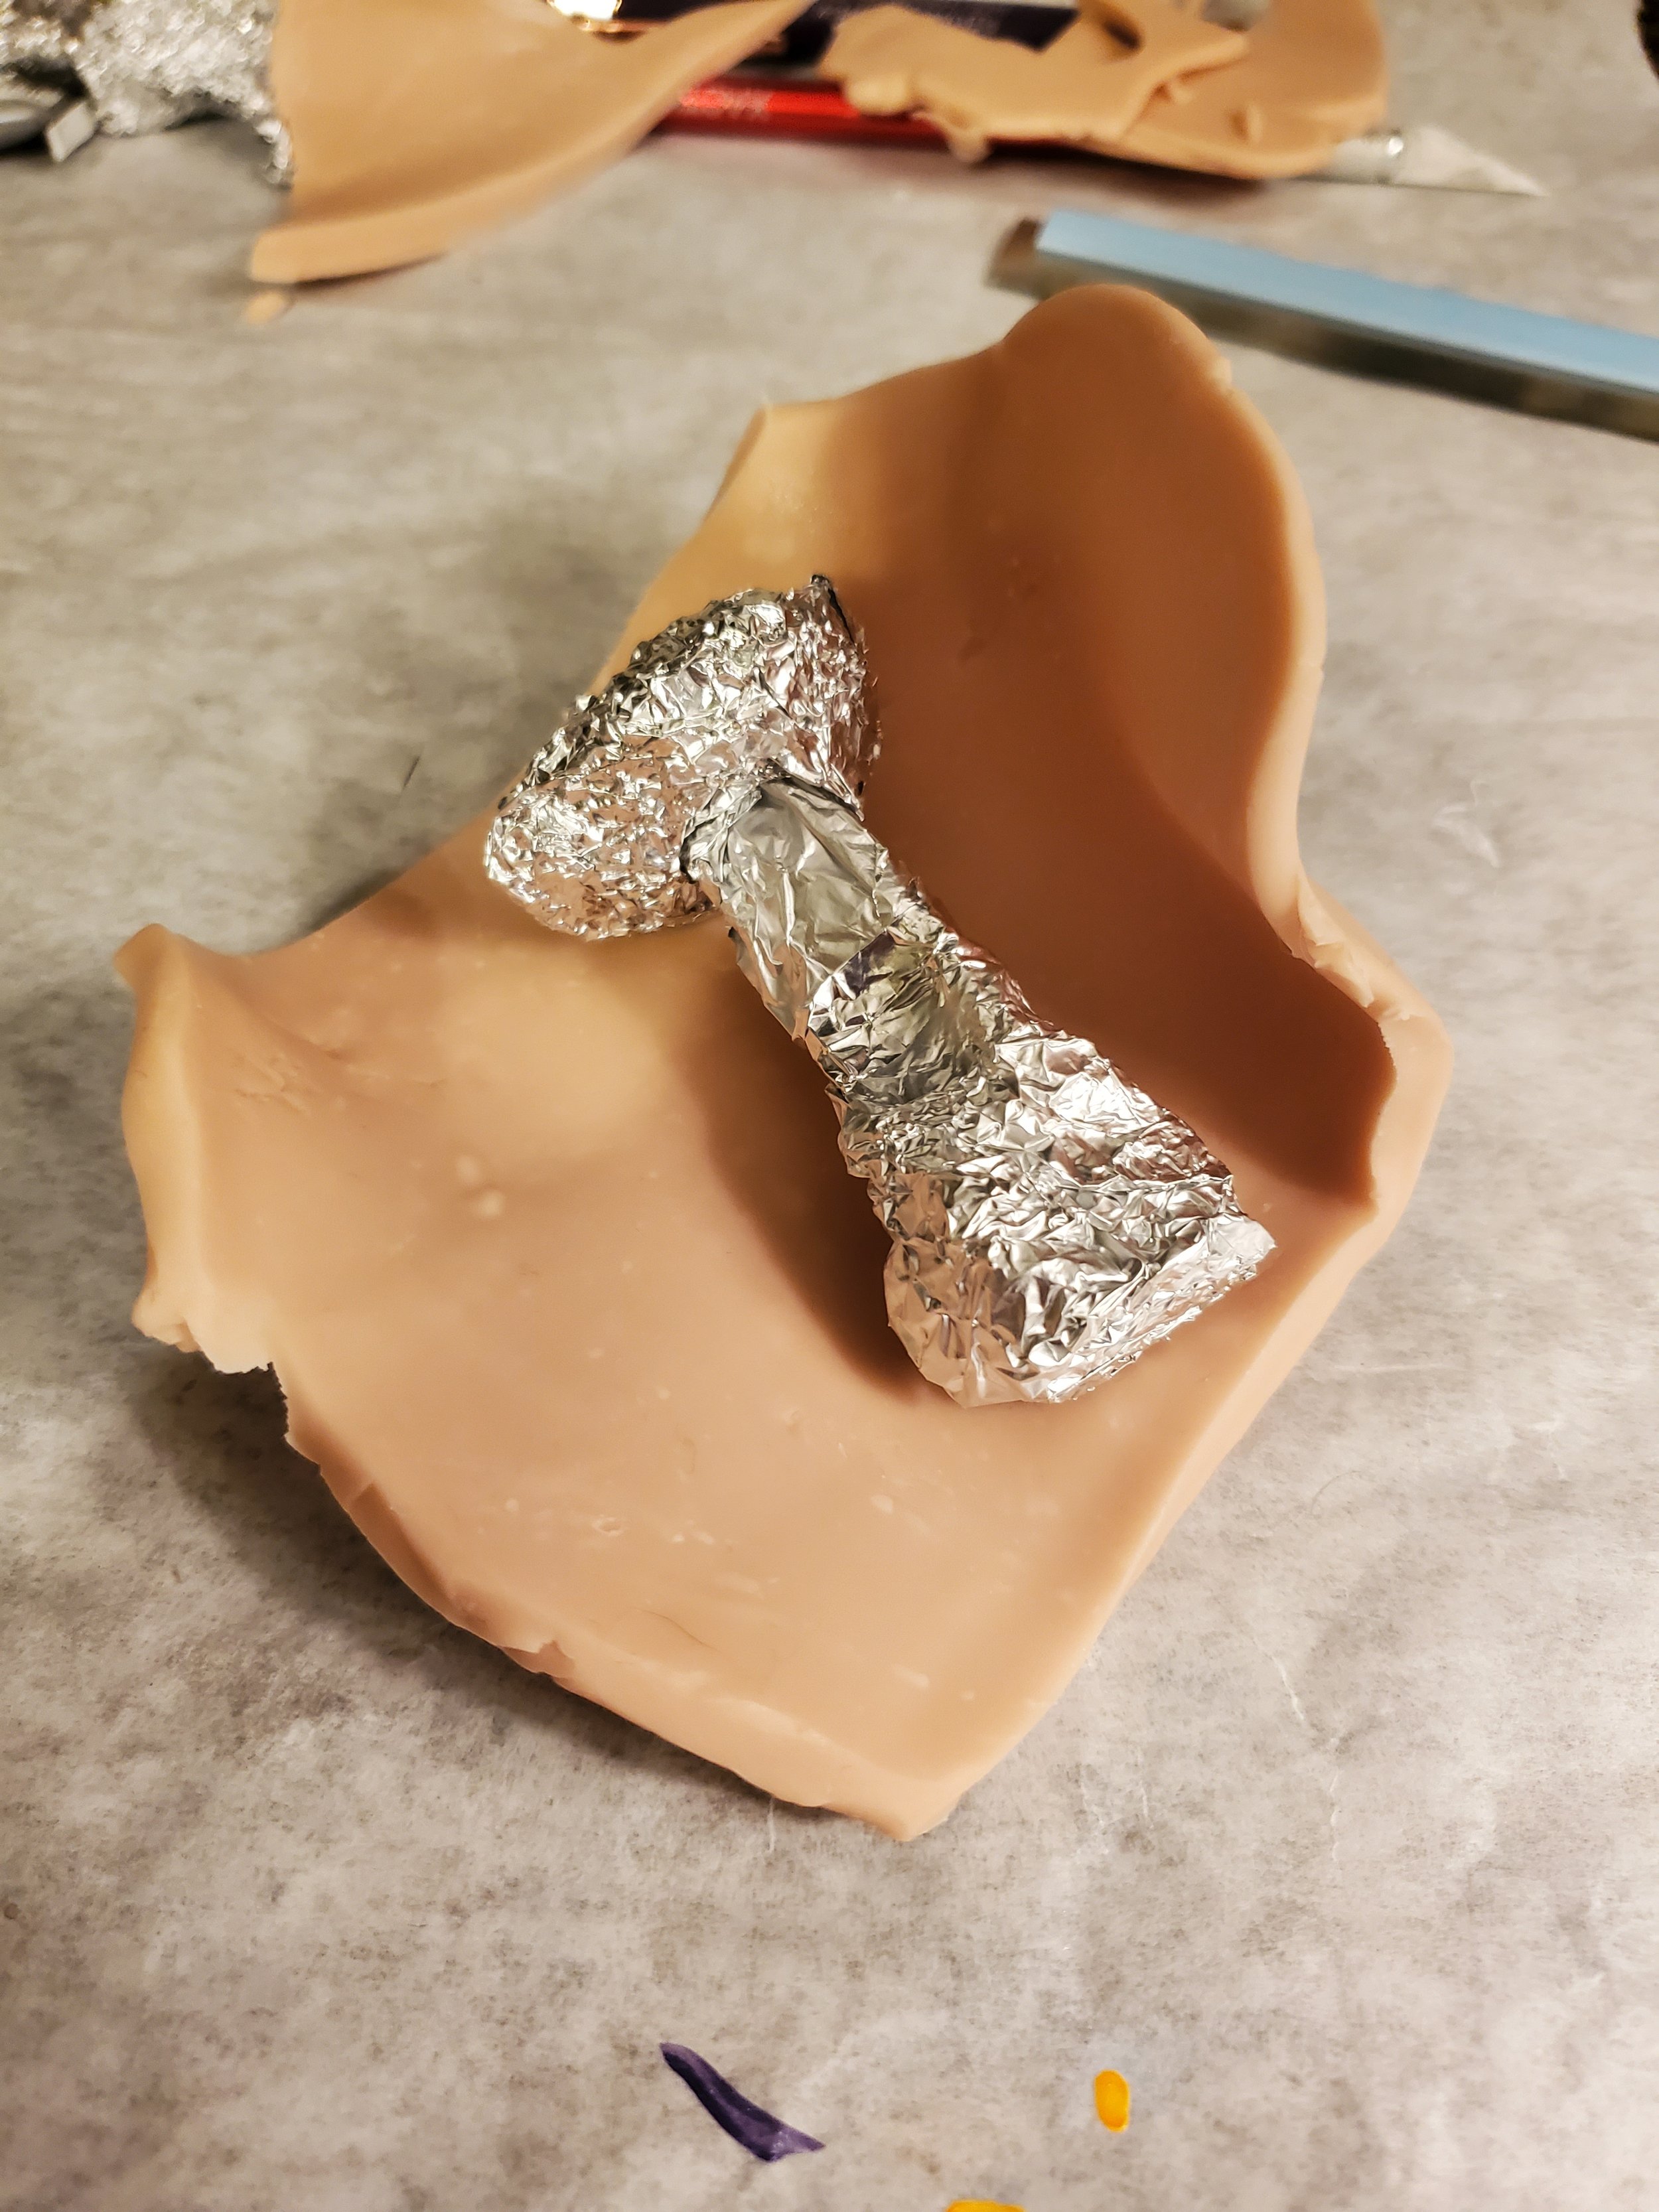
So first I made a vague foil shape for my mushroom bot, then used a rolling pin to roll out a thin slab of polymer clay. The kind of clay I’ve been using is Super Sculpey Original by the company Sculpey. For me it’s just the right combination of softness and firmness.

After wrapping the foil in polymer clay, I added more clay and created a mushroom shape.
Adding Features
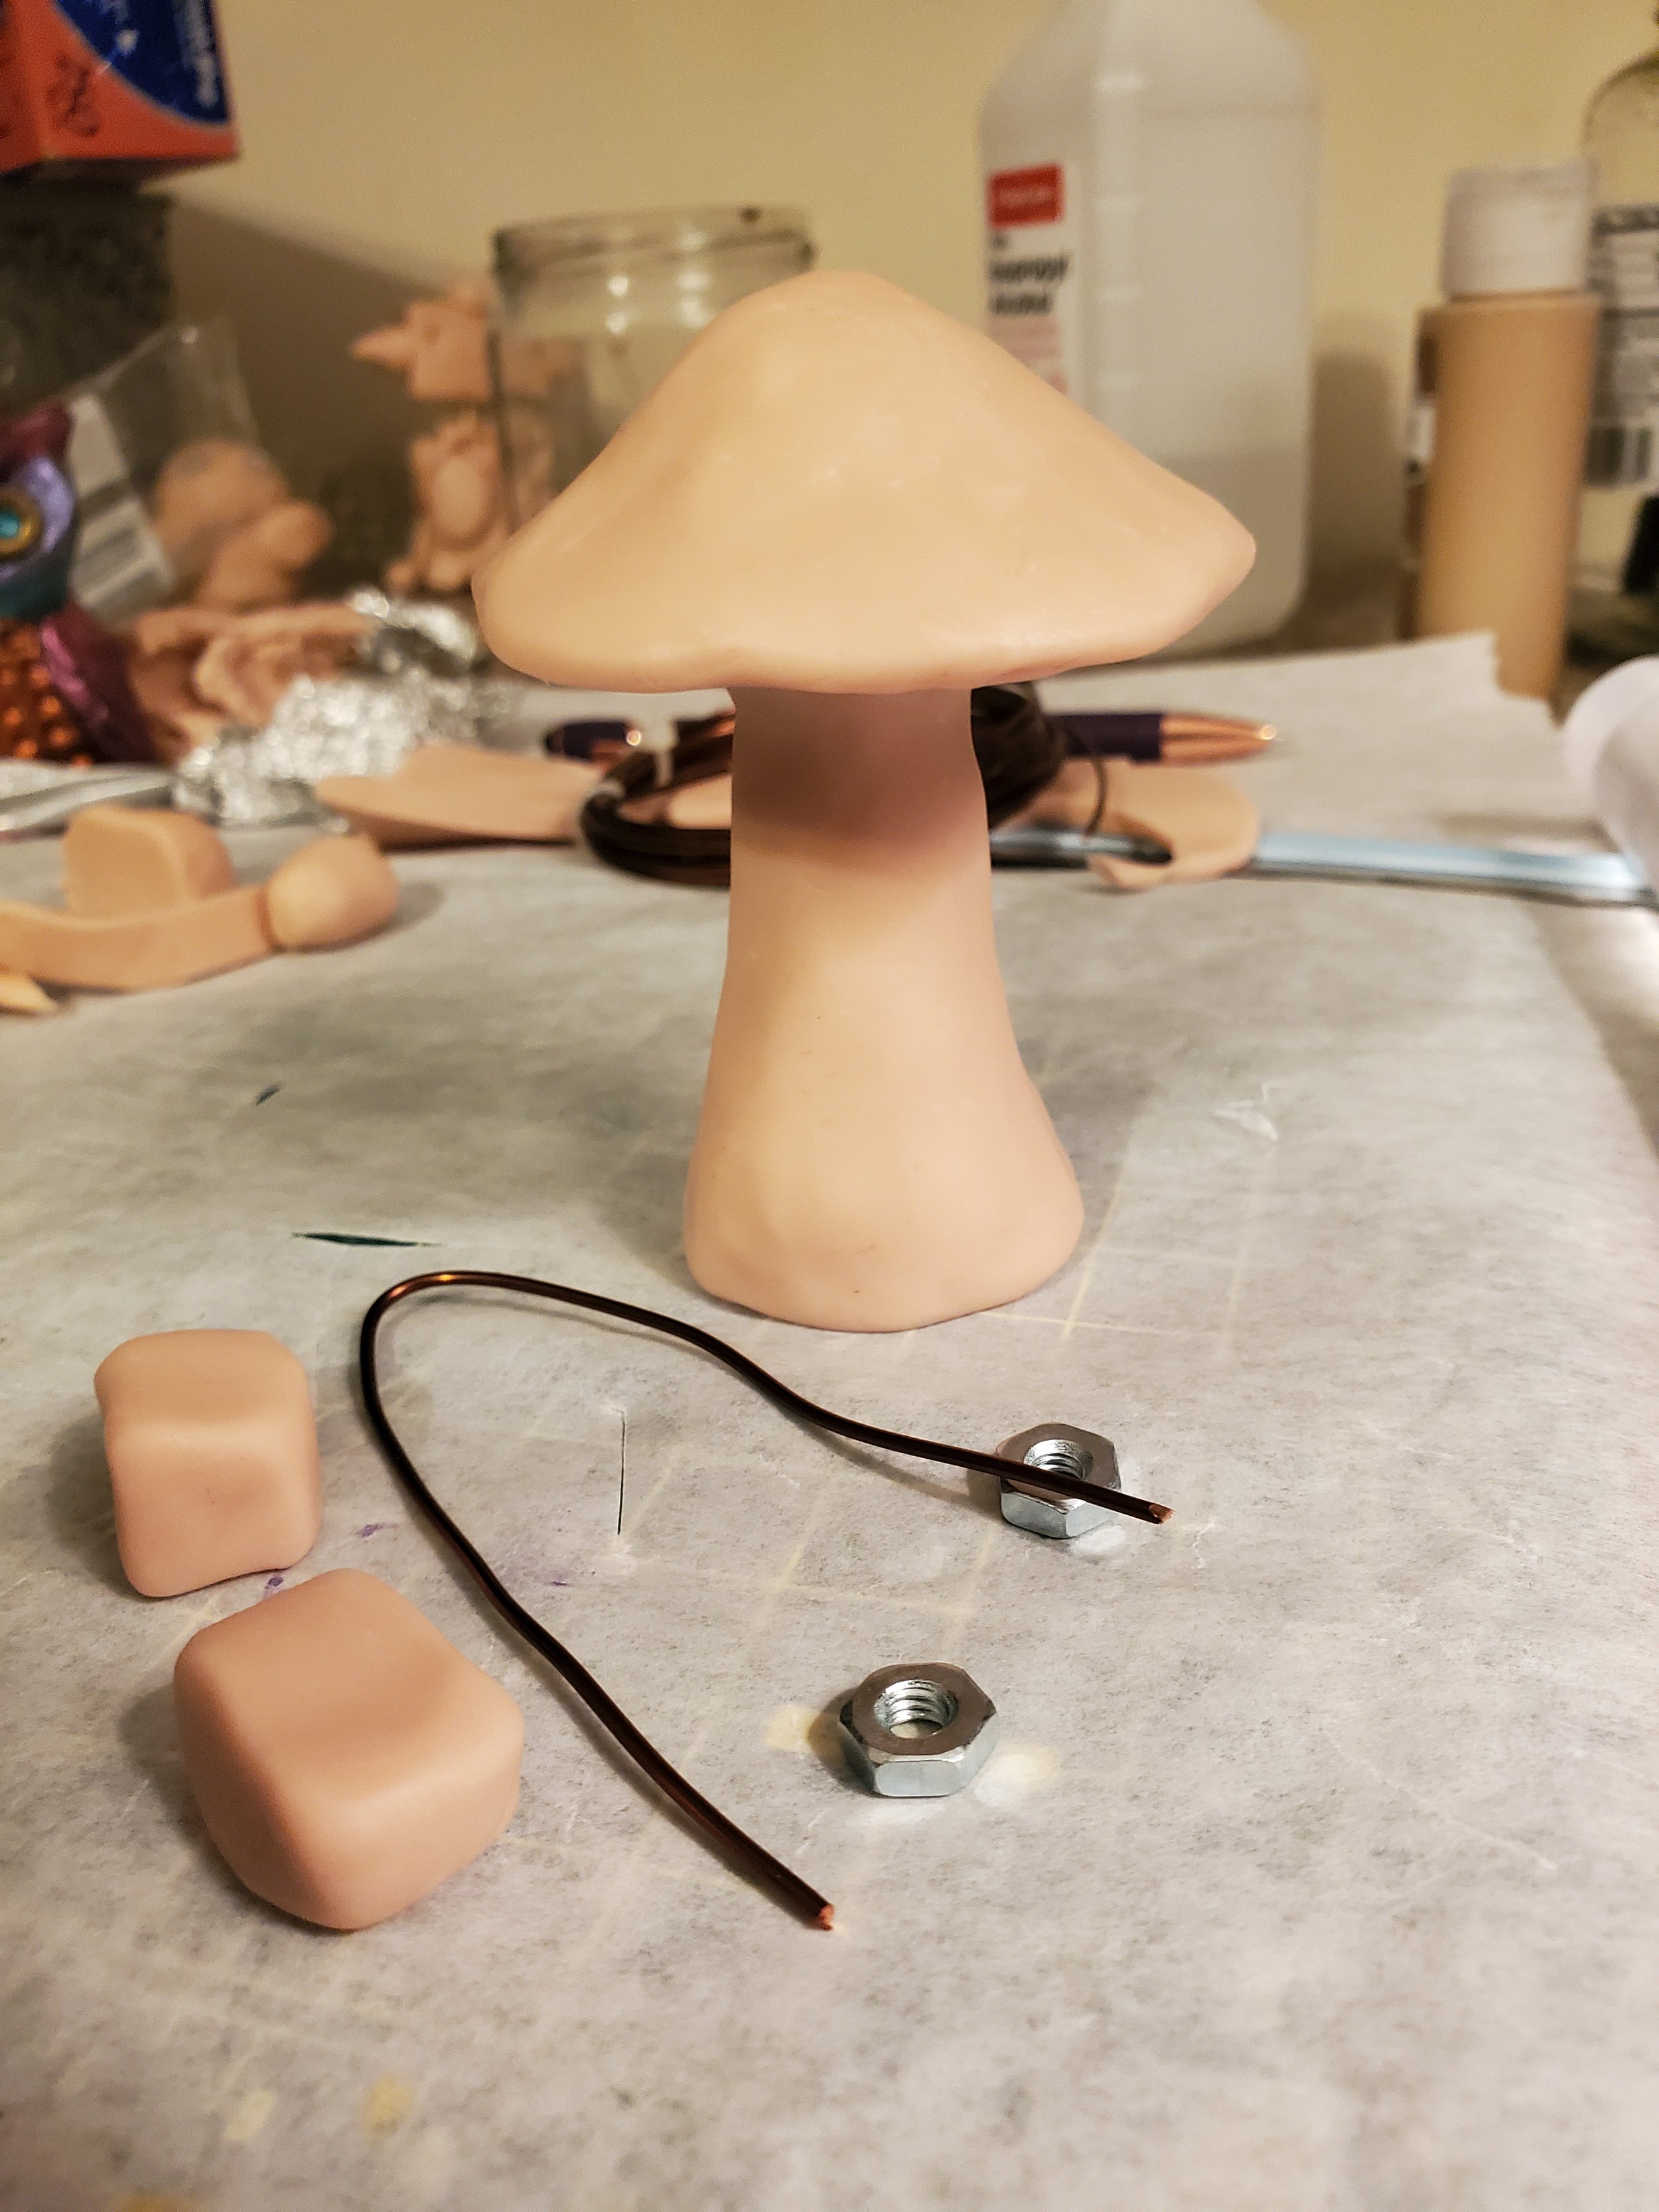
I shaped the mushroom even more into the shape that I wanted.
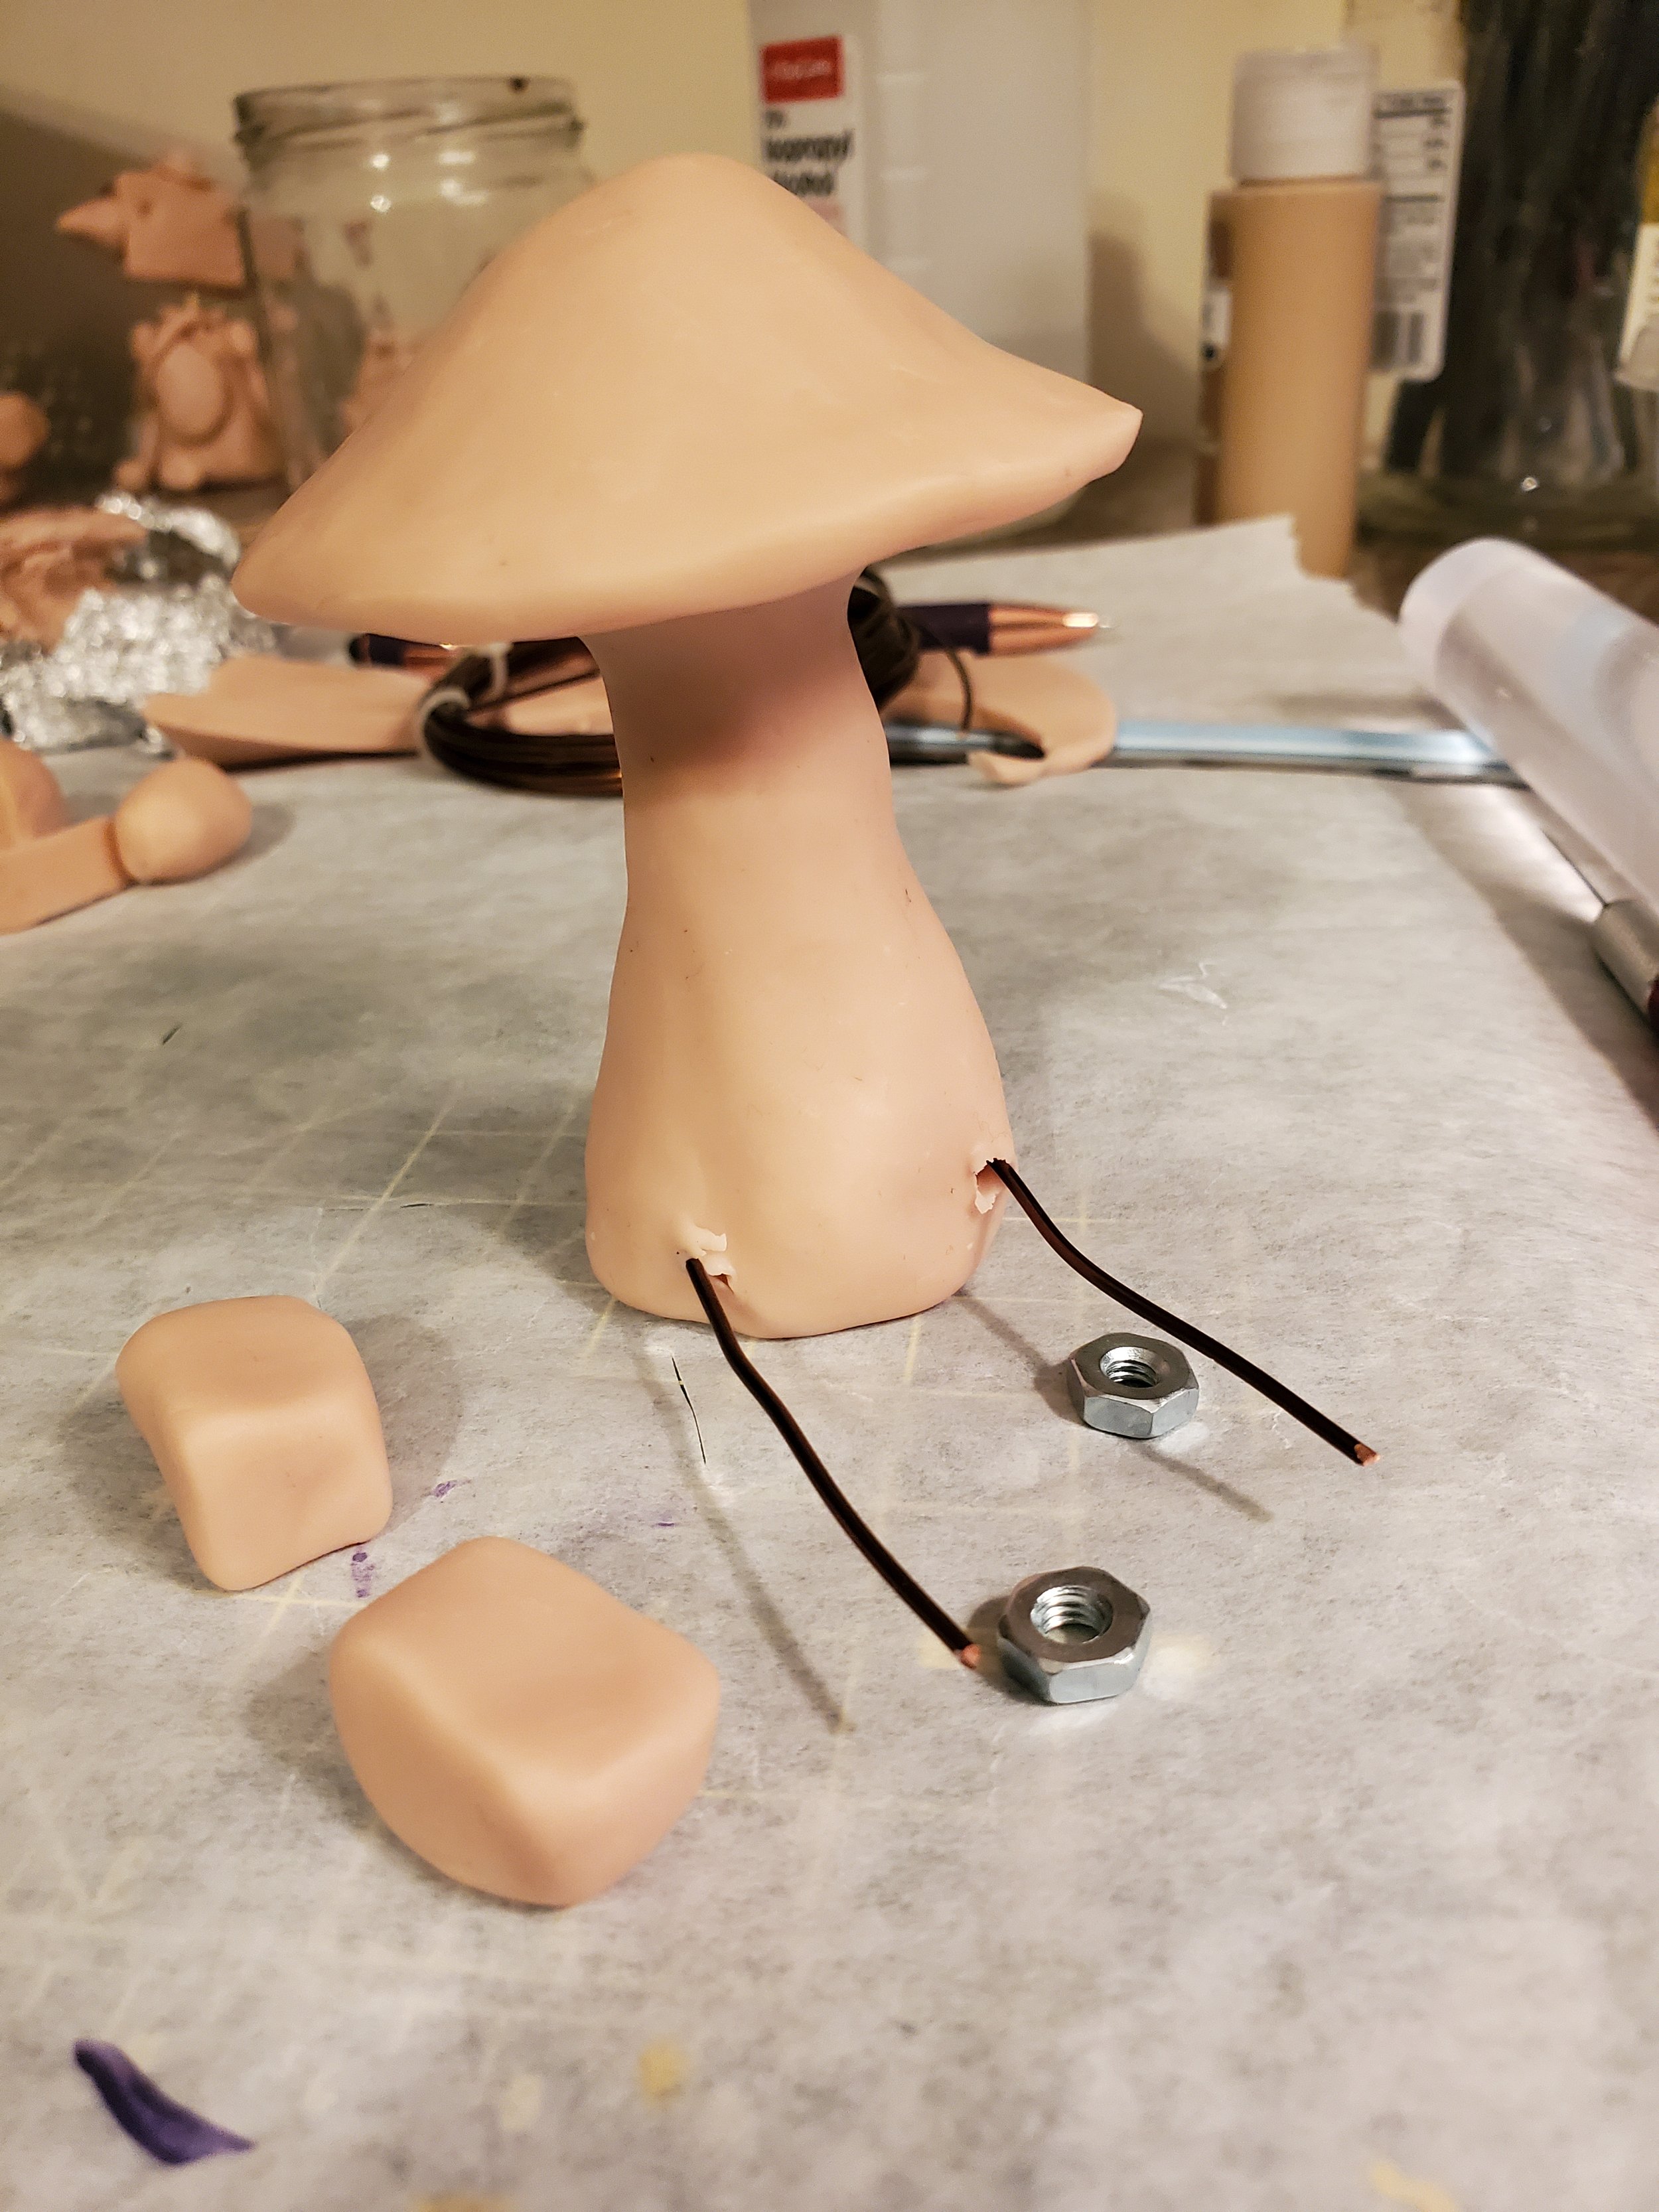
Next I shaped some blocks for the shoes. At first I thought I would just have the shoes attached to the bottom of the mushroom without legs, but then I realized I wanted to add legs. To make sure that the legs and shoes were sturdy enough, I wanted to attach them to the foil inside the mushroom. I cut and bent a piece of wire, which you can see in the first picture.
Then I pushed that bent piece of wire through the clay from the back of the sculpture, pulling it through so that the bend hooked around the foil inside. Then I smoothed the clay back over in the back, covering up where I’d pushed the wire through.
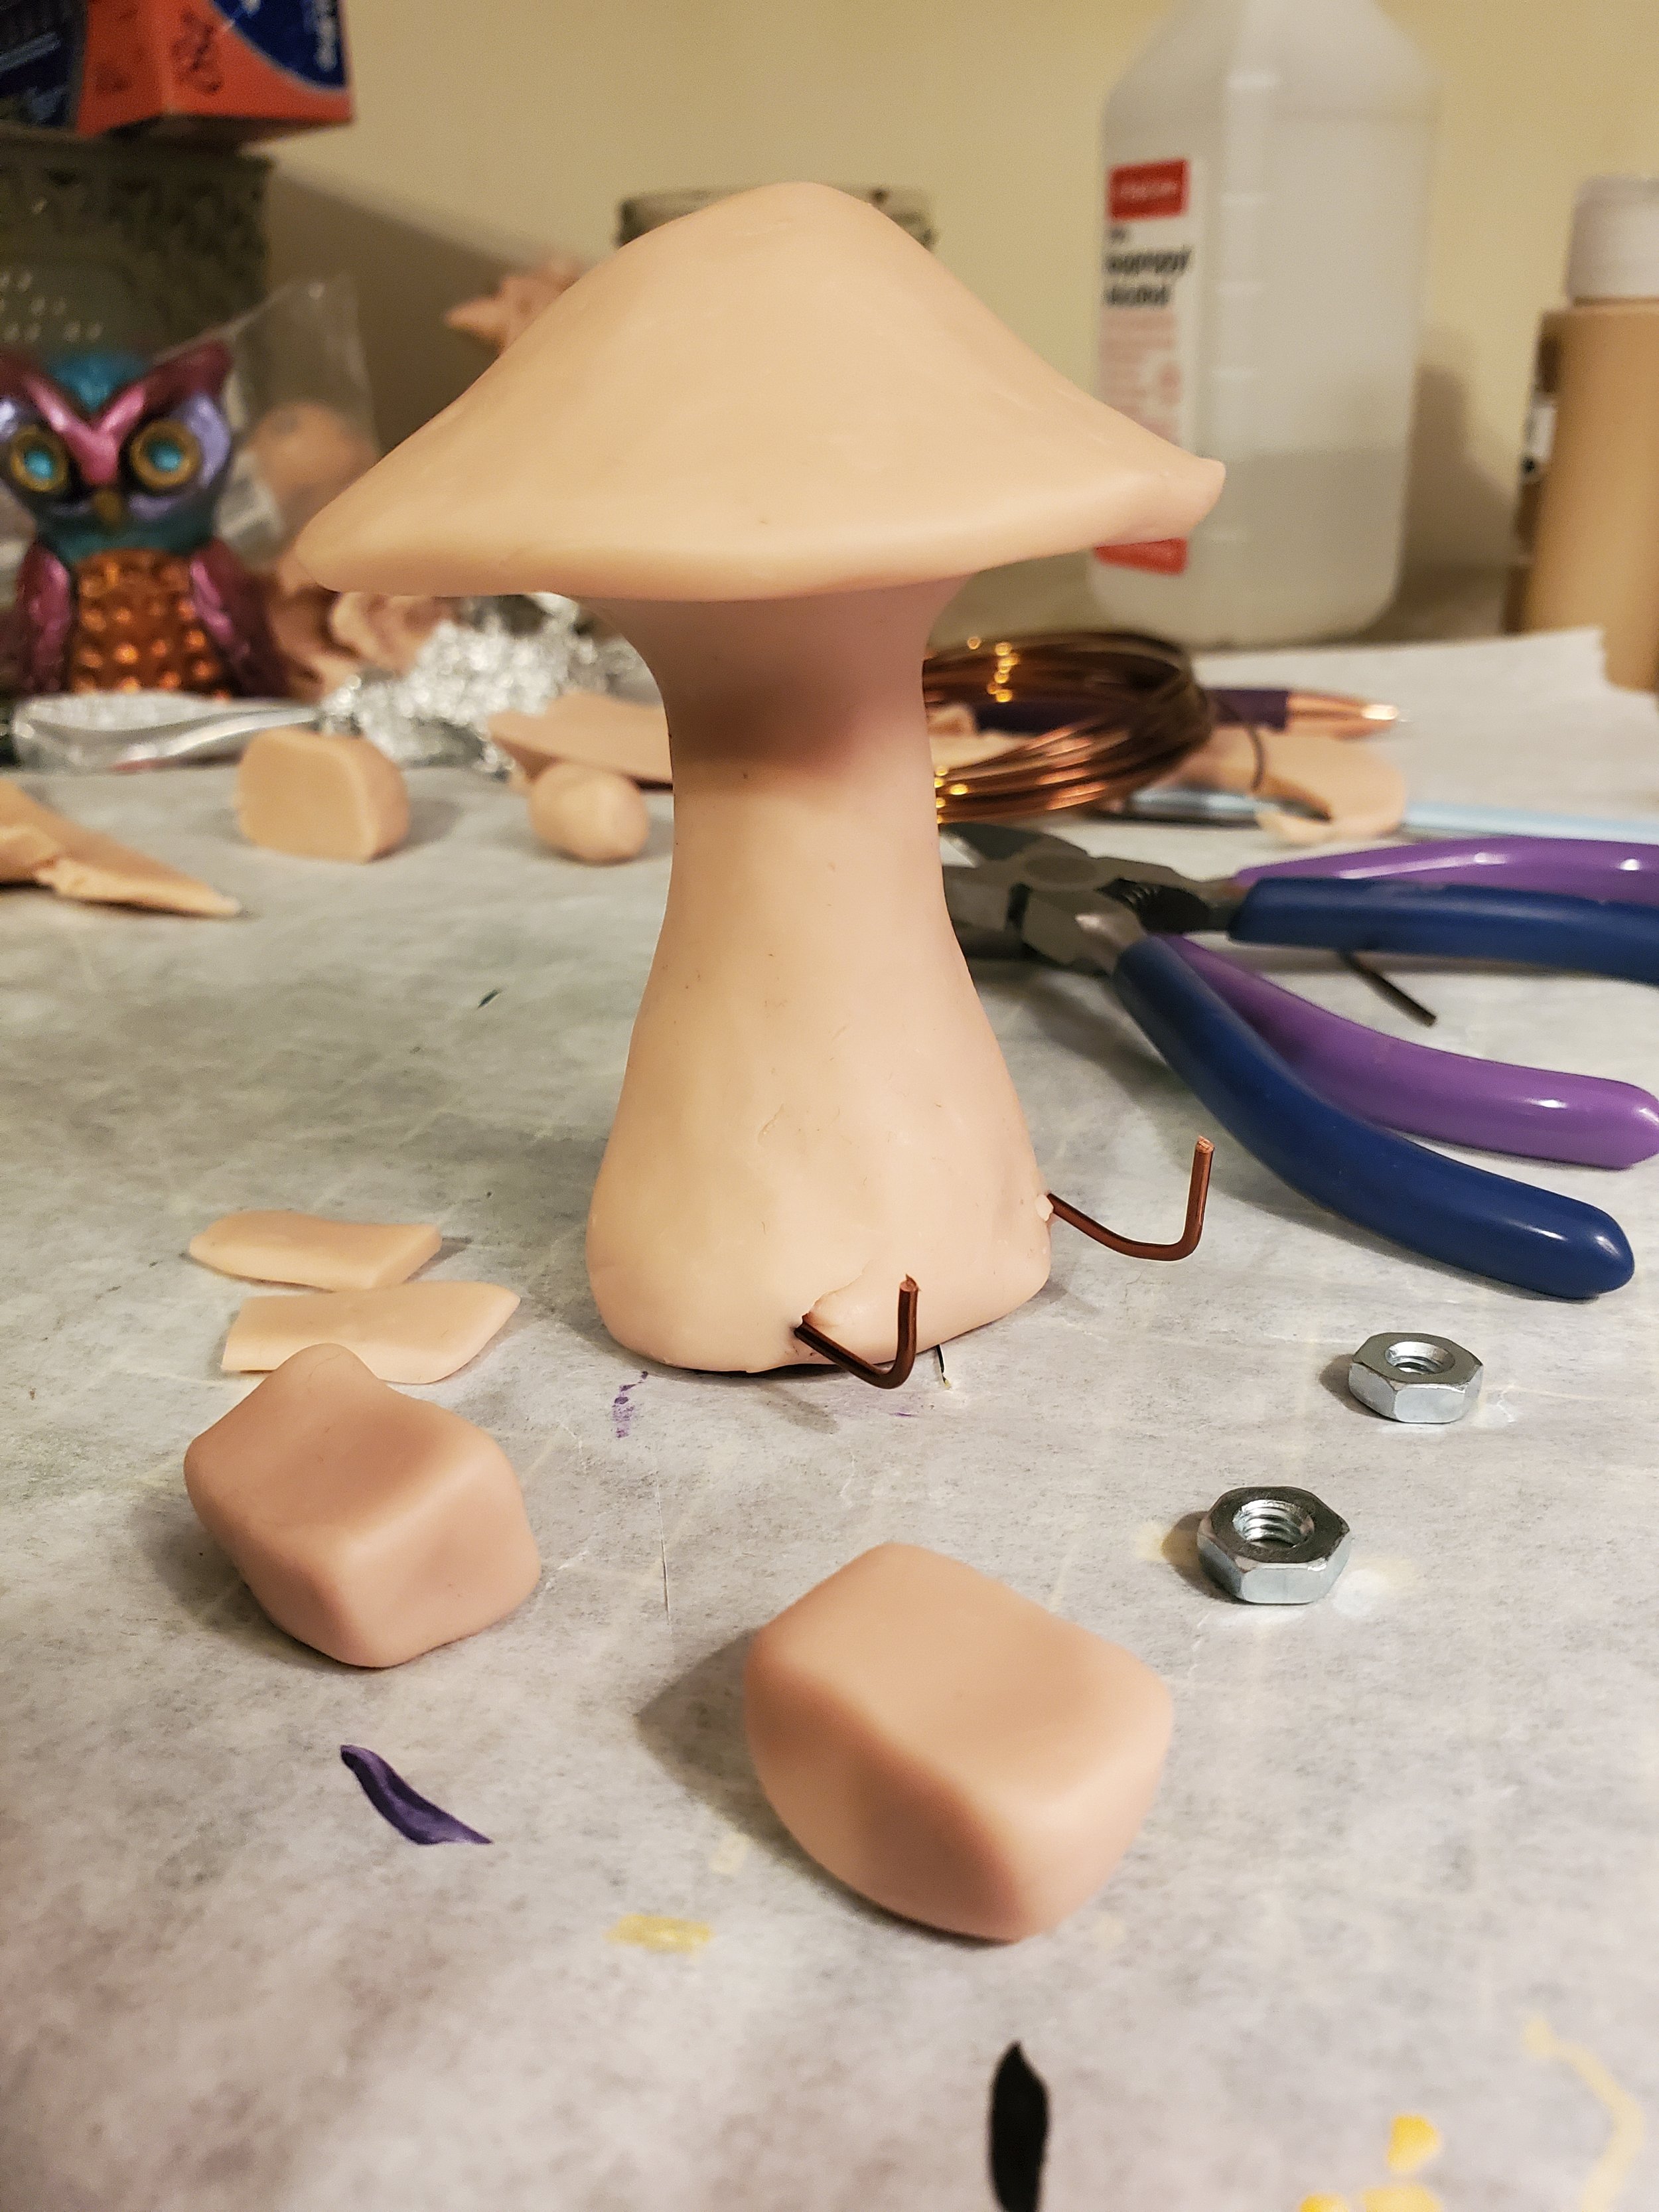
I cut the two ends of the wire, then bent them up, as you can see in the first picture. The bending of the wire is to ensure that the clay of the shoes won’t just slide off after the sculpture is complete - it kind of hooks the shoe pieces on.
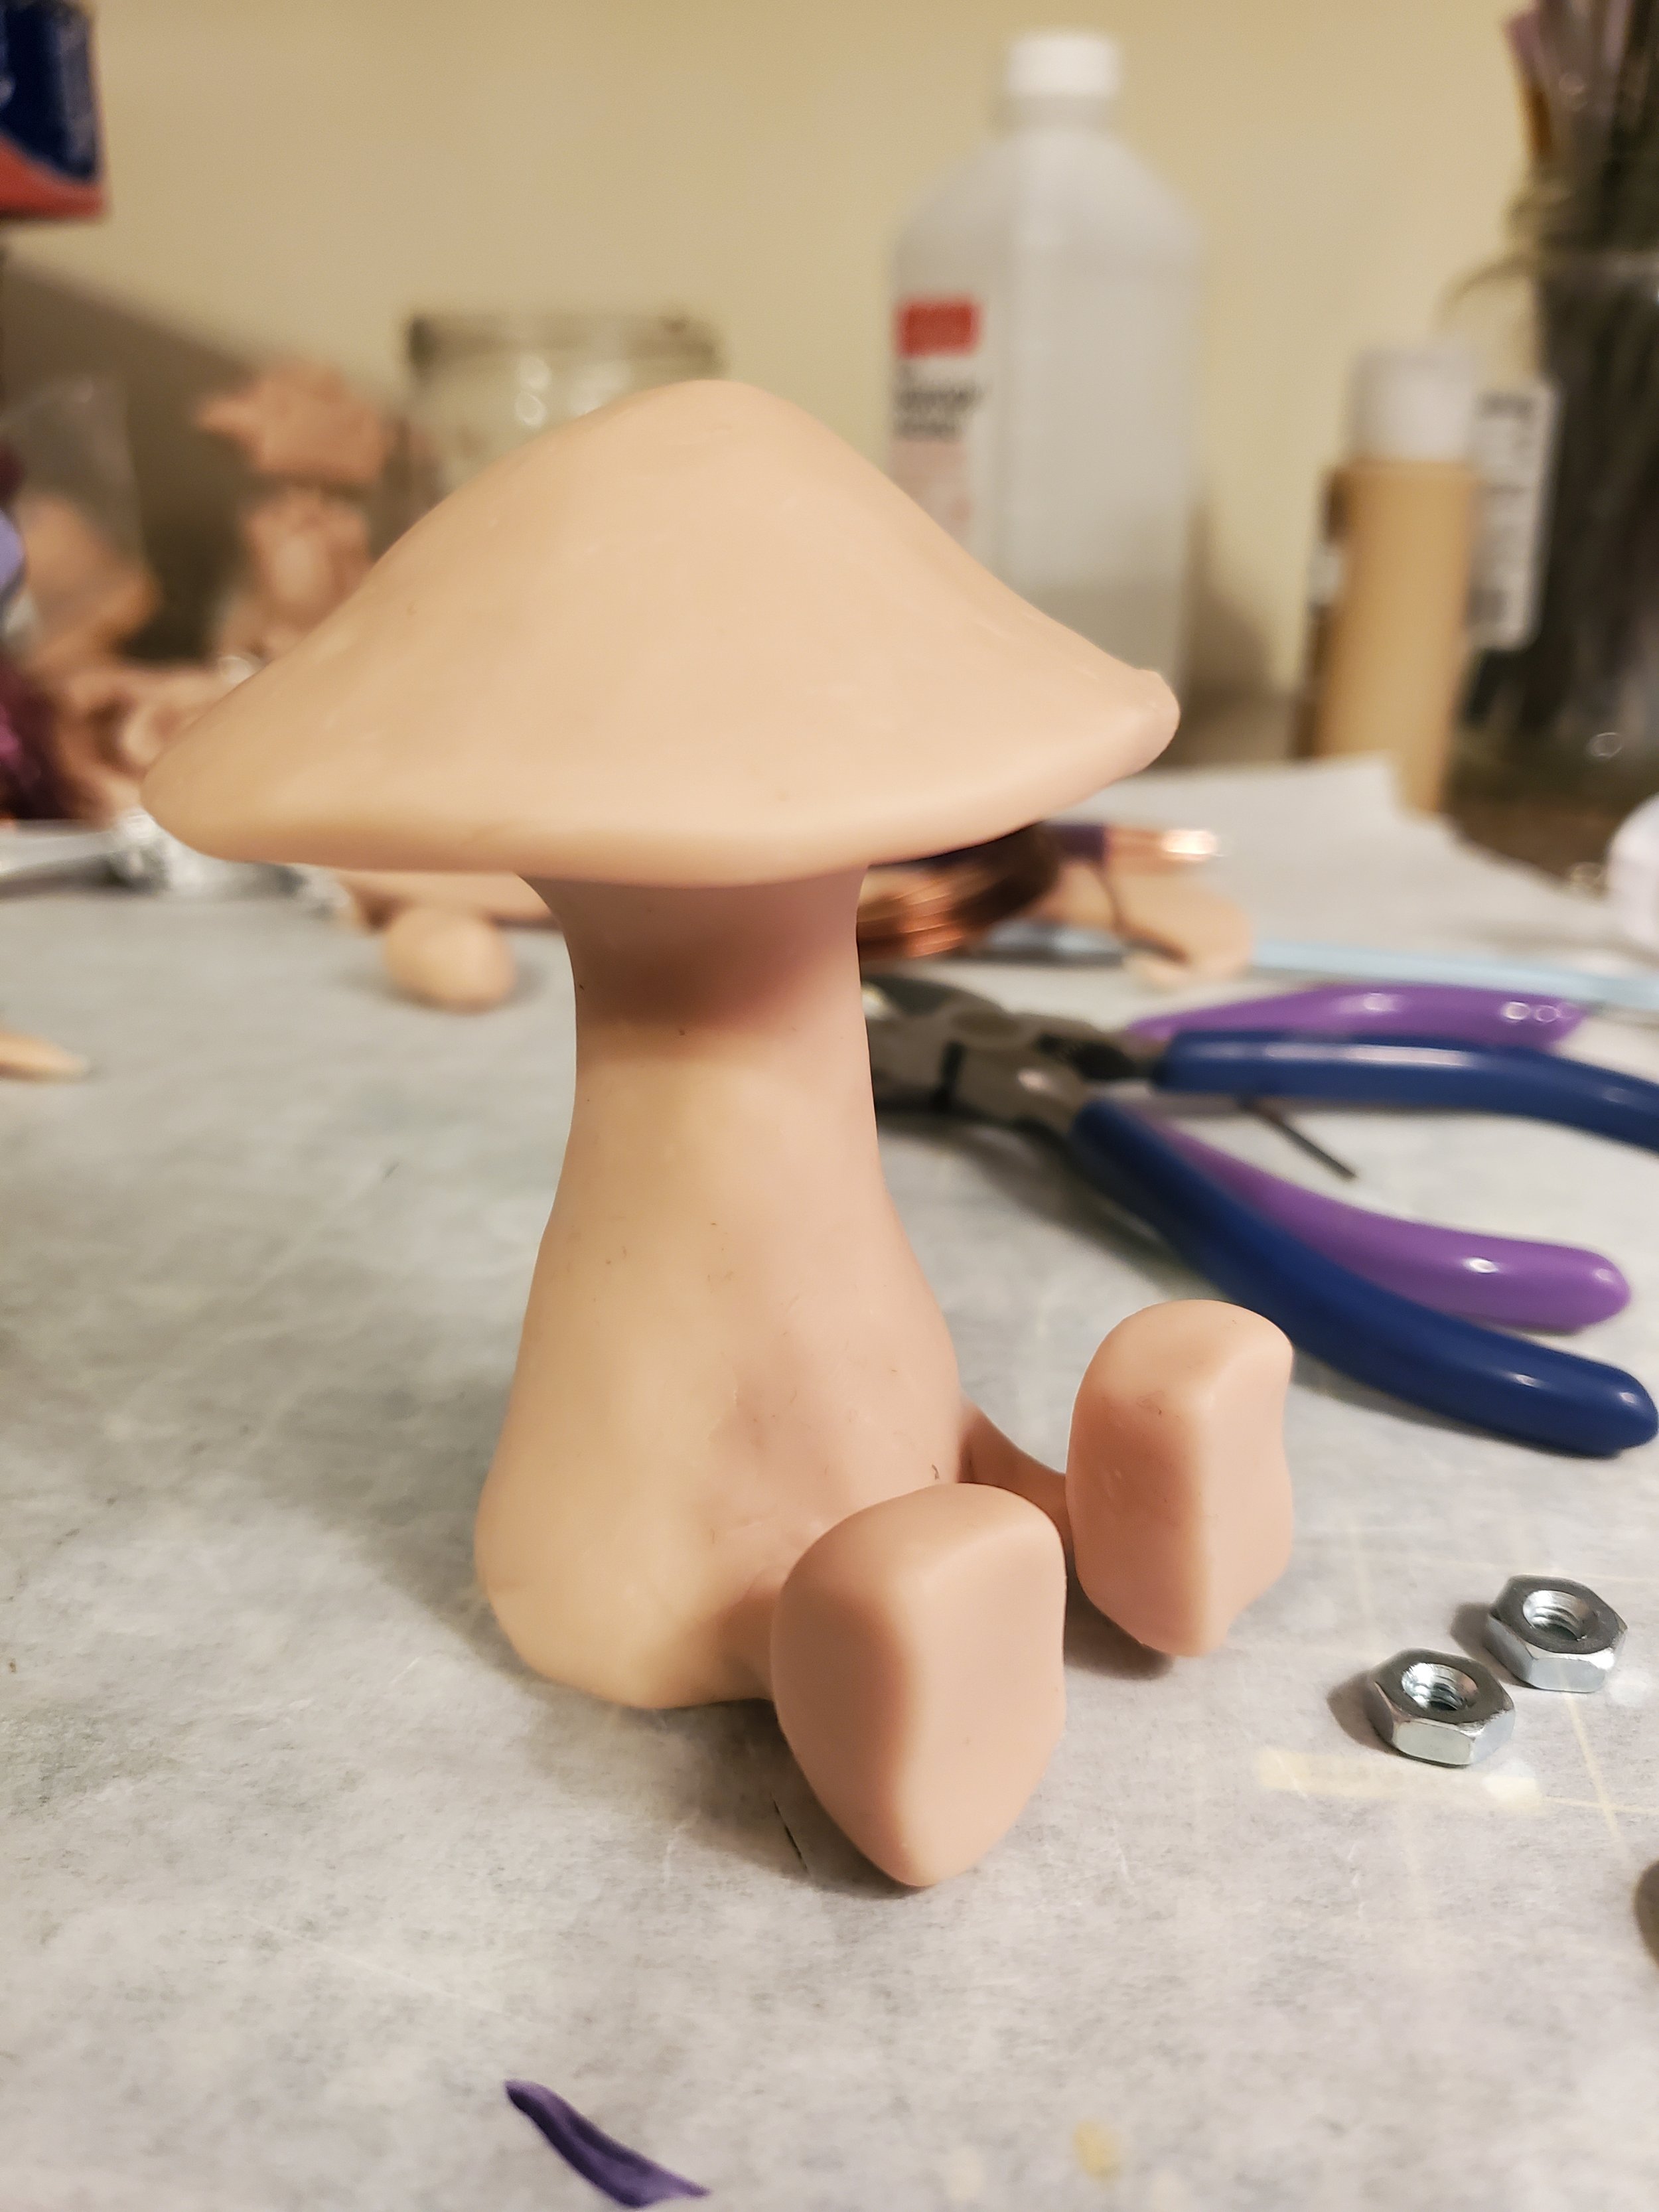
I slipped the shoes on, then made some tiny sheets of clay to wrap around the remaining wire to make the legs.
Adding Details
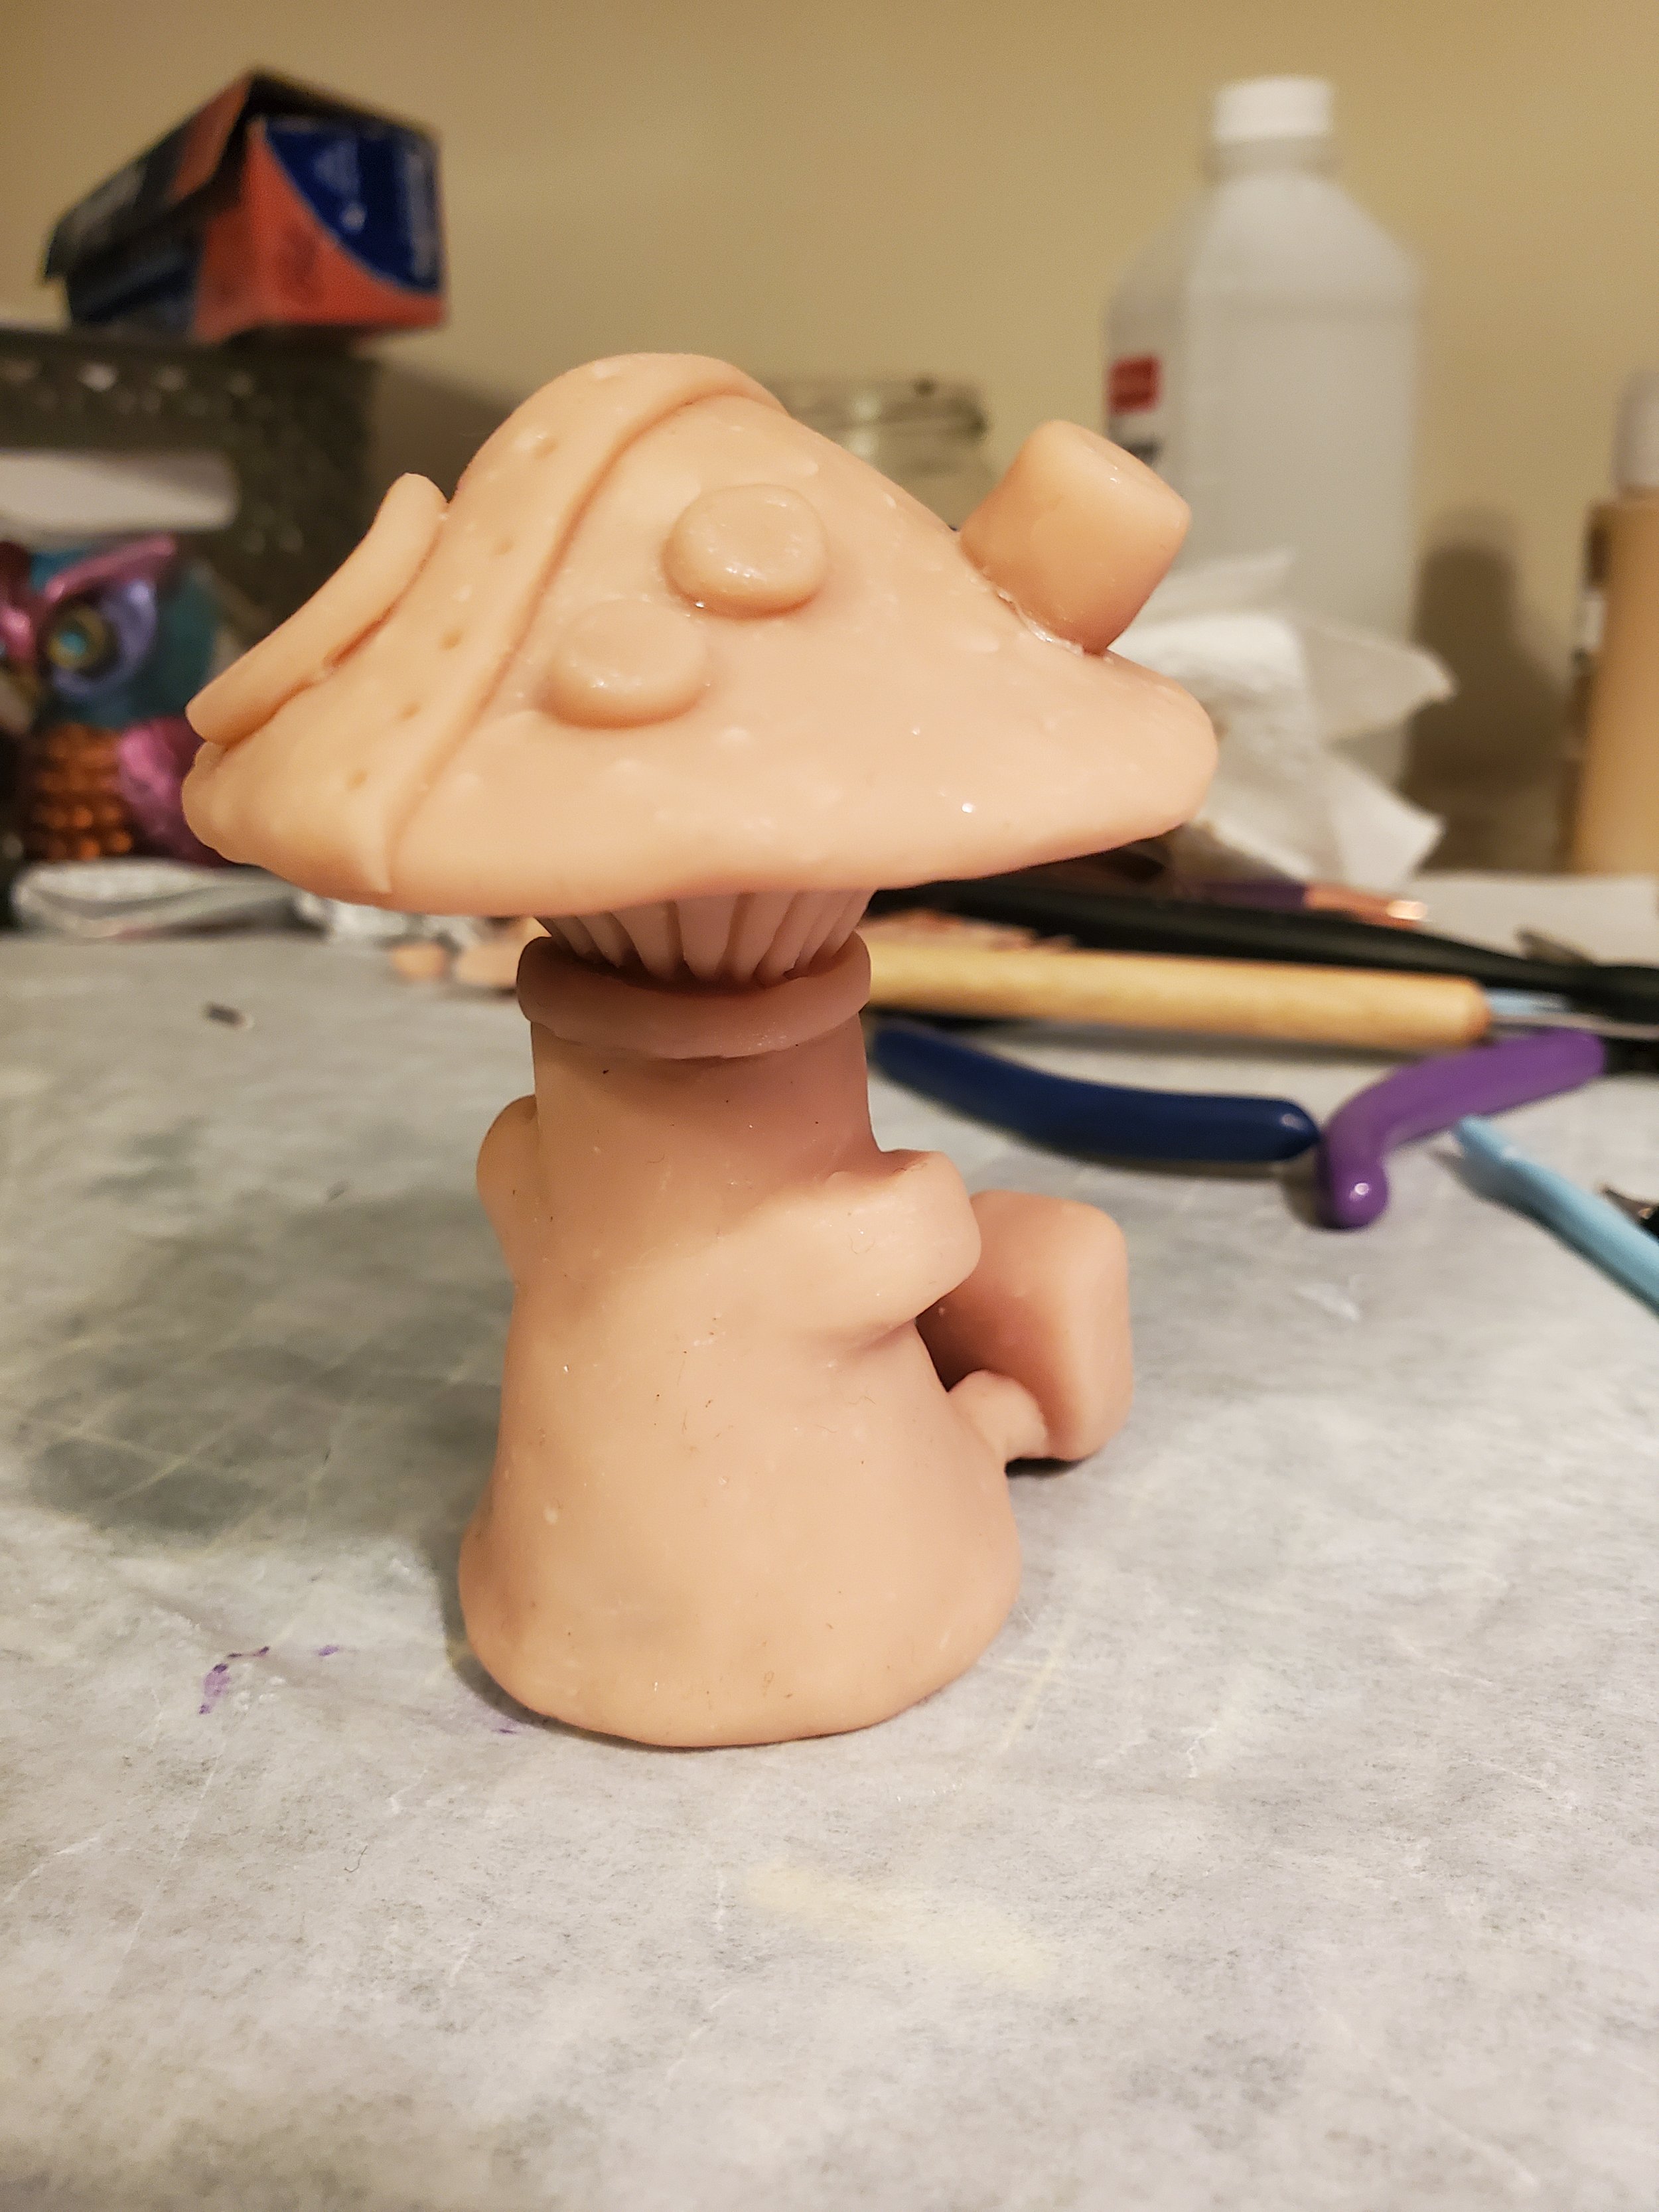
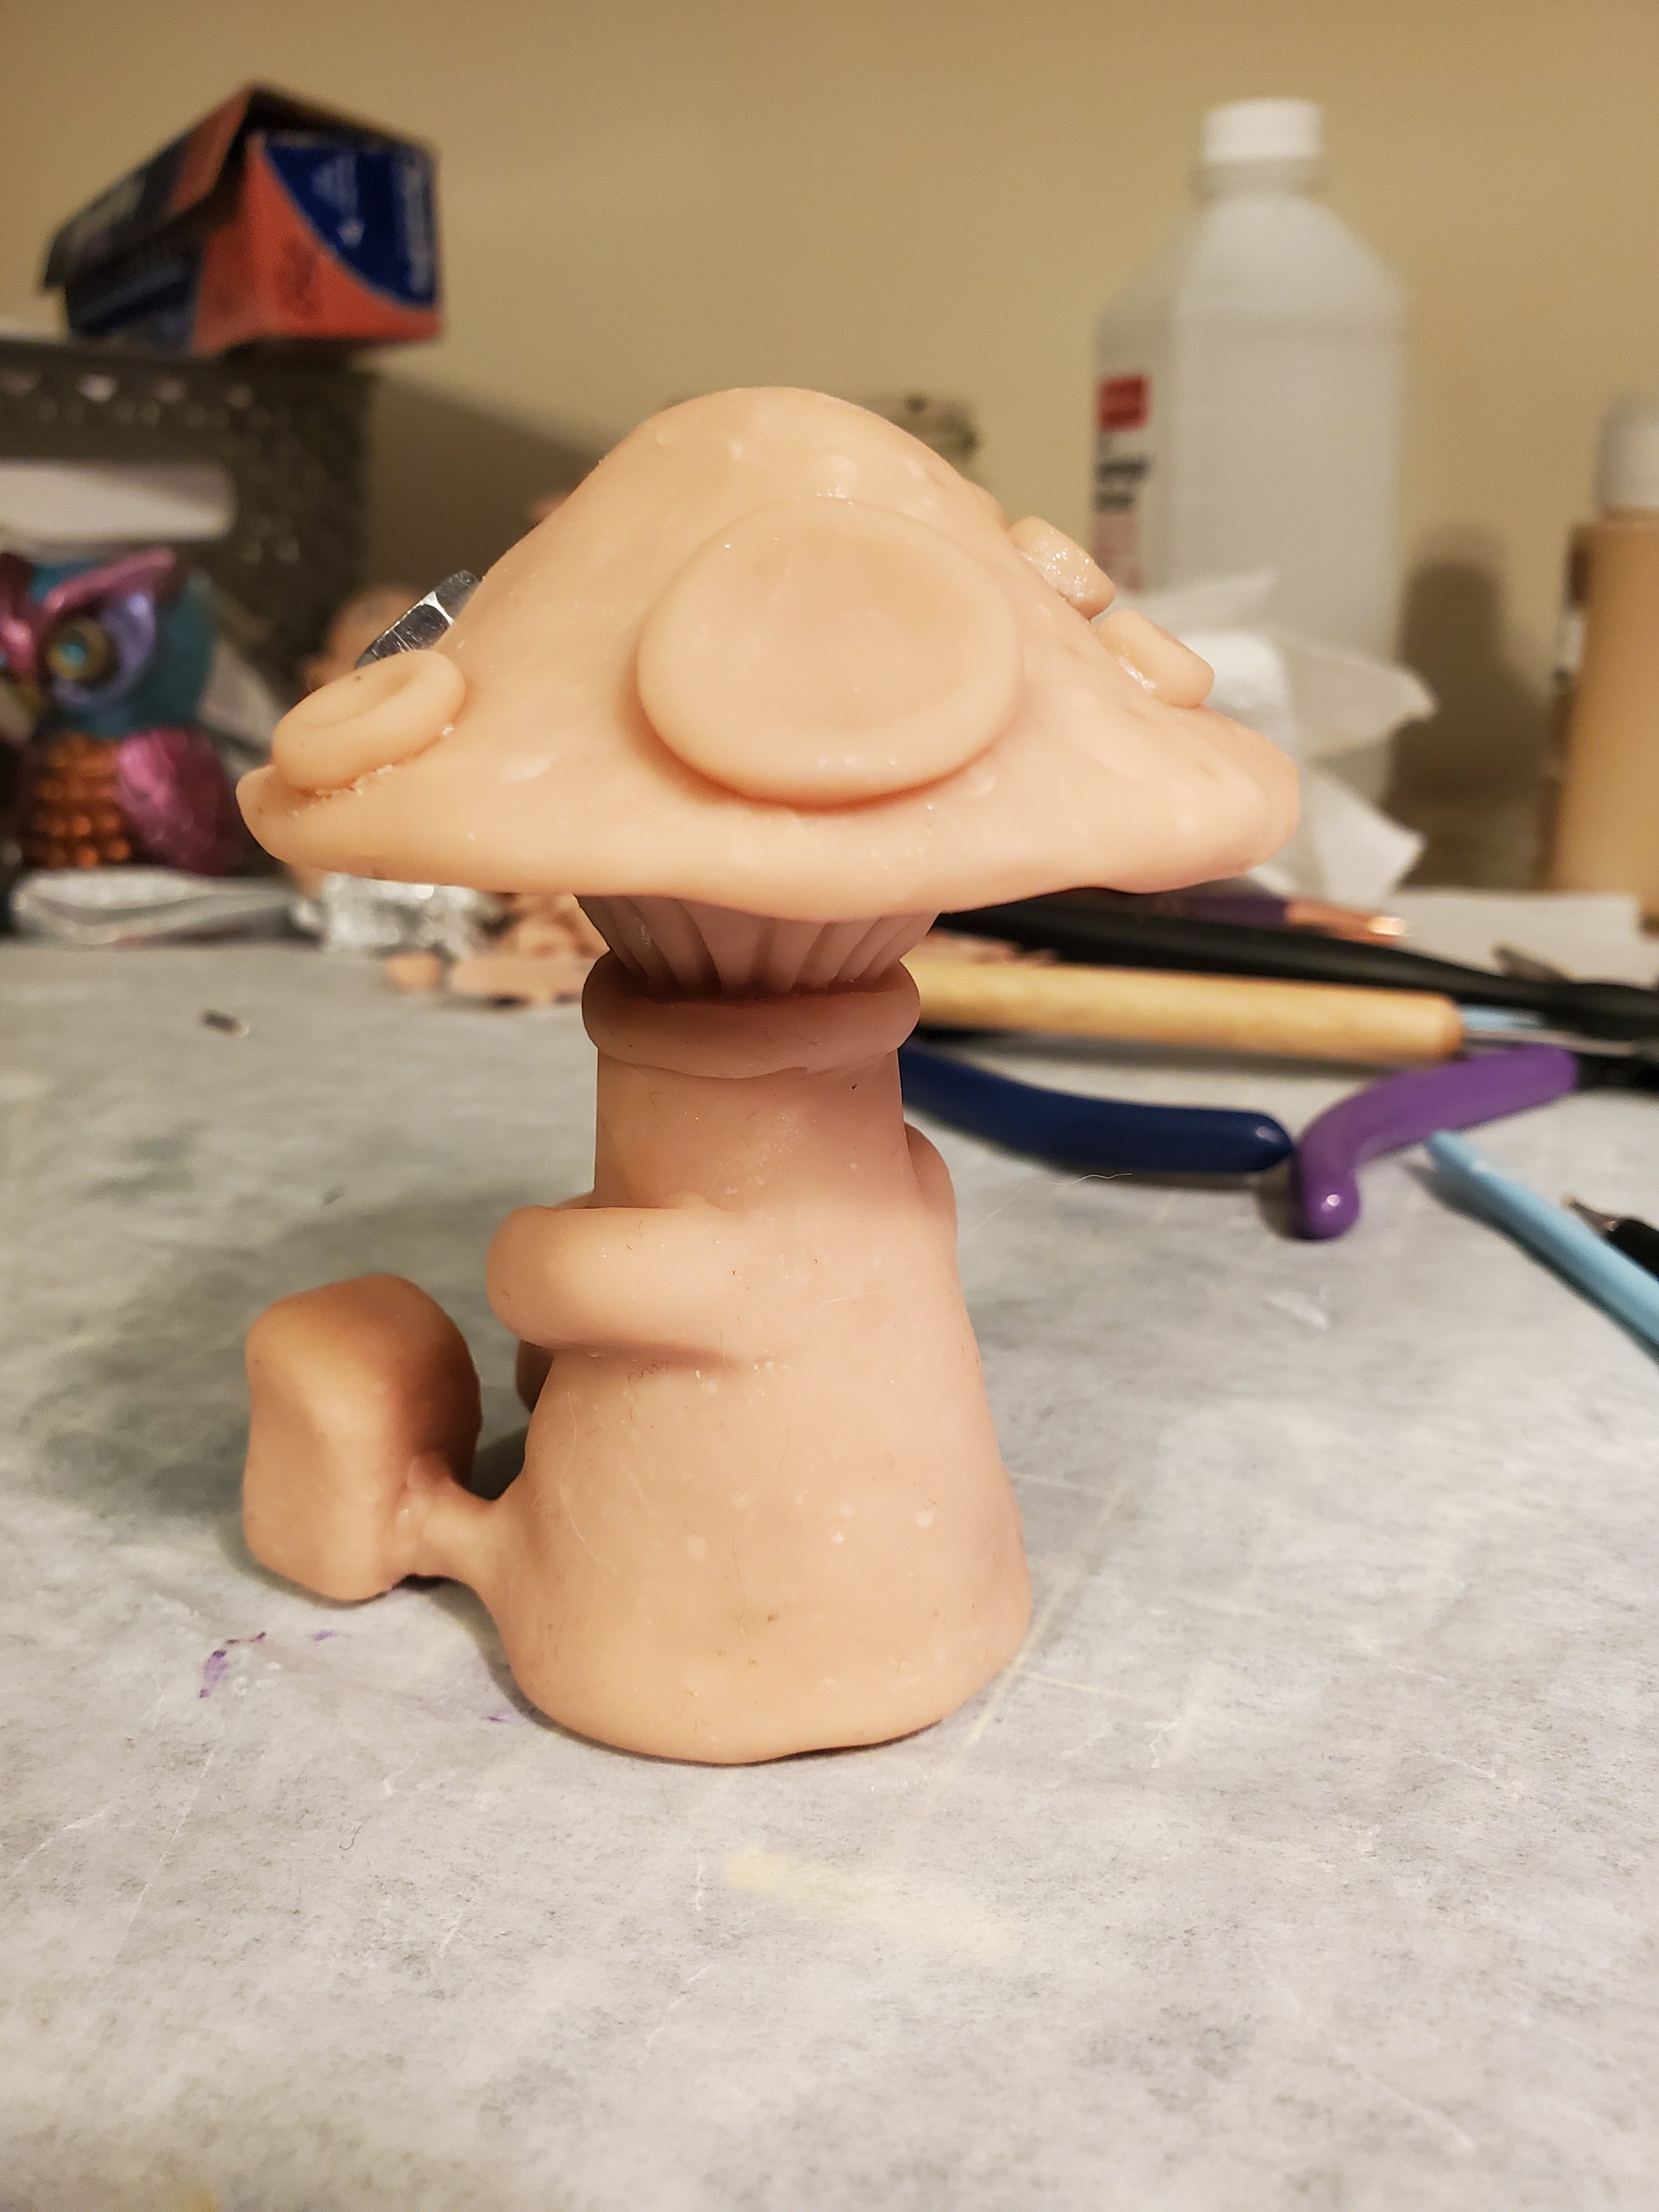
I added arms at this point, shaping them out of clay, placing them on the body, and then smoothing the edges into the body.
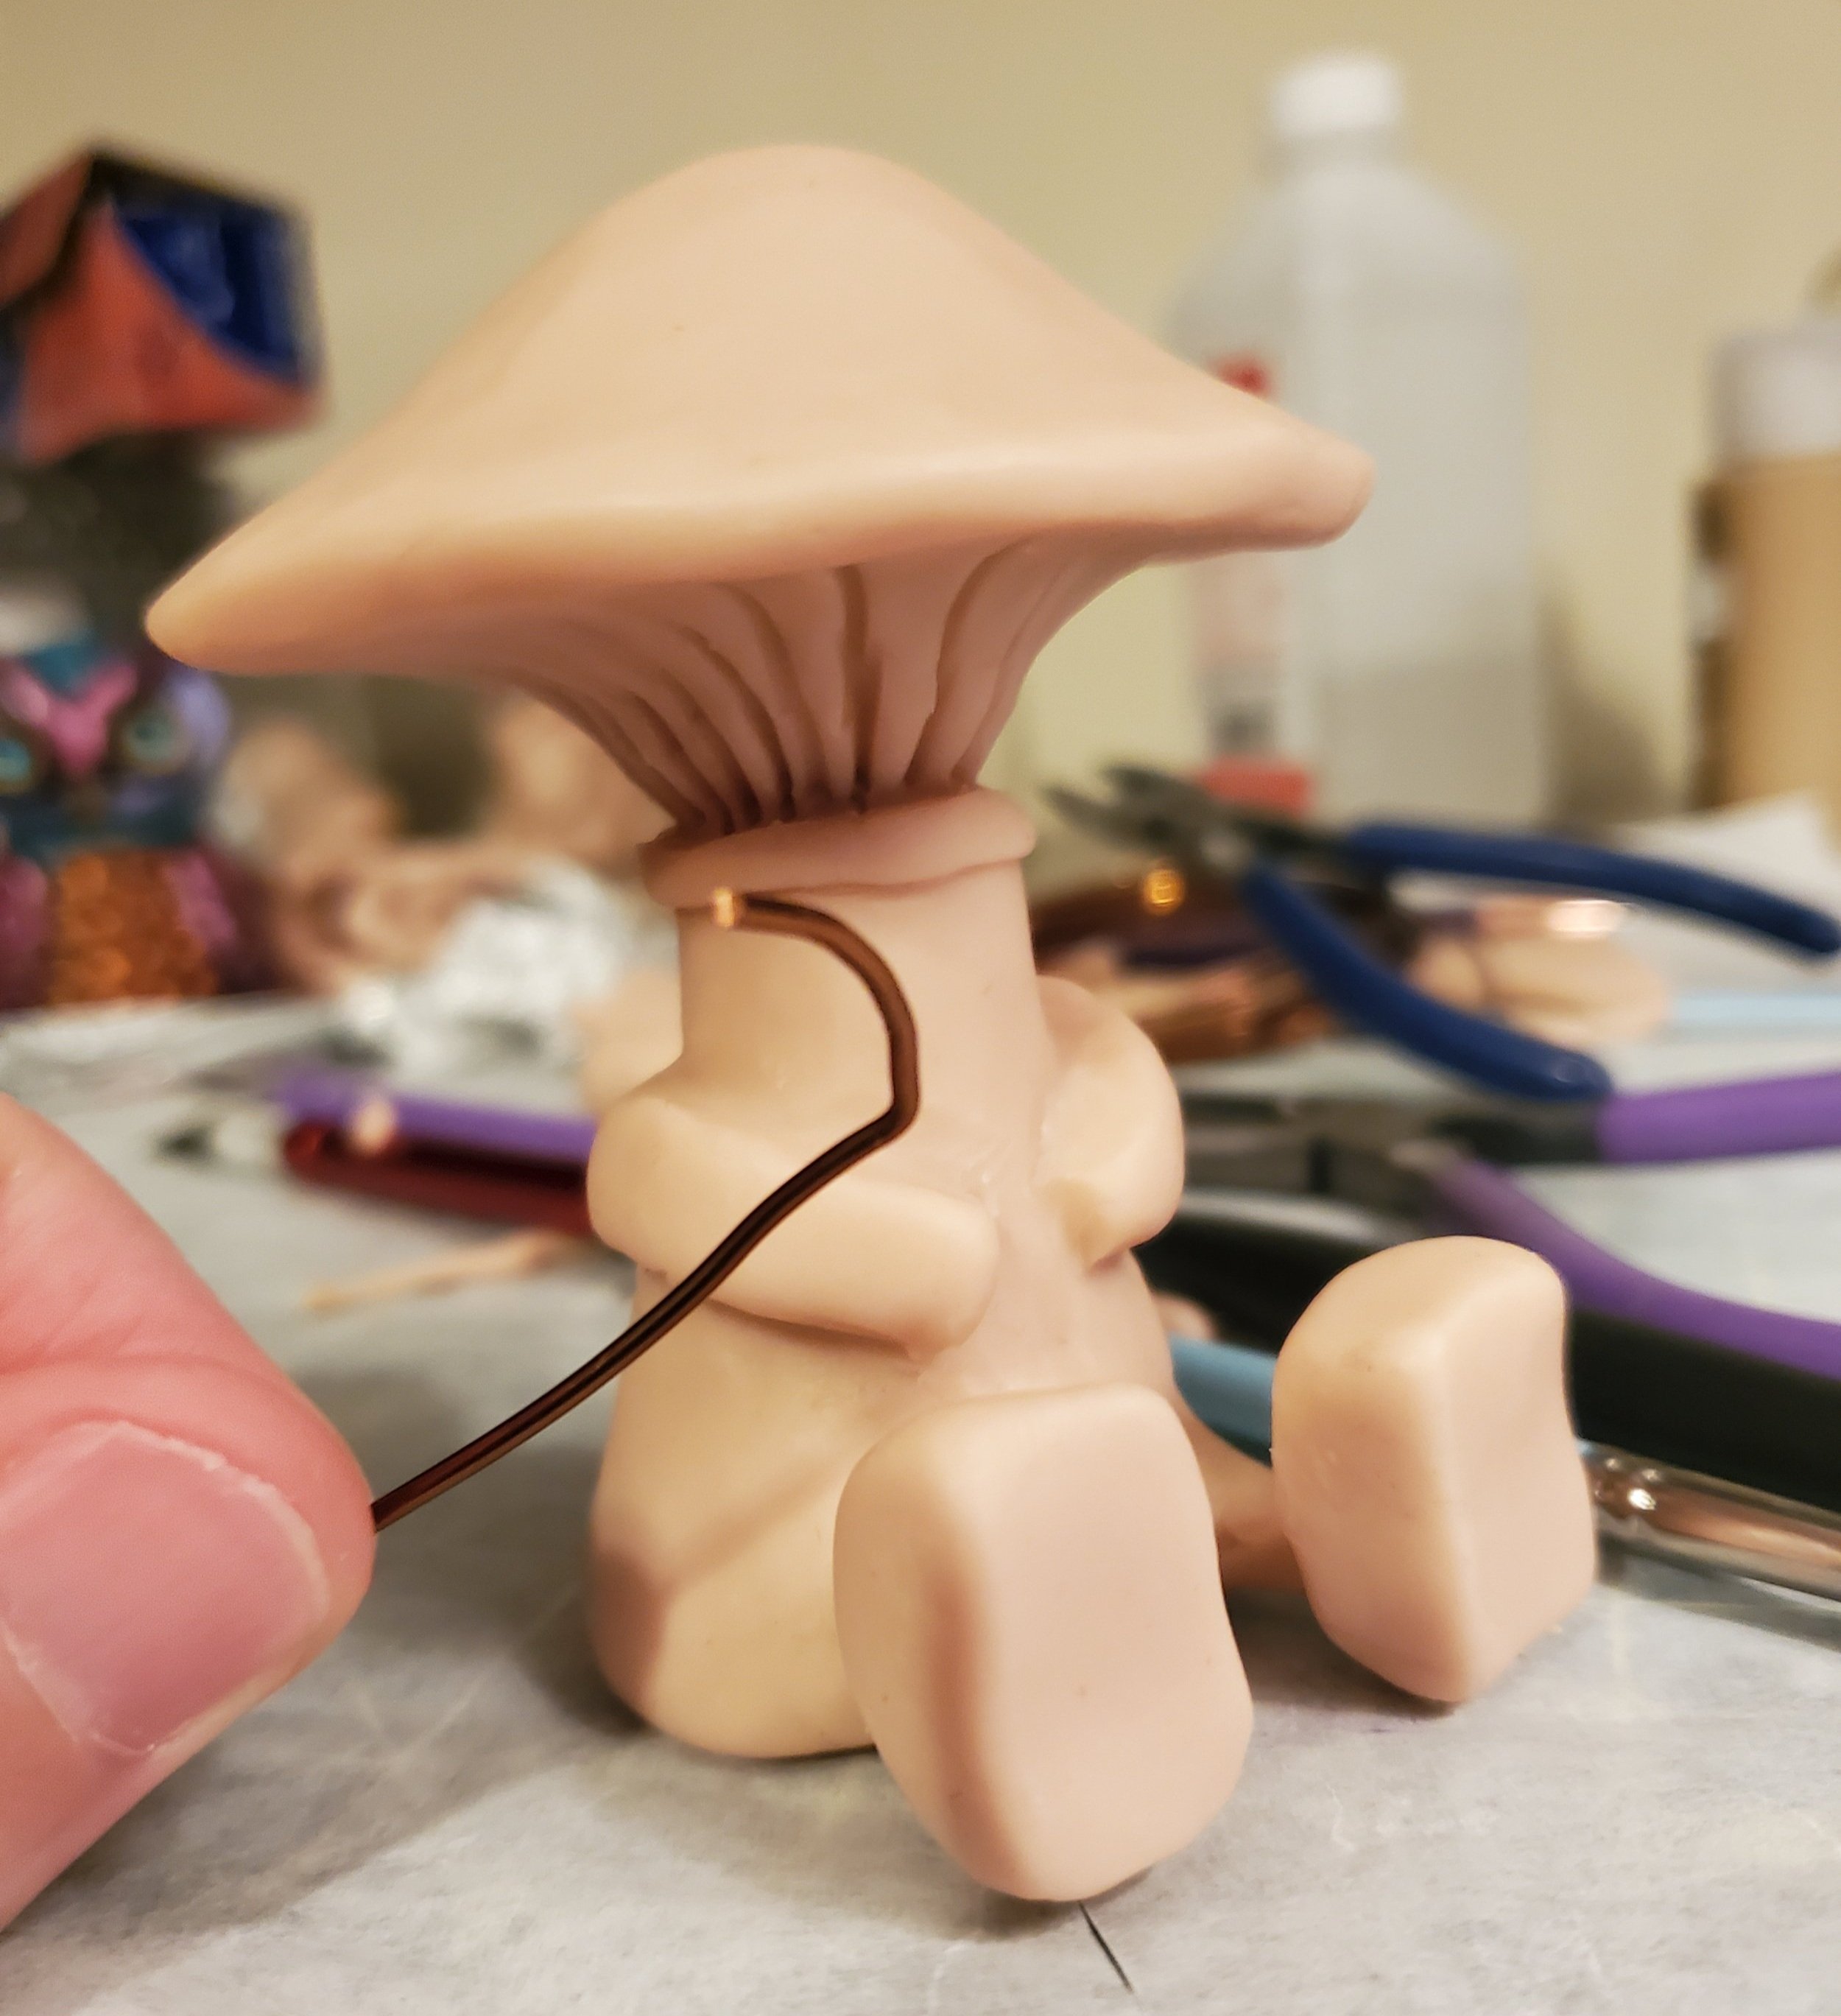
For the “neck”, I added a kind of collar, then used a rubber clay sculpting tool to press the neck in so that it looked like it was coming out of the body.
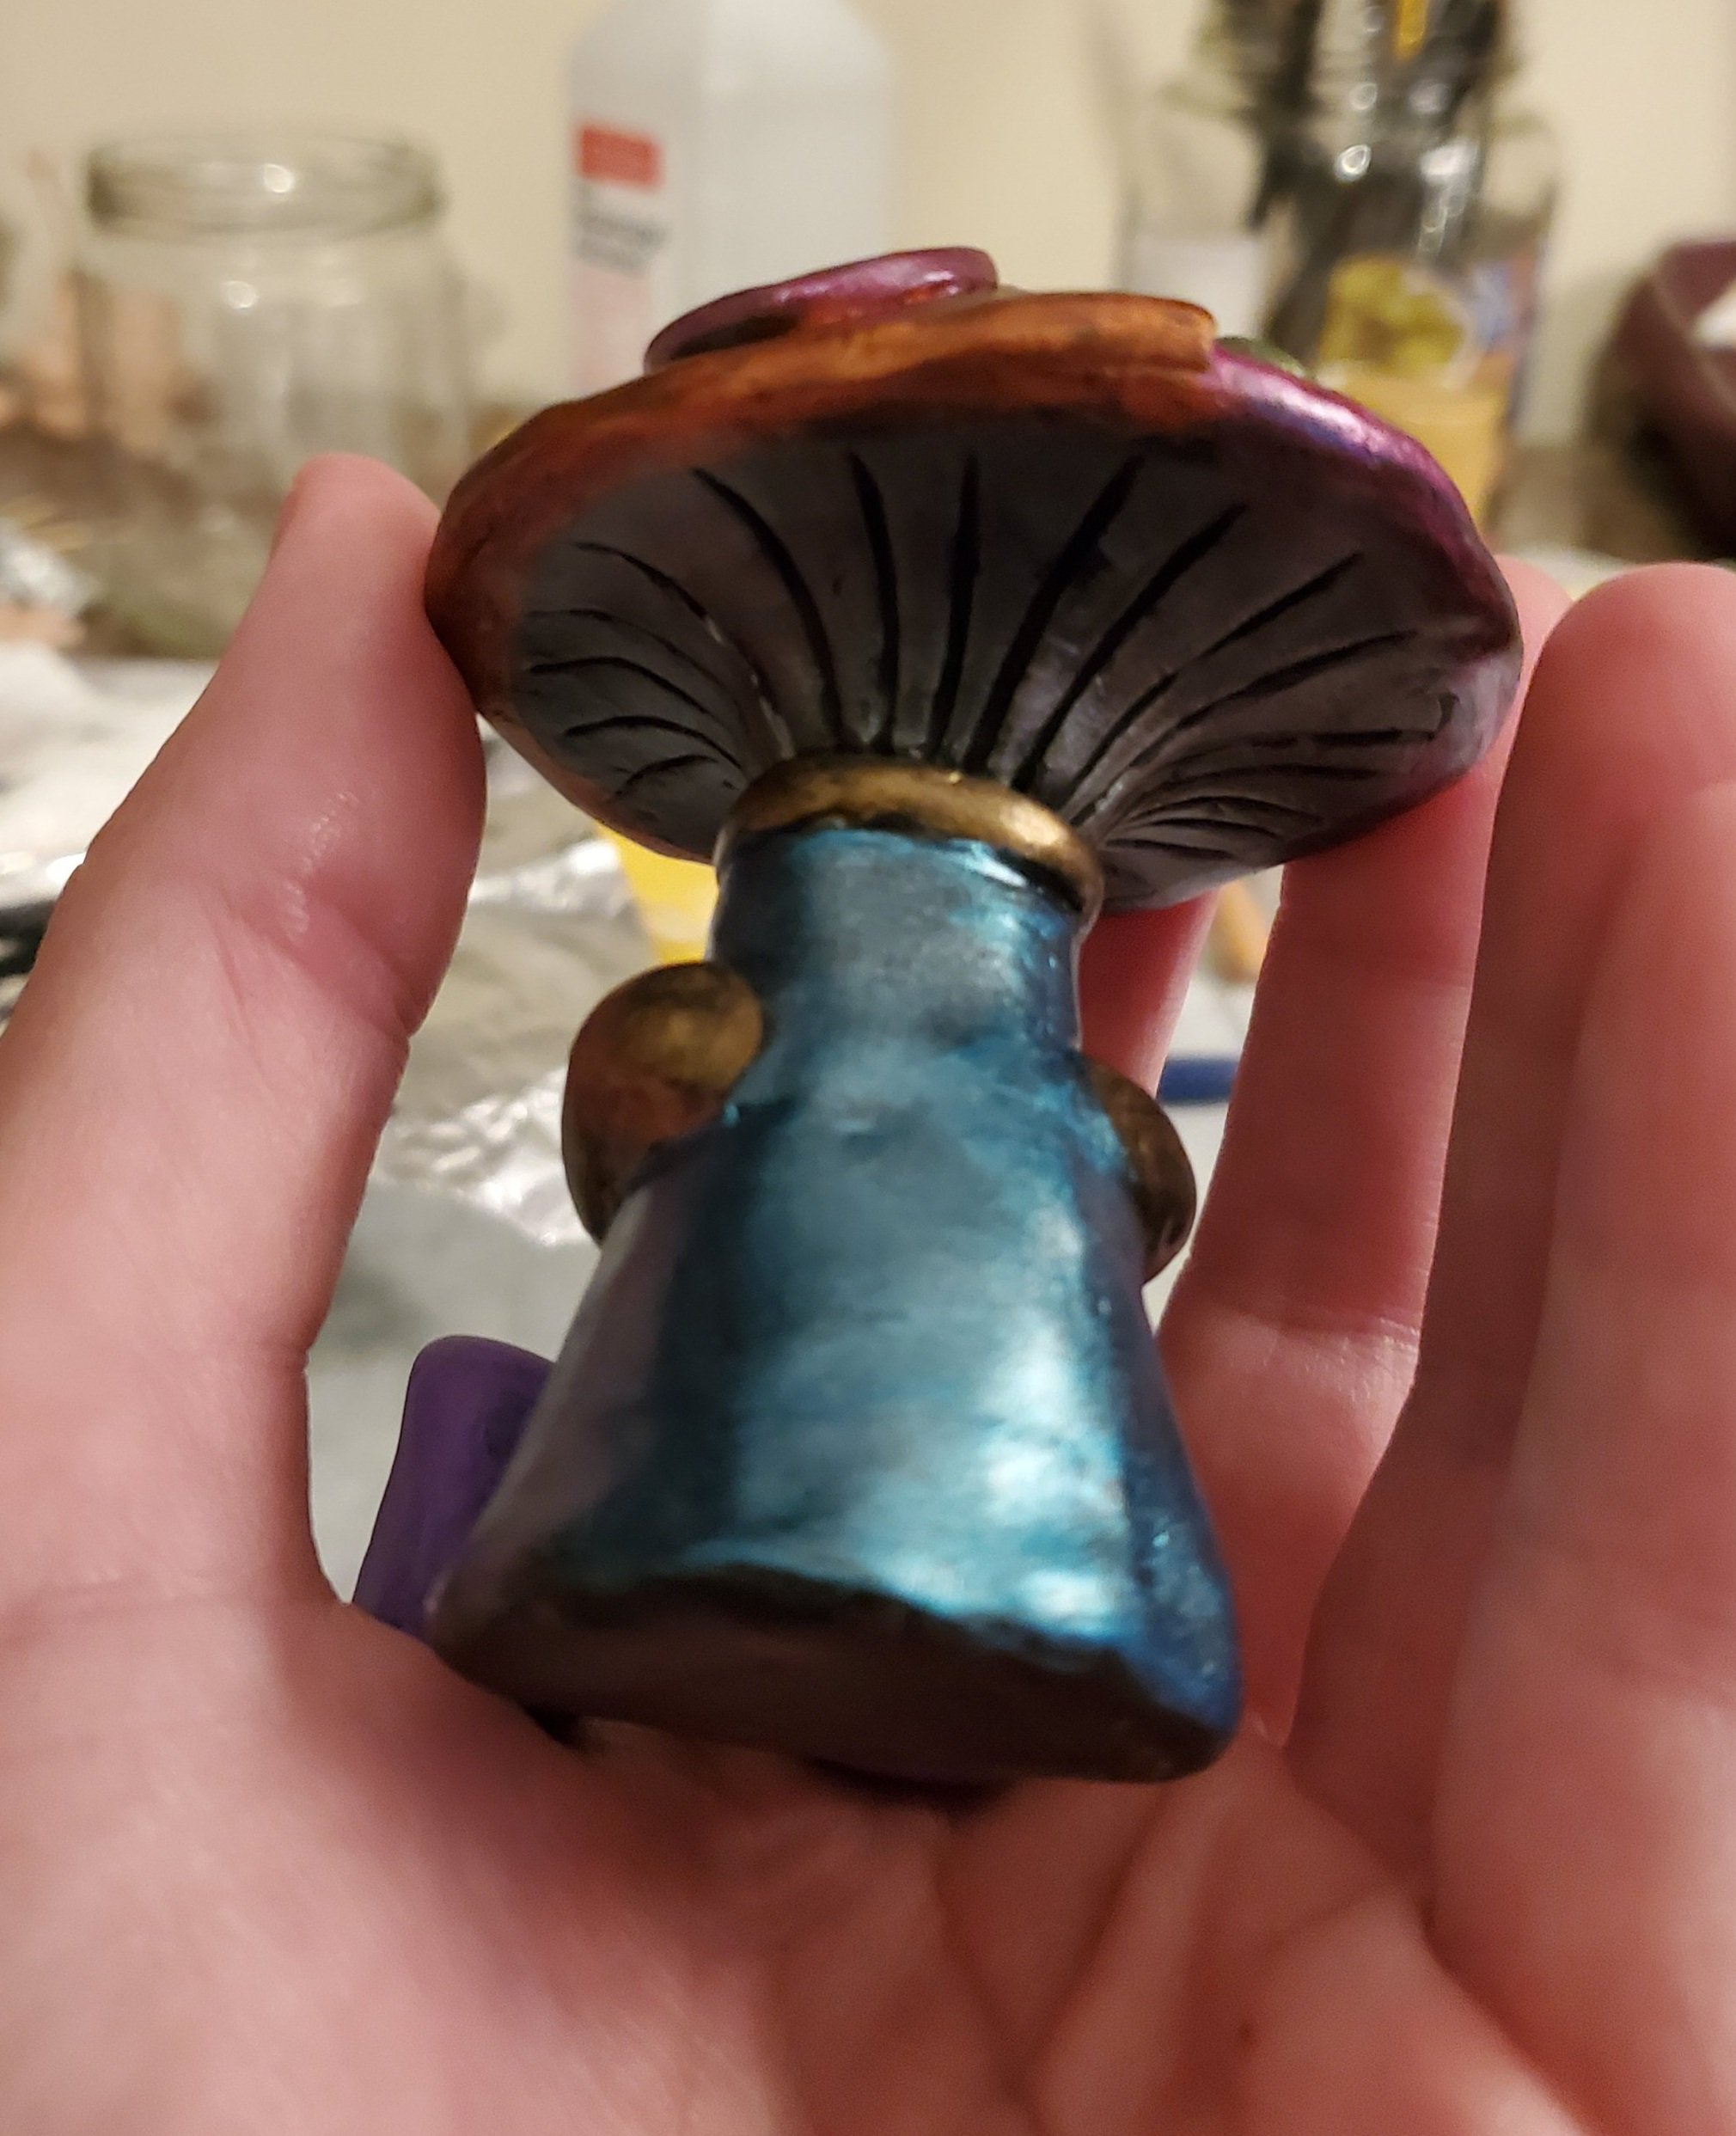
I wanted to make lines under the mushroom cap, and to do this I bent a piece of wire which I used to press lines into the clay. I could have drawn the lines, but it would have taken longer and been messier, requiring even more time to clean it up.
To complete the shoes, I took a piece of wire and pressed lines into the souls of the shoes.
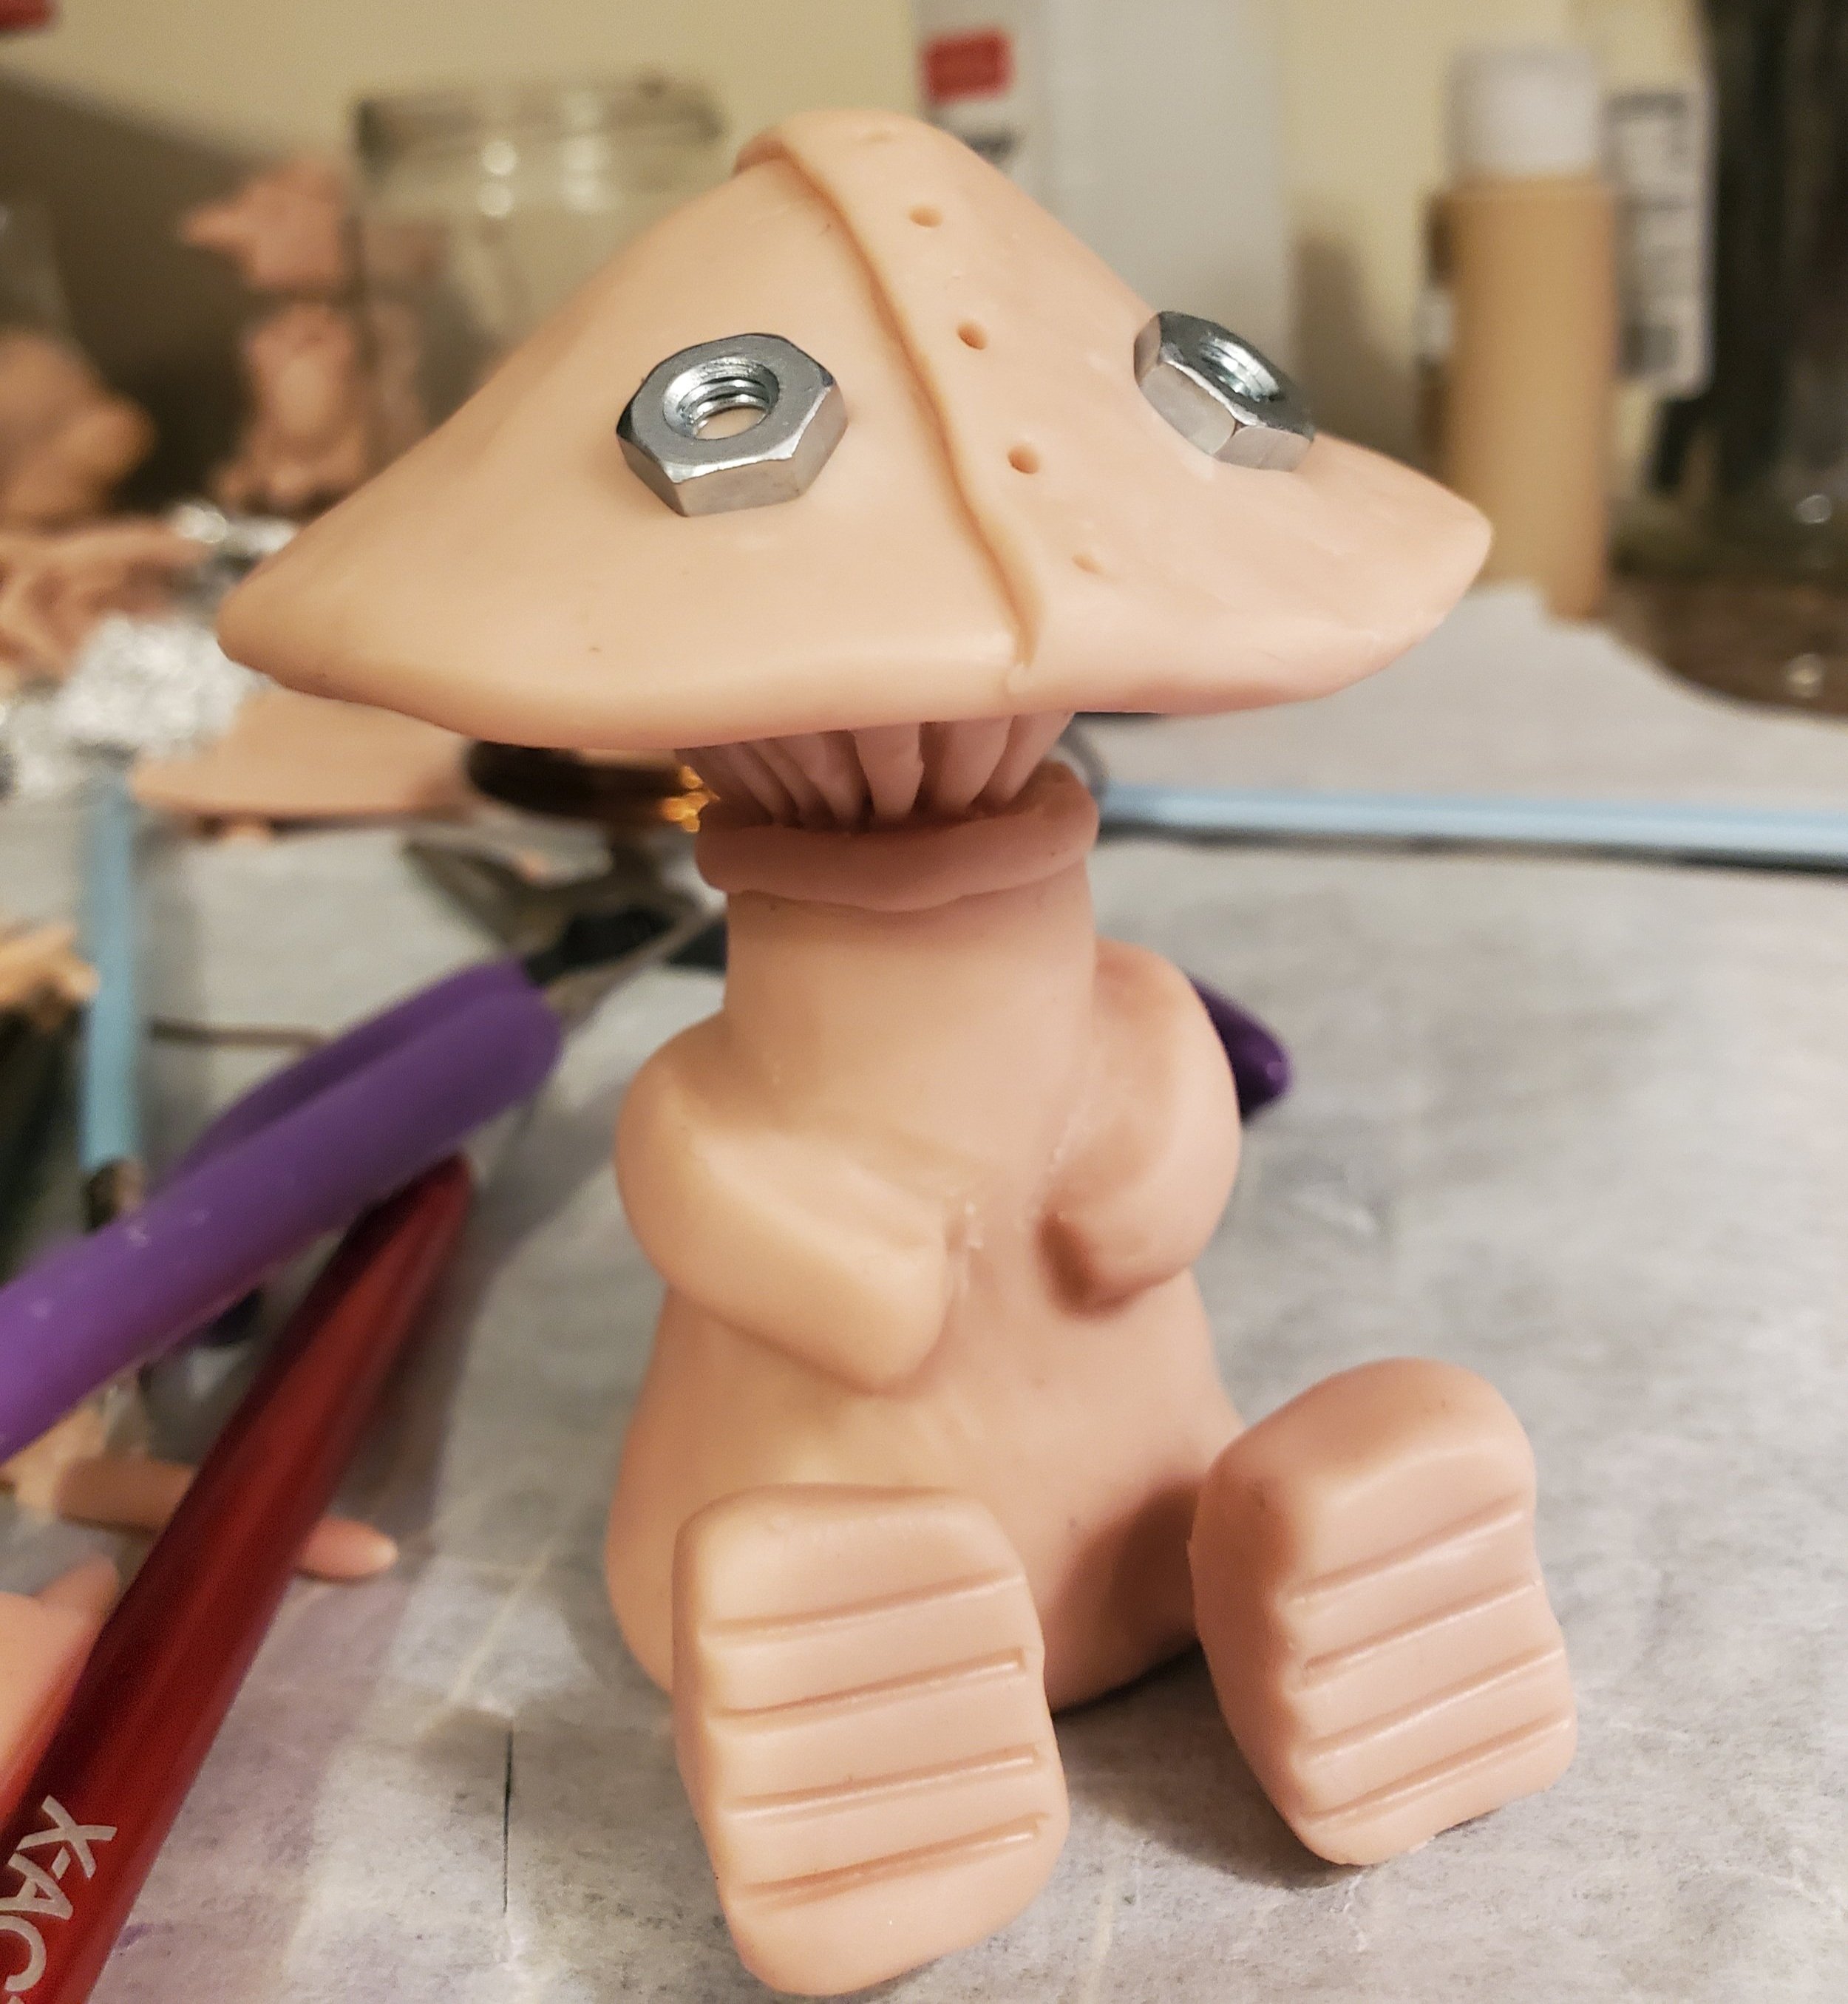
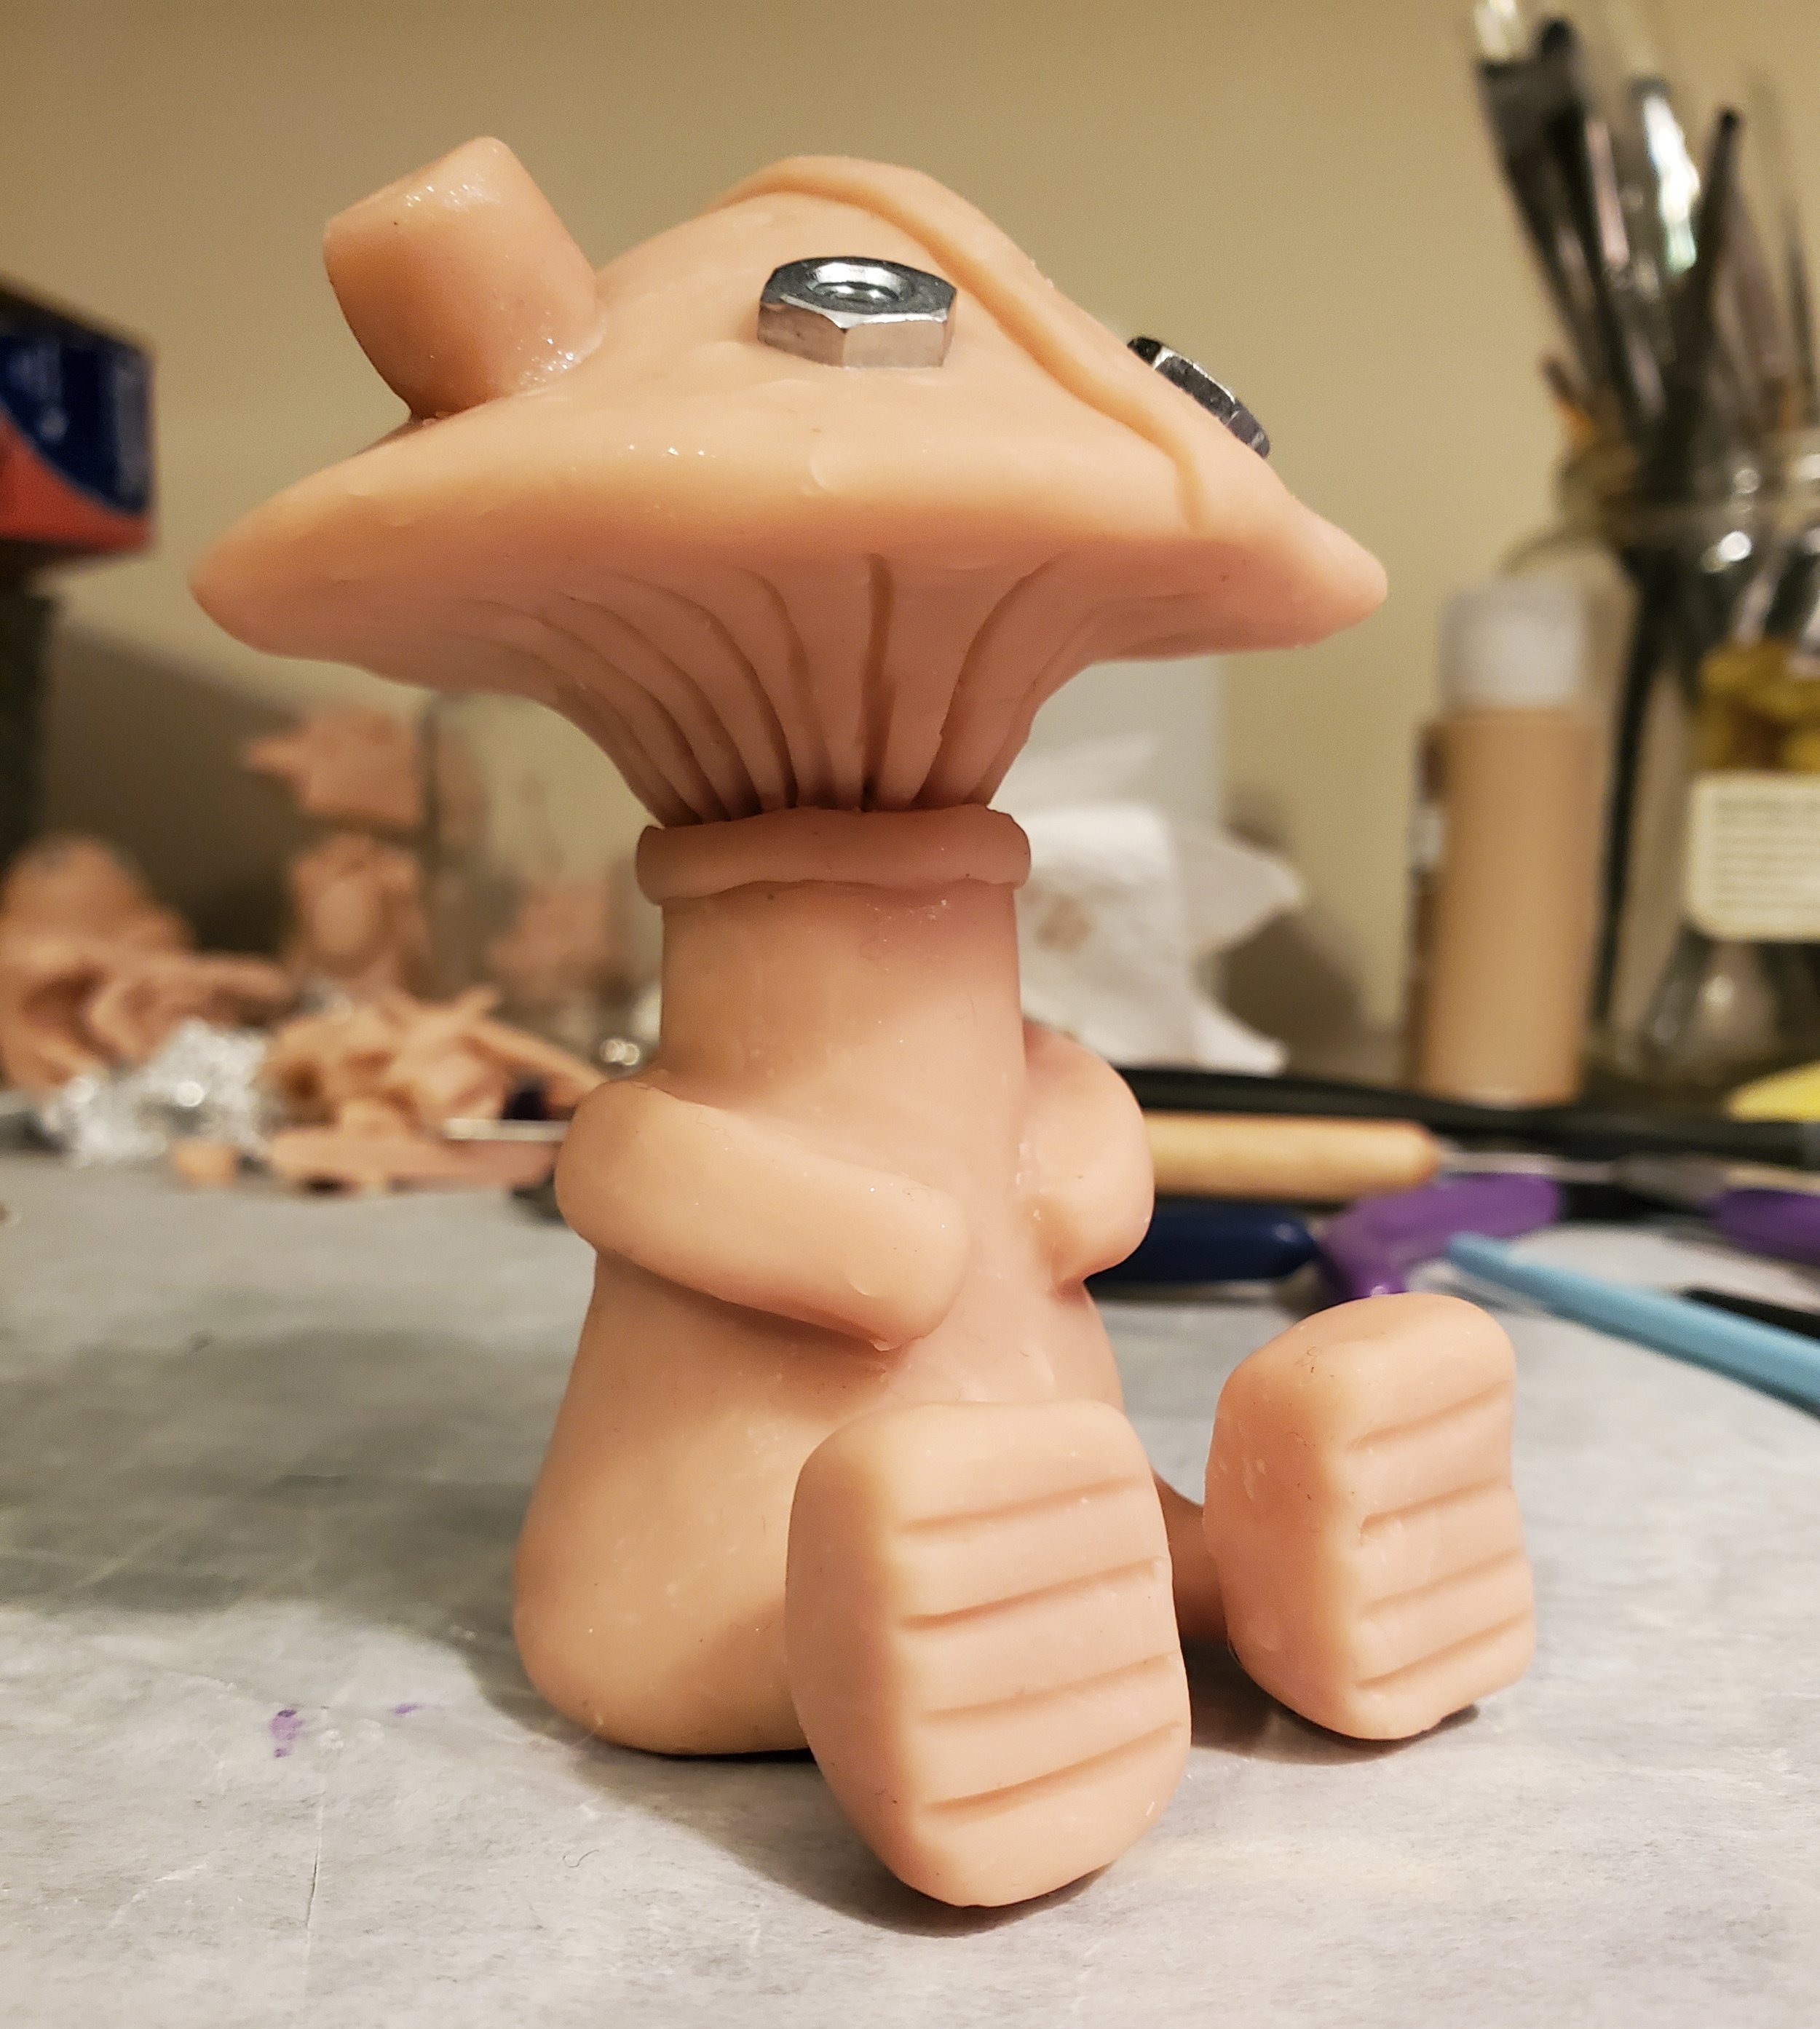
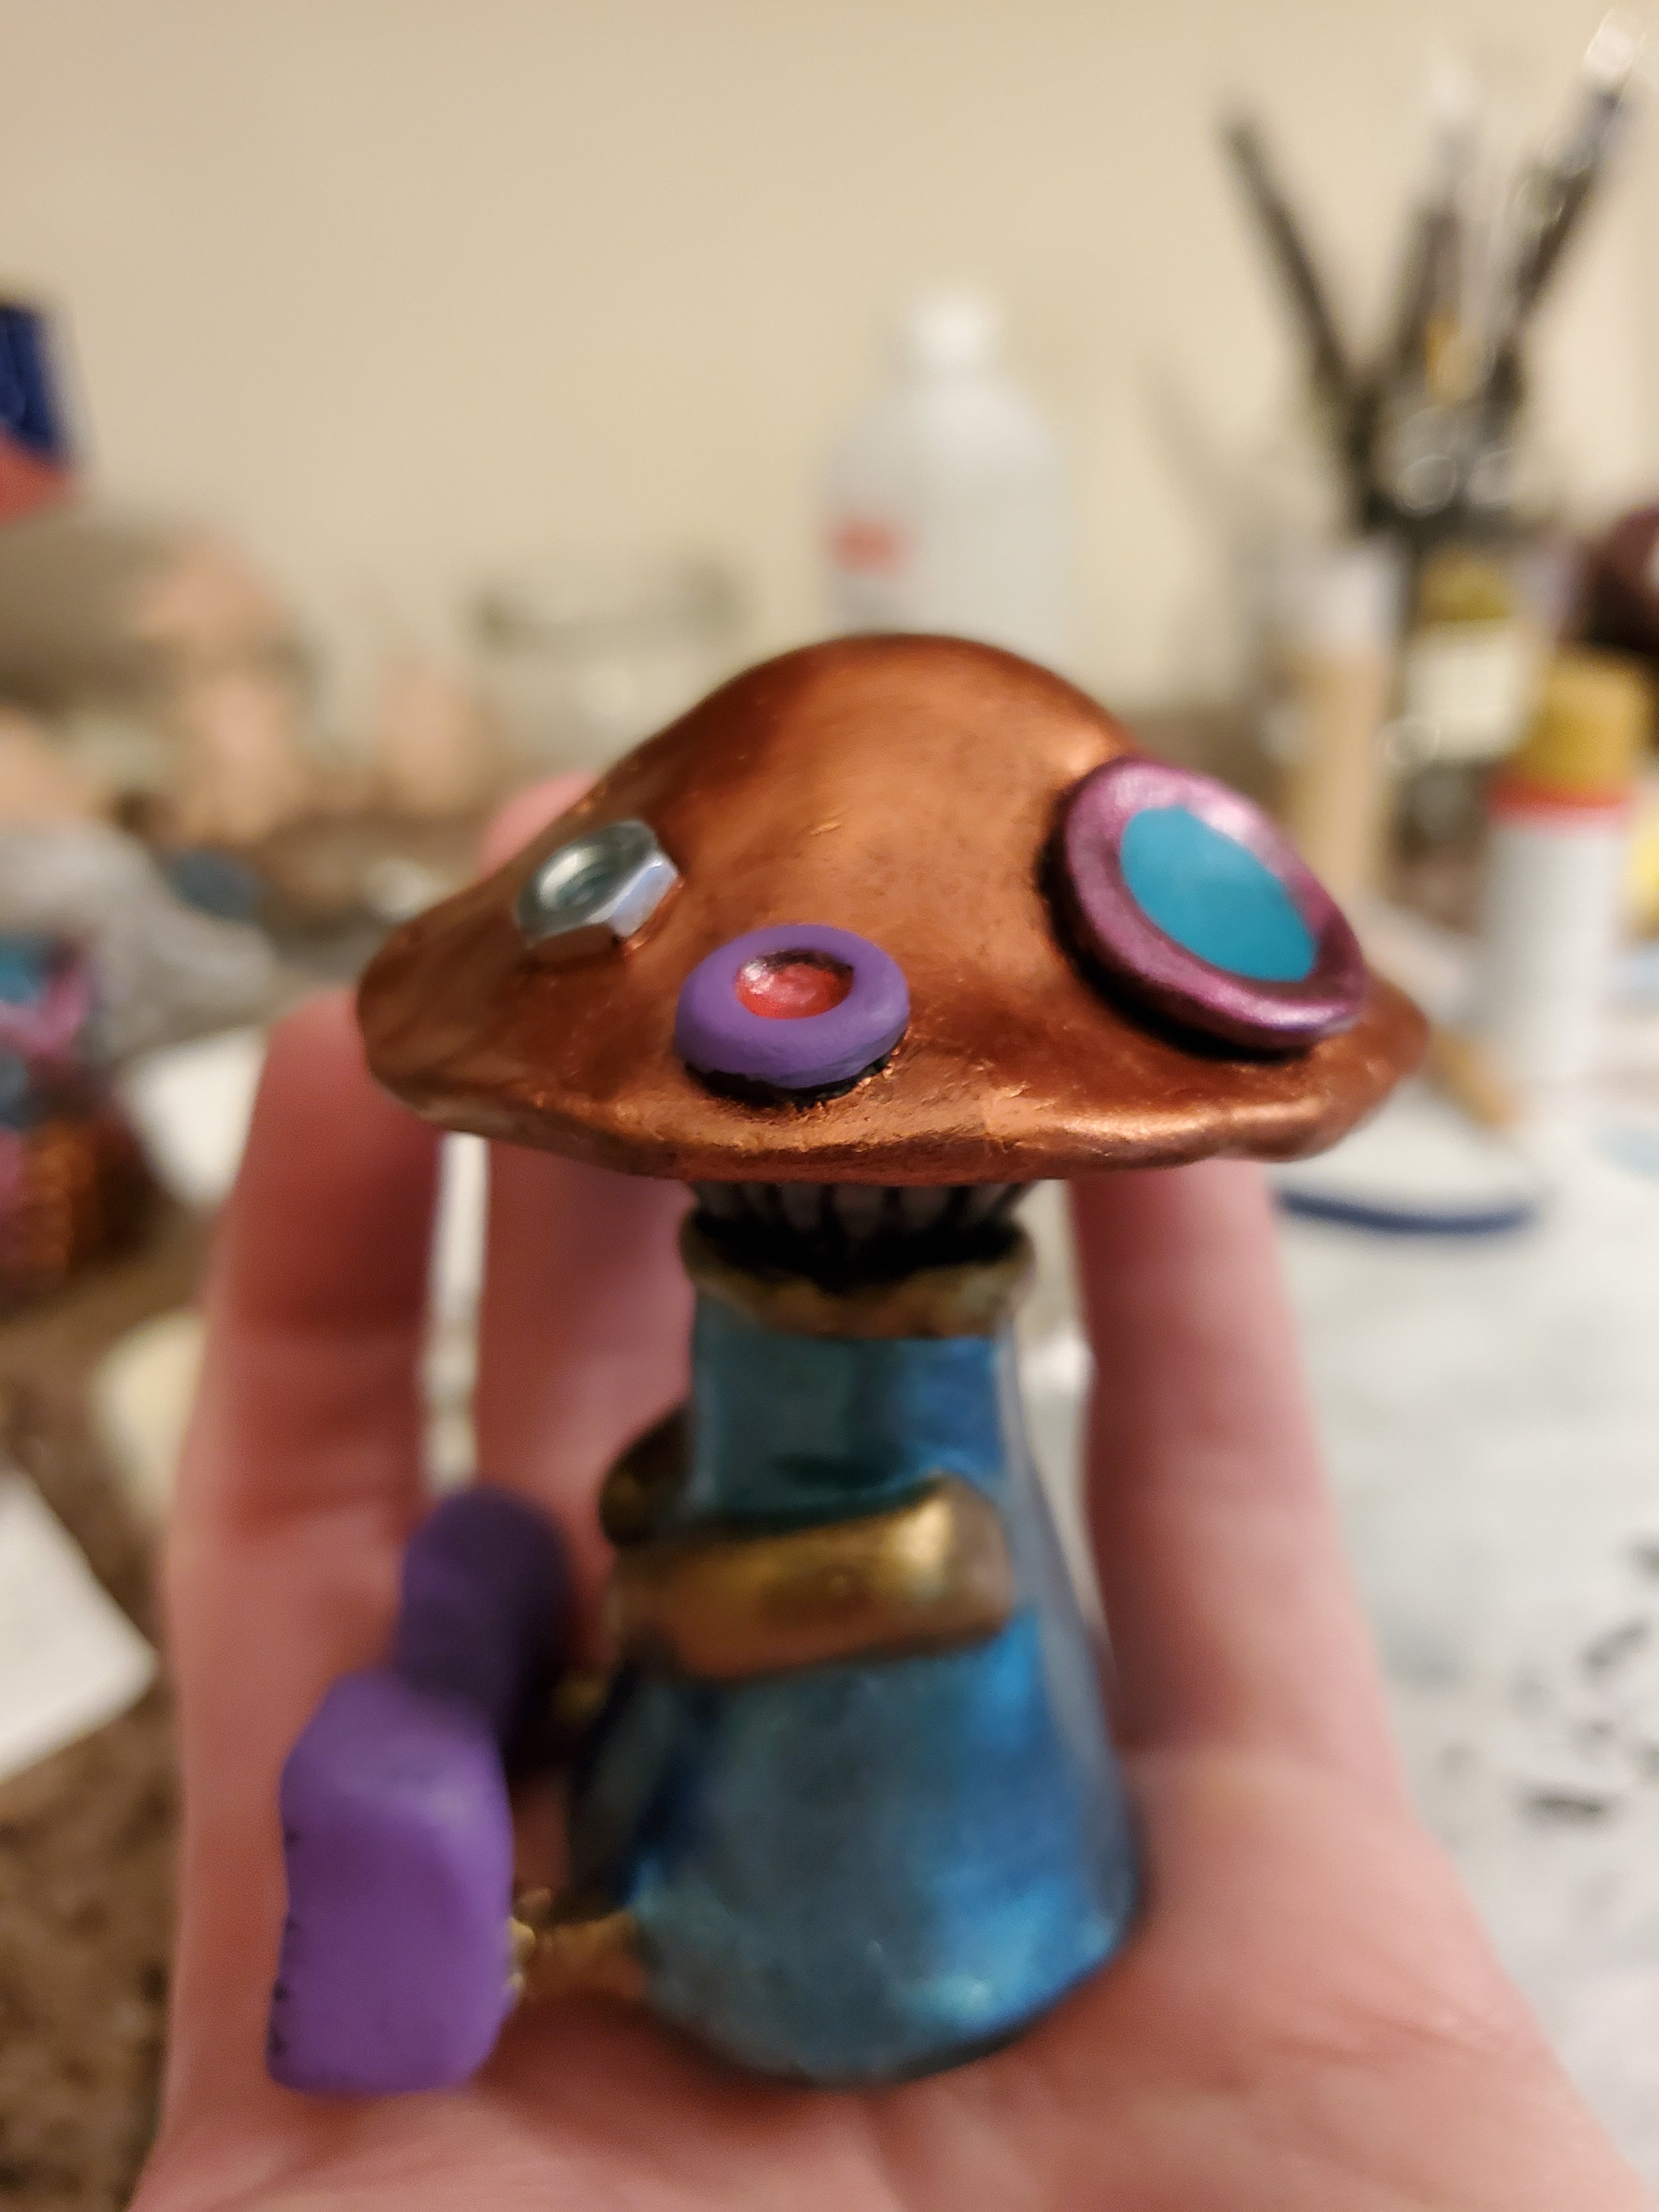
Next, I got a thin strip of clay and ran it down the center of the head, smoothing one side of it to create the effect of one piece of metal riveted onto another. Then I added the rivets by poking holes with a ball stylus tool (essentially a stick with a tiny ball on one end).
I took the metal nuts and pressed them into the head to give the Mushroom Bot some eyes.
I added some buttons, an exaust pipe, and some fuel gauge pieces to the robot’s head. Then I used a sponge and some Isoprobyl alcohol to smooth out the body, trying to get rid of fingerprints and other imperfections.
Baked and Ready for Painting
Next, I preheated my kitchen oven to 275 degrees and put the little robot inside for 30 minutes. Different kinds of polymer clay have different instructions on how long to bake. The Sculpey clays that I’ve used say to bake at 275 degrees for 15 minutes per quarter inch, so most of my sculptures are baked for 30 minutes.
After he was taken out and cooled down, he was ready to paint.
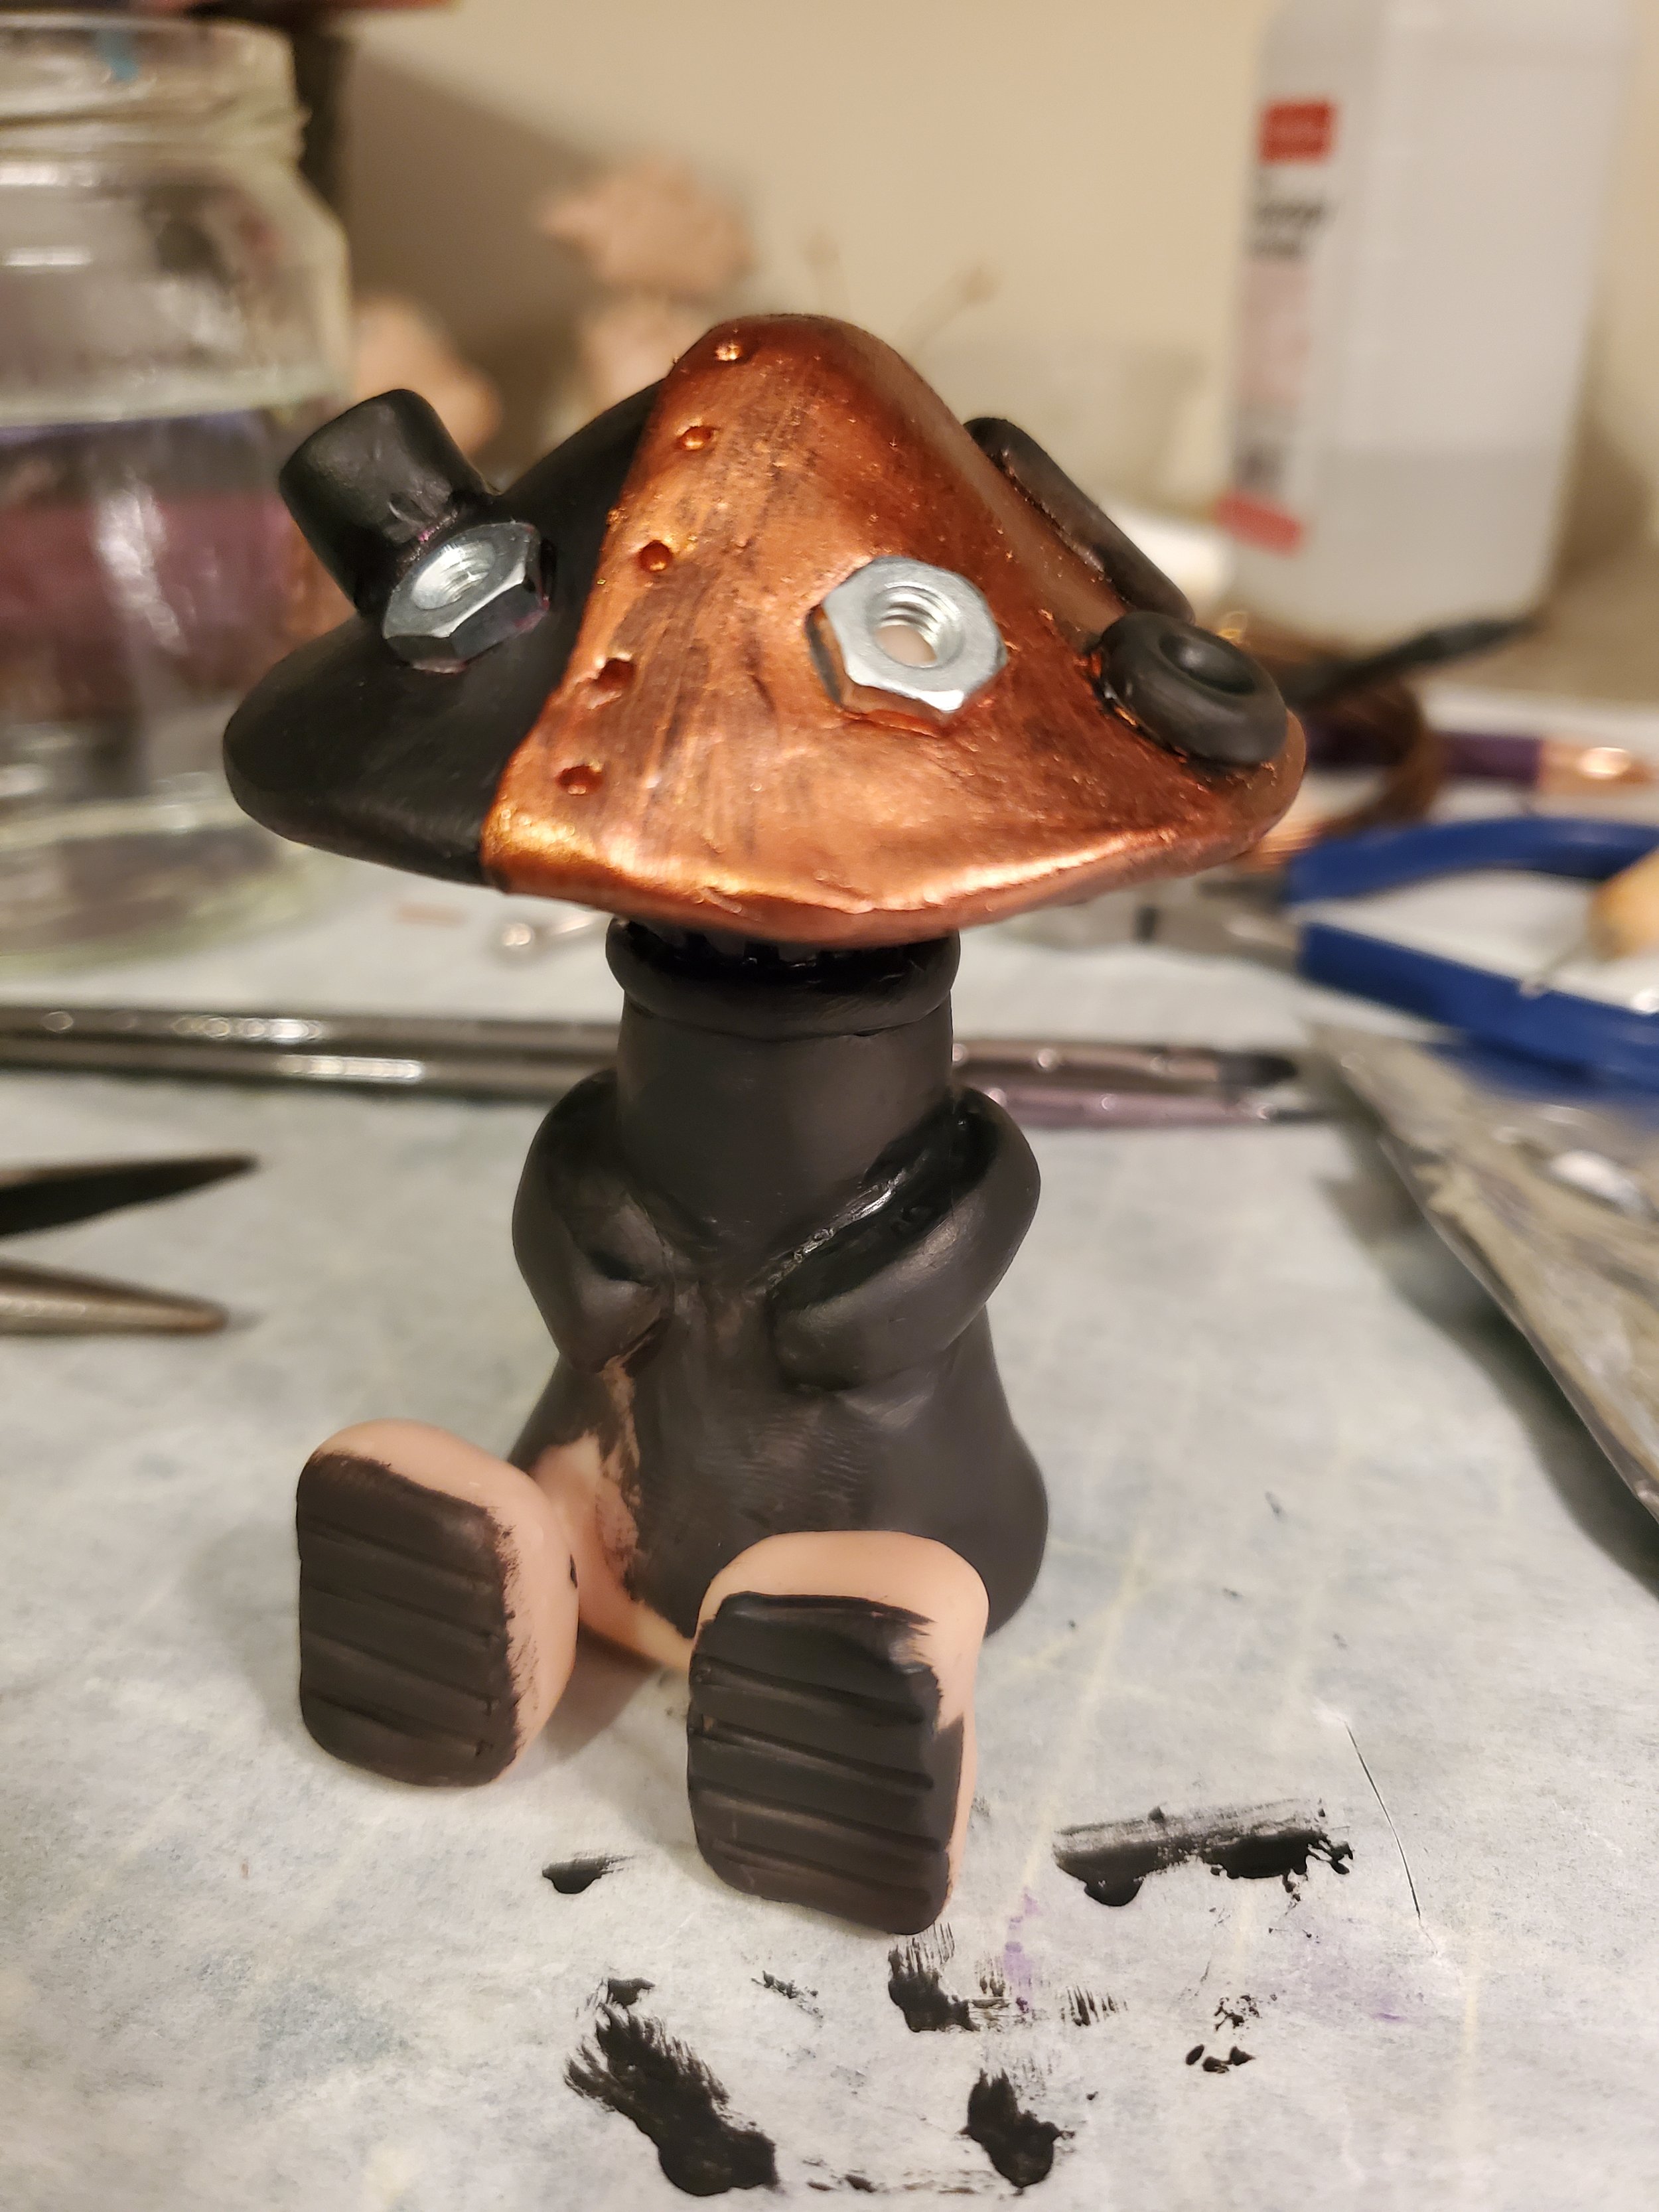
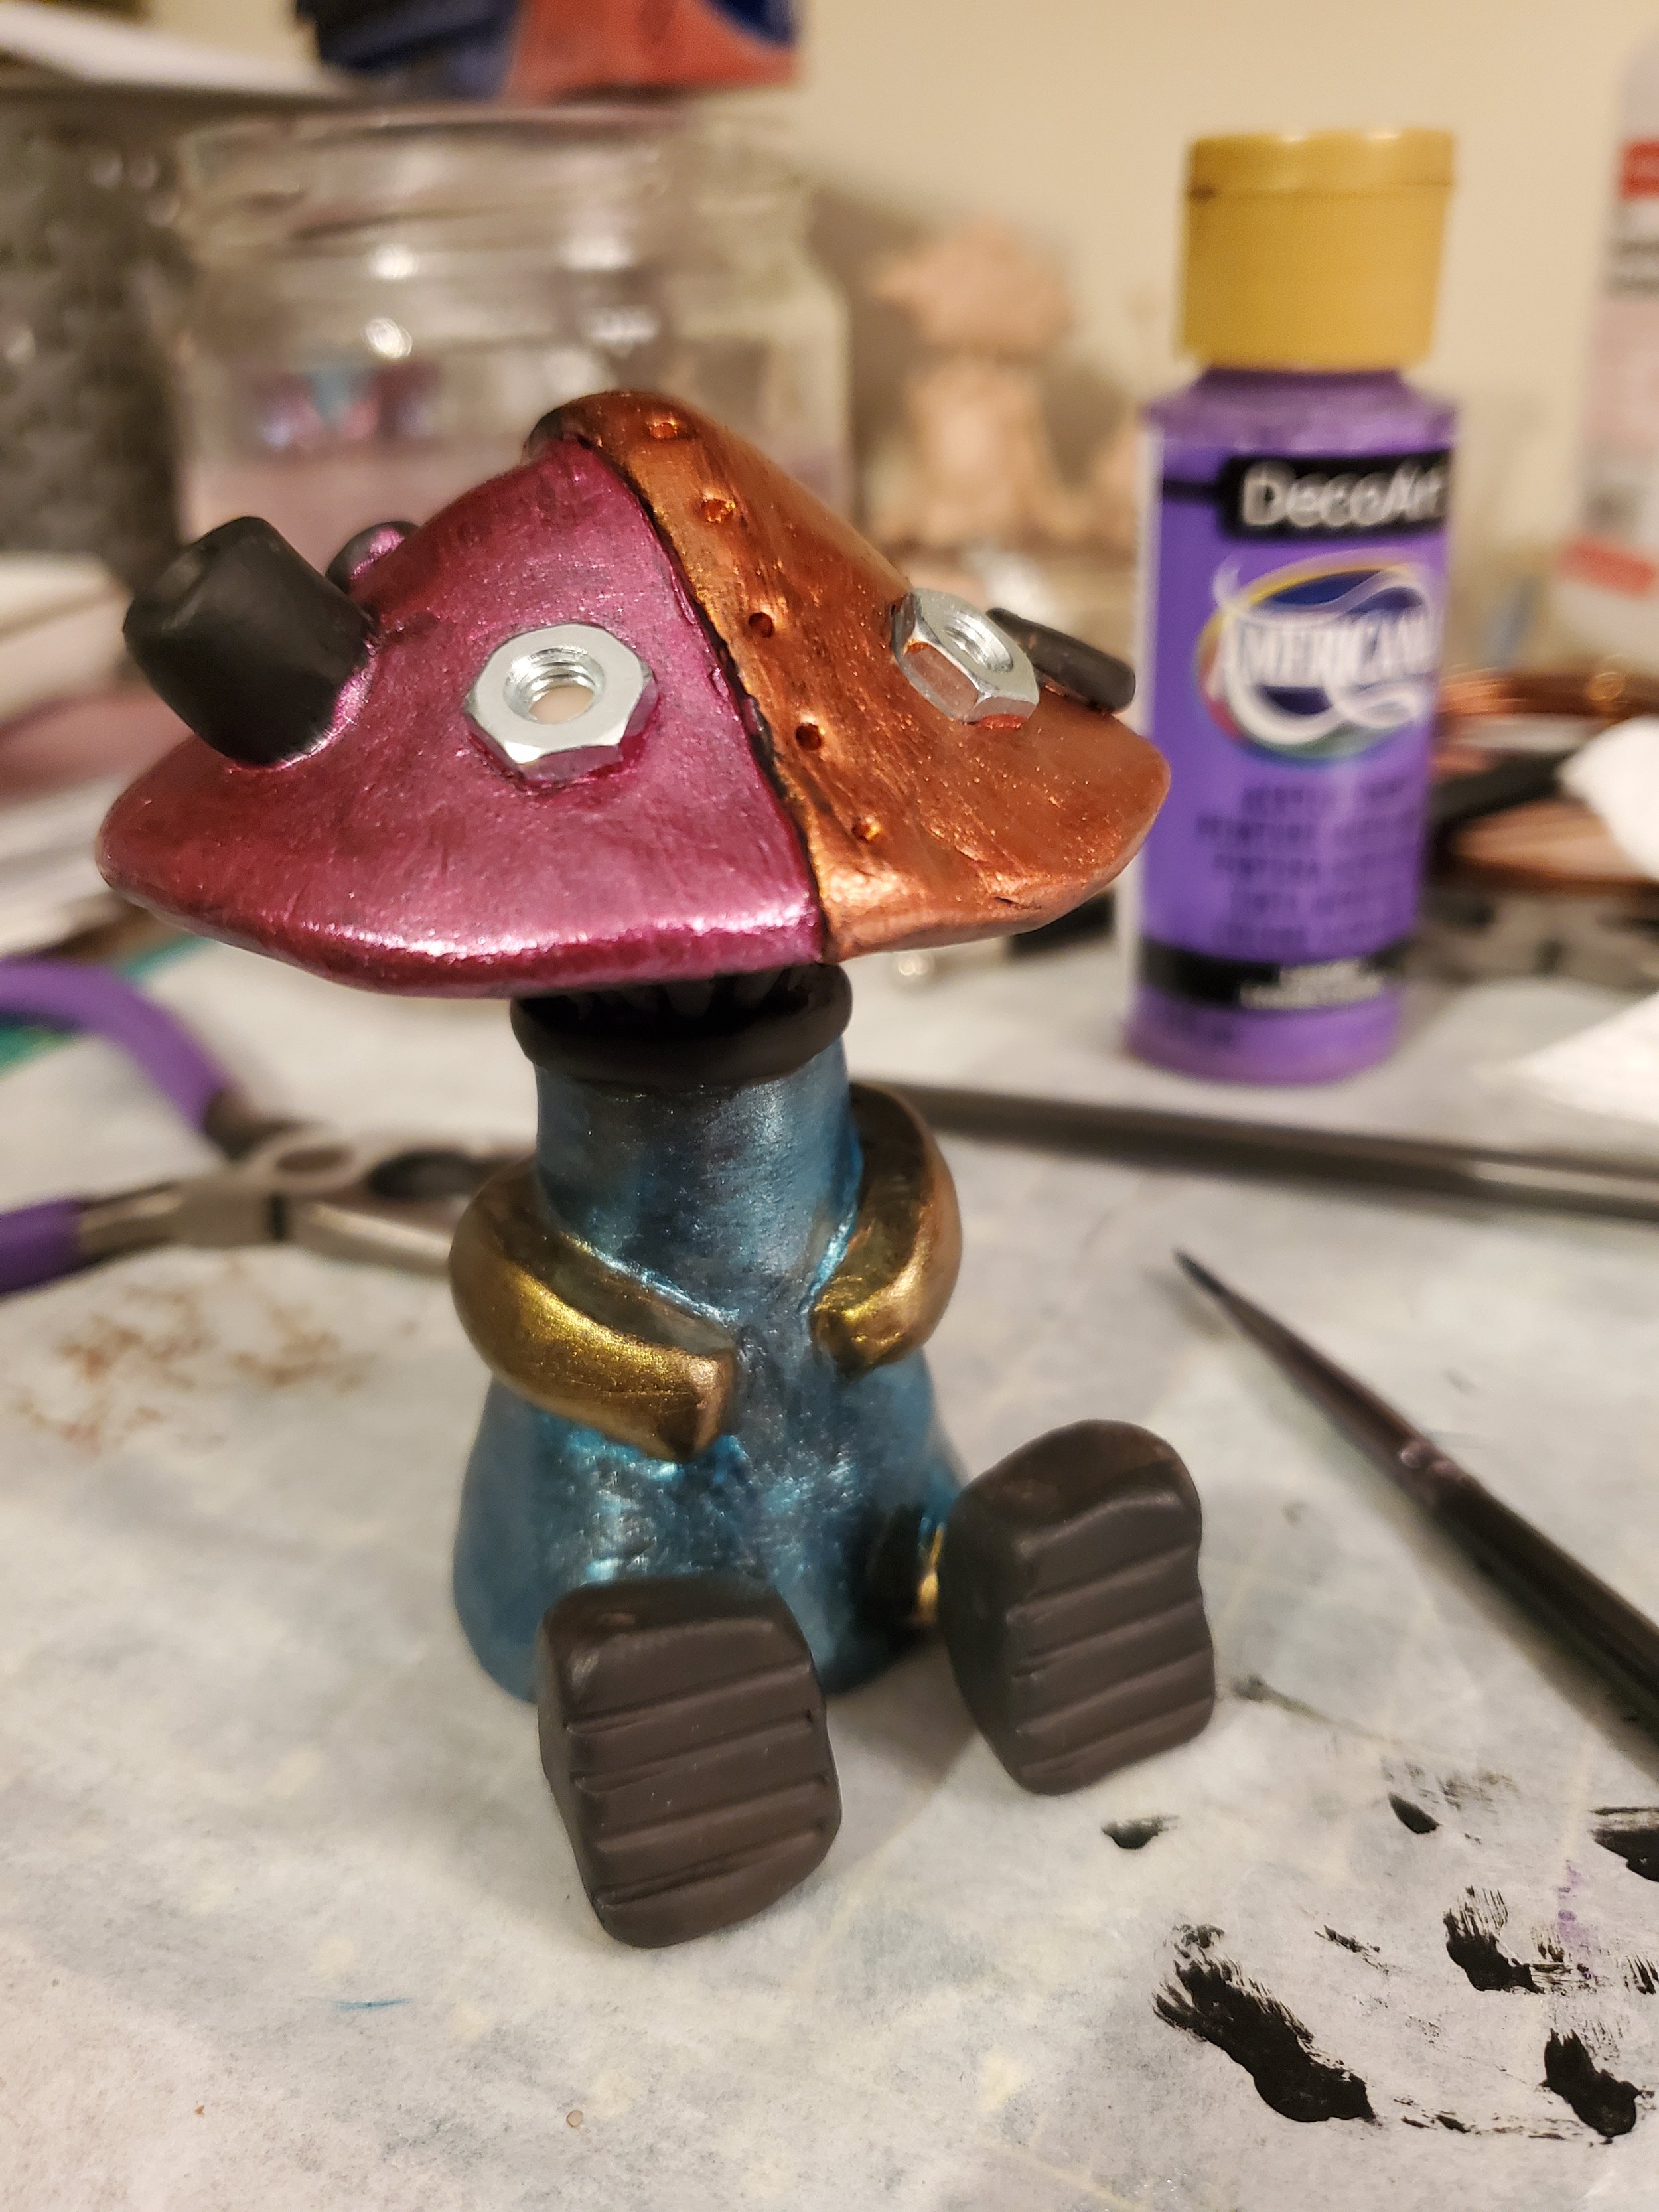
I did an undercoat of black paint because it gives the metalic paints a gritty, worn look that I thought would look good on this robot. I wanted him to look a bit kicked-around, like he’d been on some crazy adventures. Also, some of my paint colors (like copper and bronze) don’t look good at all over a lighter color, so I always paint black underneath.
I use a mix of different paints from FolkArt, DecoArt, and Artist’s Loft. As I’m buying new paint, I’m transitioning to FolkArt, because I really like the quality of that paint.
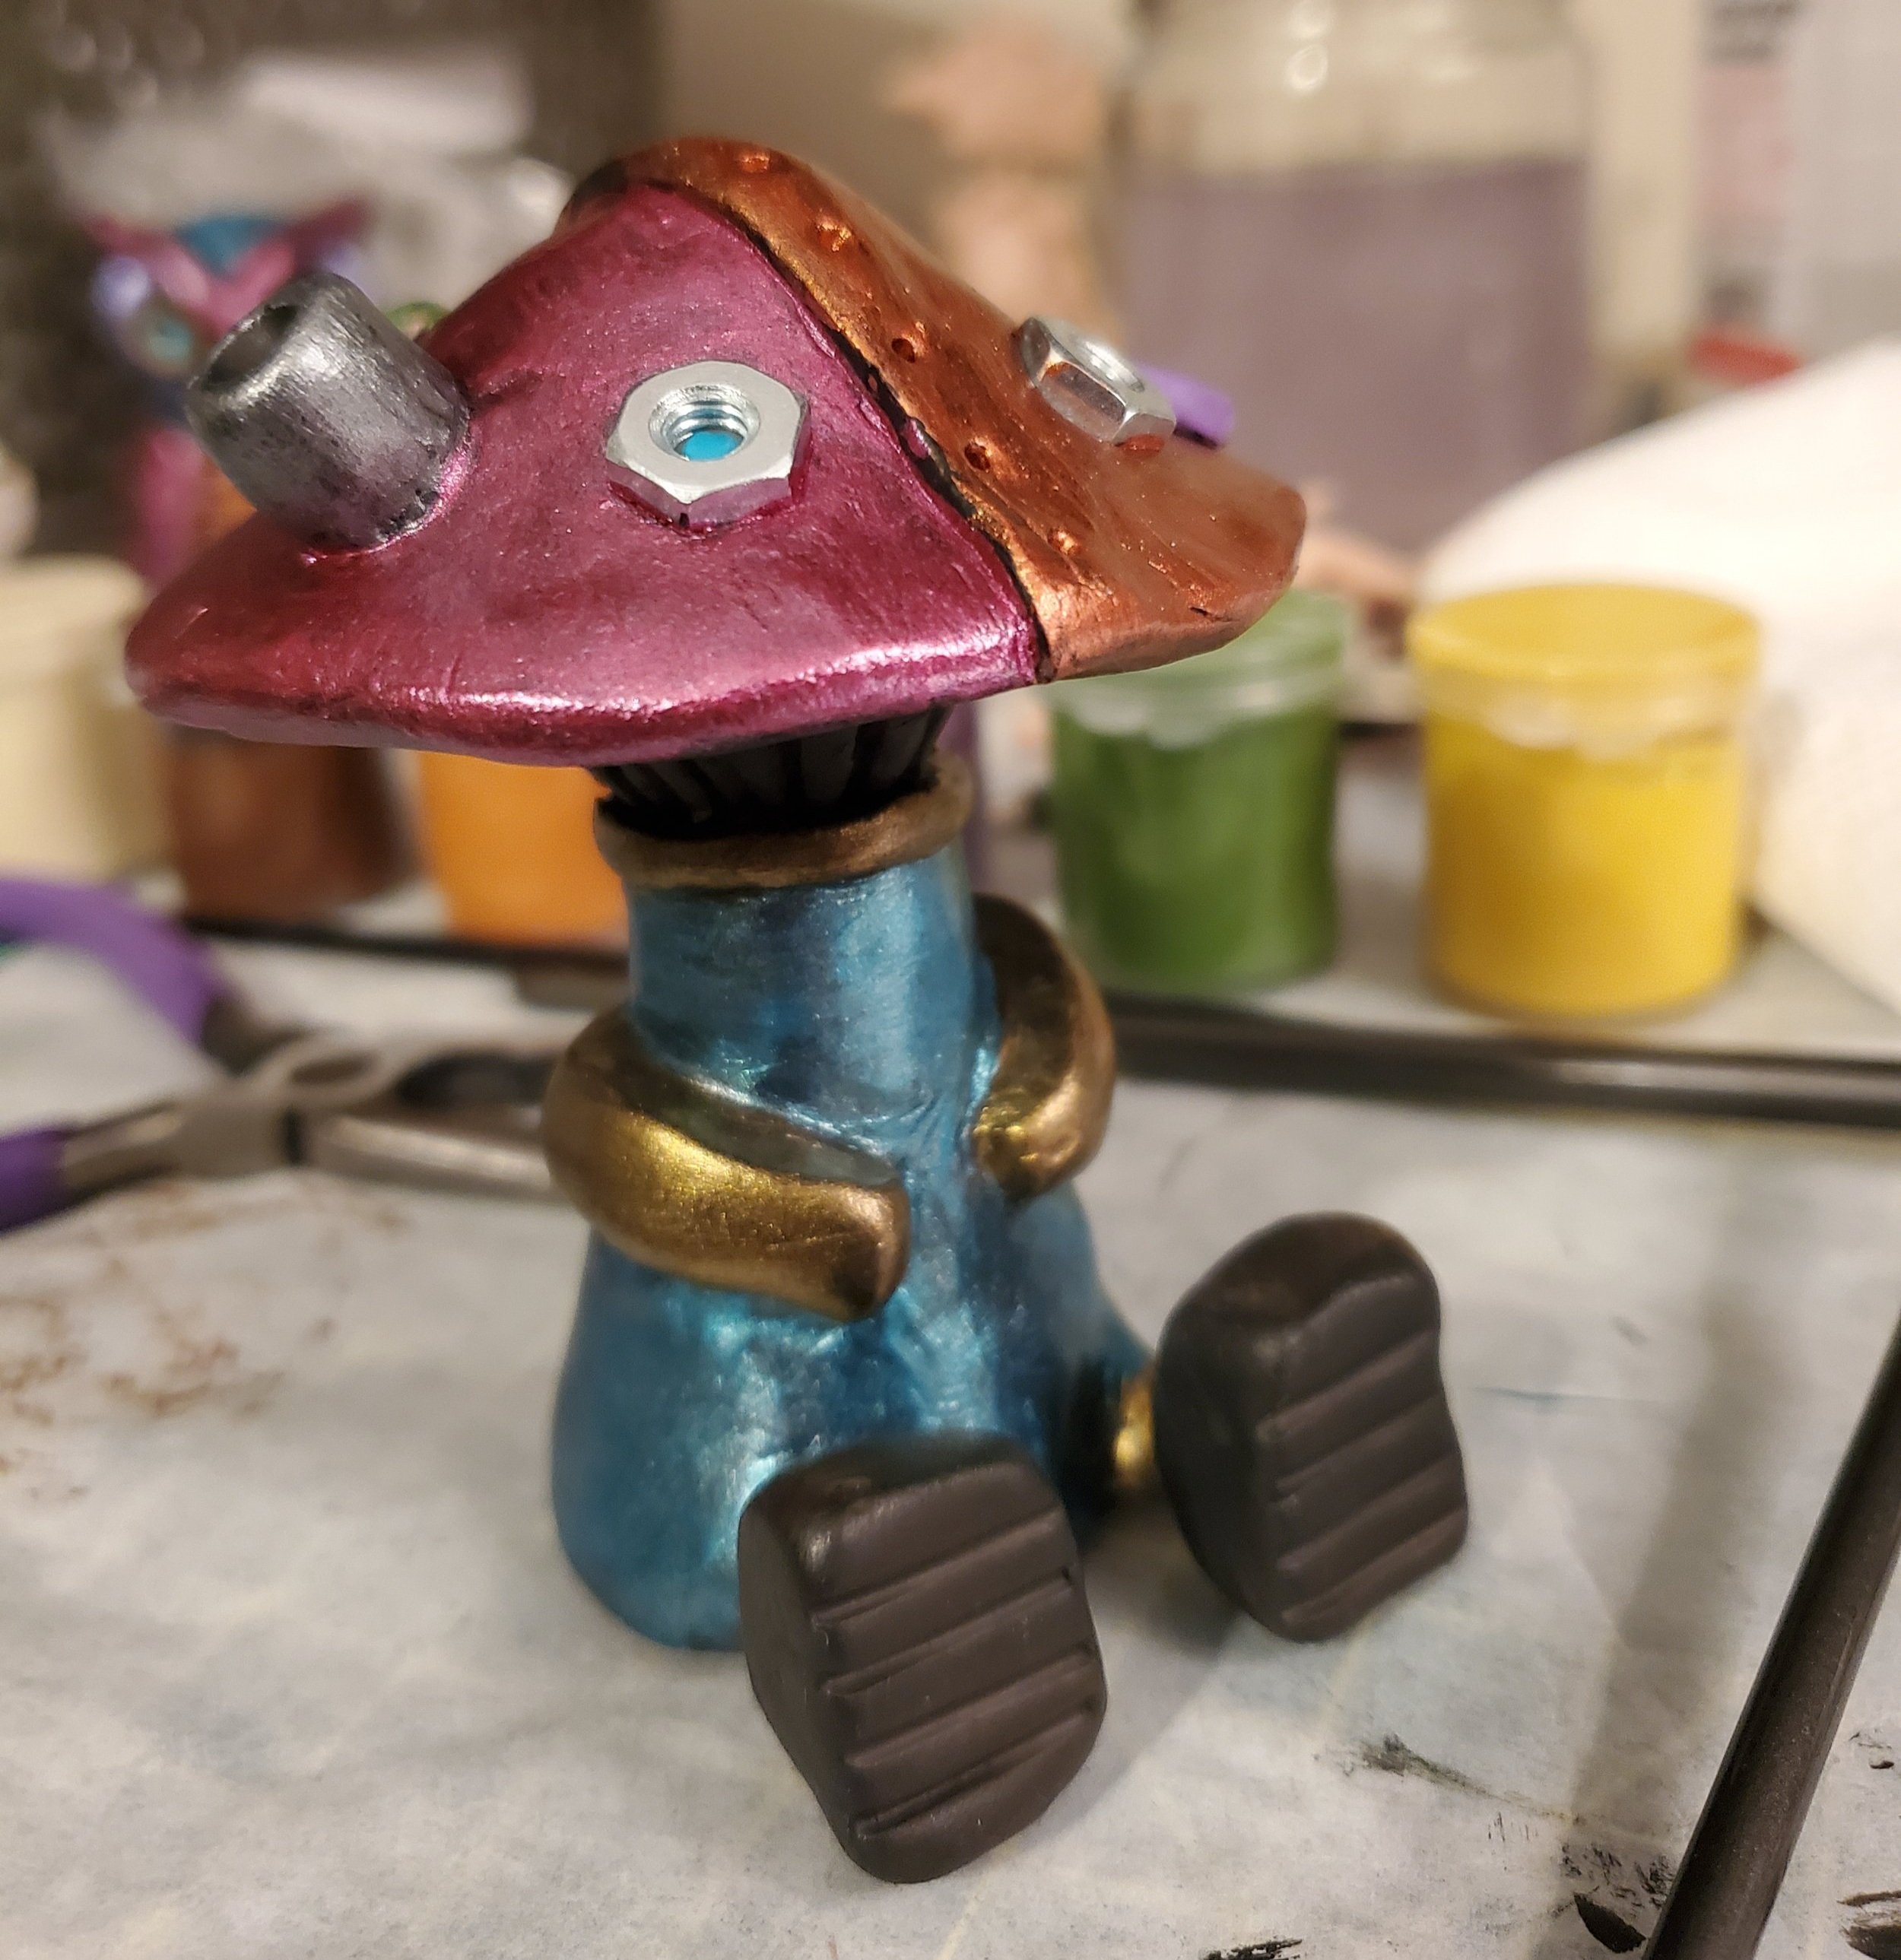
I use teal as the eye color for nearly all my robots and sculptures. My idea is that they all run on the same fuel source (which I have yet to name or figure out). And I like how it really connects them all.
Mushroom Bot is Complete!
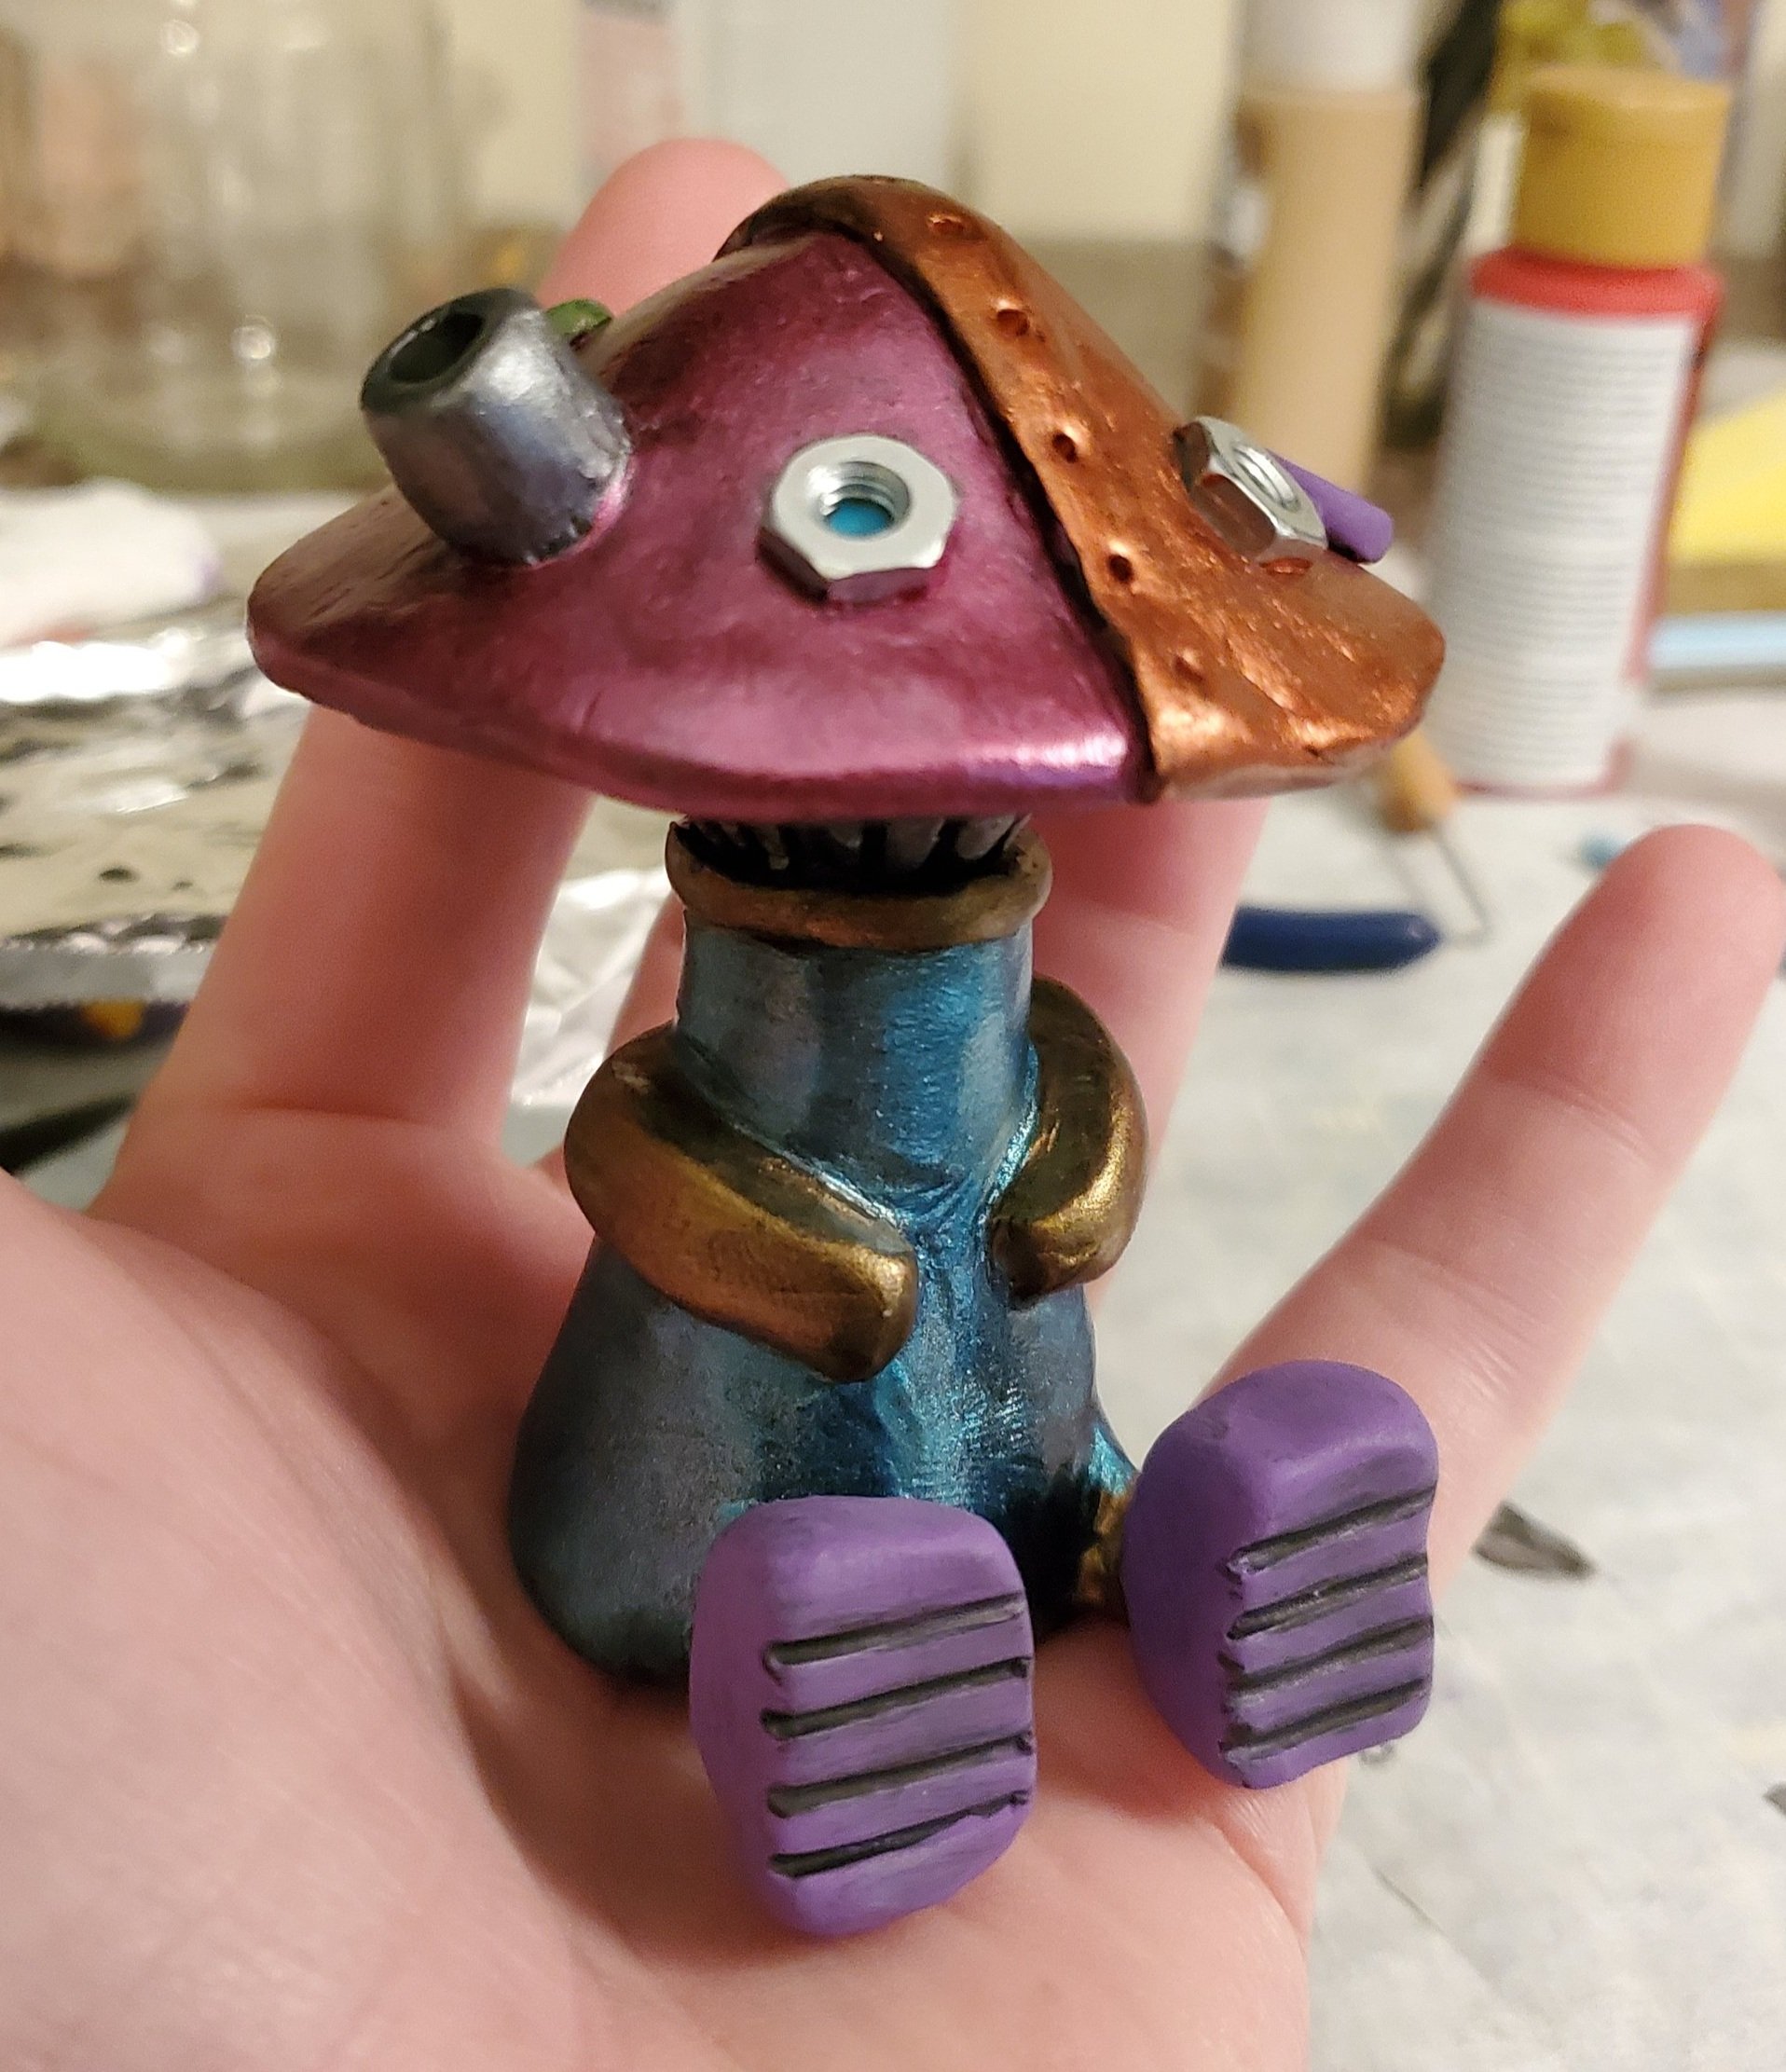
And he’s done!
I really had fun working on this robot. I think I might make a series of mushroom bots.
If you liked this more detailed description of my making-of process, let me know by commenting or messaging me and I’ll be sure to make more. Also, if you’re not signed up for my newsletter, be sure to sign up here. I only send out one or two newsletters a month.
And if you’re interested in helping fuel my creativity for a few bucks a month, check out my Patreon.
Until next time,
—Andy