I build Robot Puppets now…
Hello!
So it turns out I build robots now — specifically robot puppets.

It started as an idea to build one robot out of junk to do strange travel videos of the places we’re visiting, but turned into a much larger project.
I started collecting junk and relics from antique stores thinking I would build a single robot, and then I got very inspired by people who build robots on Pintrest and Instagram. I didn’t want to buy soldering equipment or metal drills, as I don’t really have a workshop right now, and I happened upon polymer clay. It’s a synthetic clay that you can bake in an oven or toaster oven. I’d heard about polymer clay but didn’t know much about it.
I took ceramics in high school and college and loved making art with my hands, both sculpting and throwing. Working with clay again has been so good for my mind — I’ve been looking for a meditative creative outlet for a while now and finally stumbled upon it.
Robot #1 - The Proof of Concept
Here is my first proof of concept — I built this to see if I could build a simple robot. I built this guy out of polymer clay, wire, and an old caster wheel. I made him pretty simple, not wanting to put too much time into him in case he just broke when I baked him. He turned out awesome, and I painted him with metallic acrylic paint. The wheel works so you can roll him around.
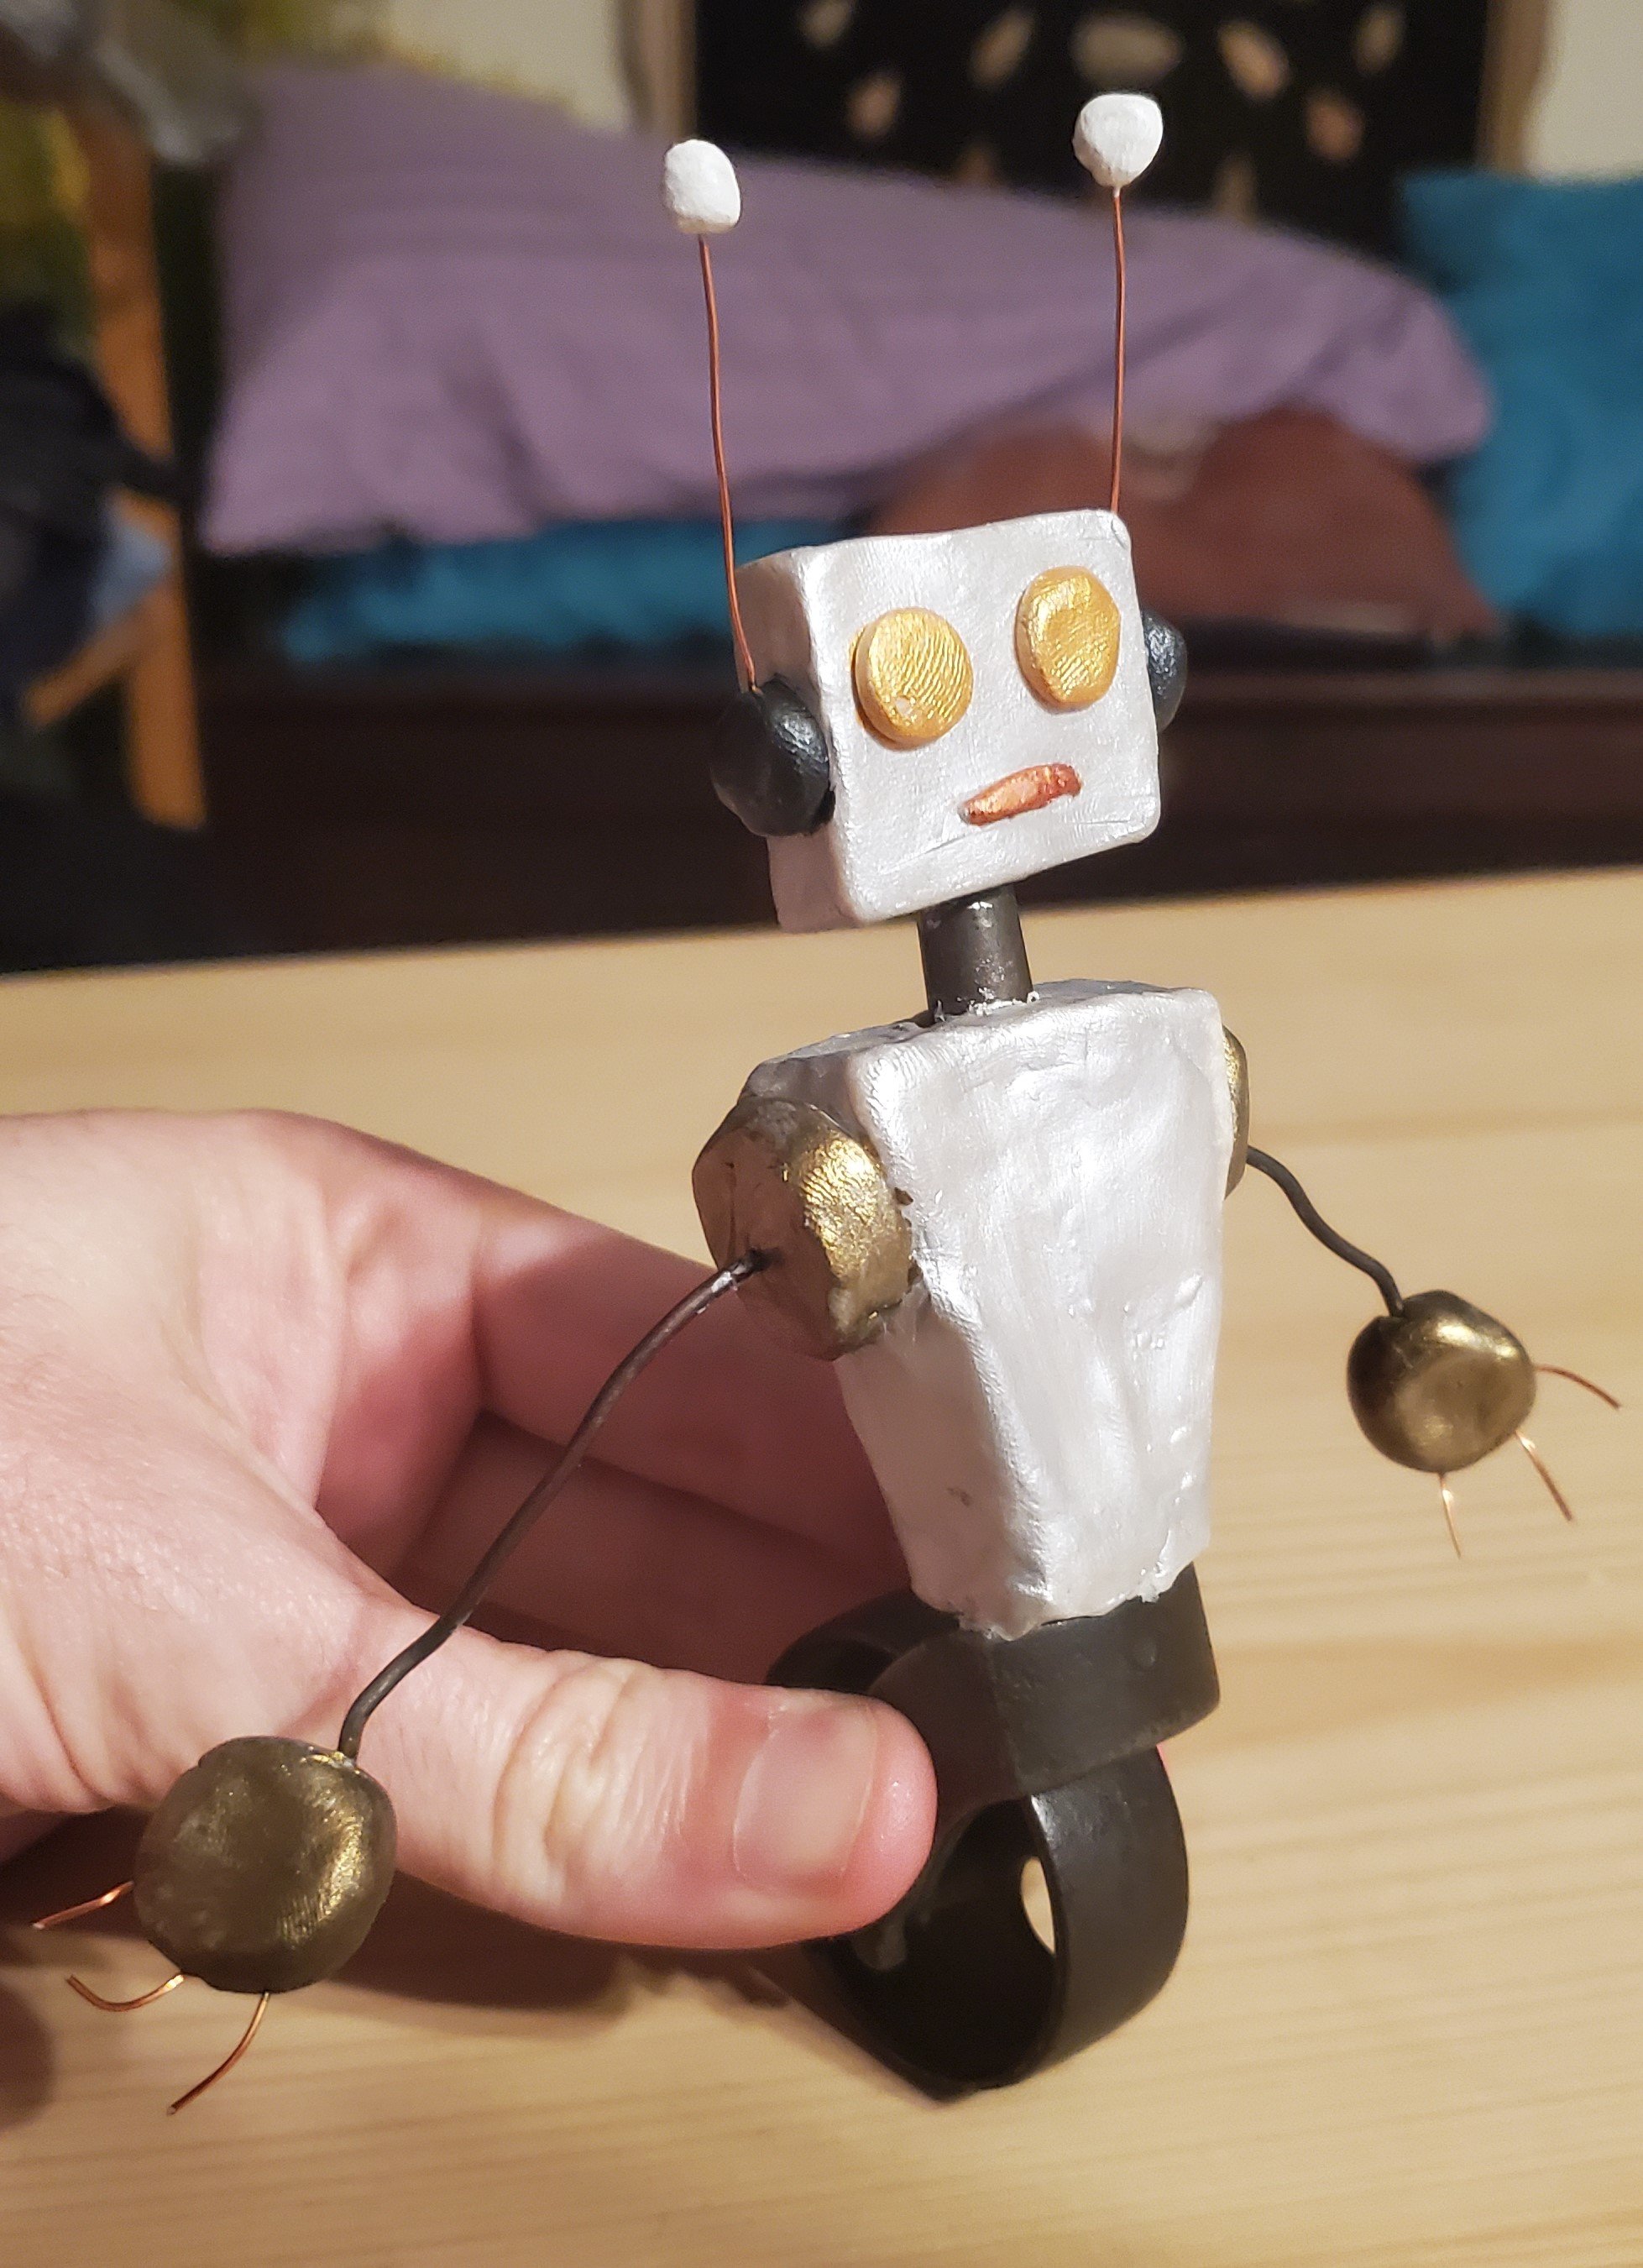
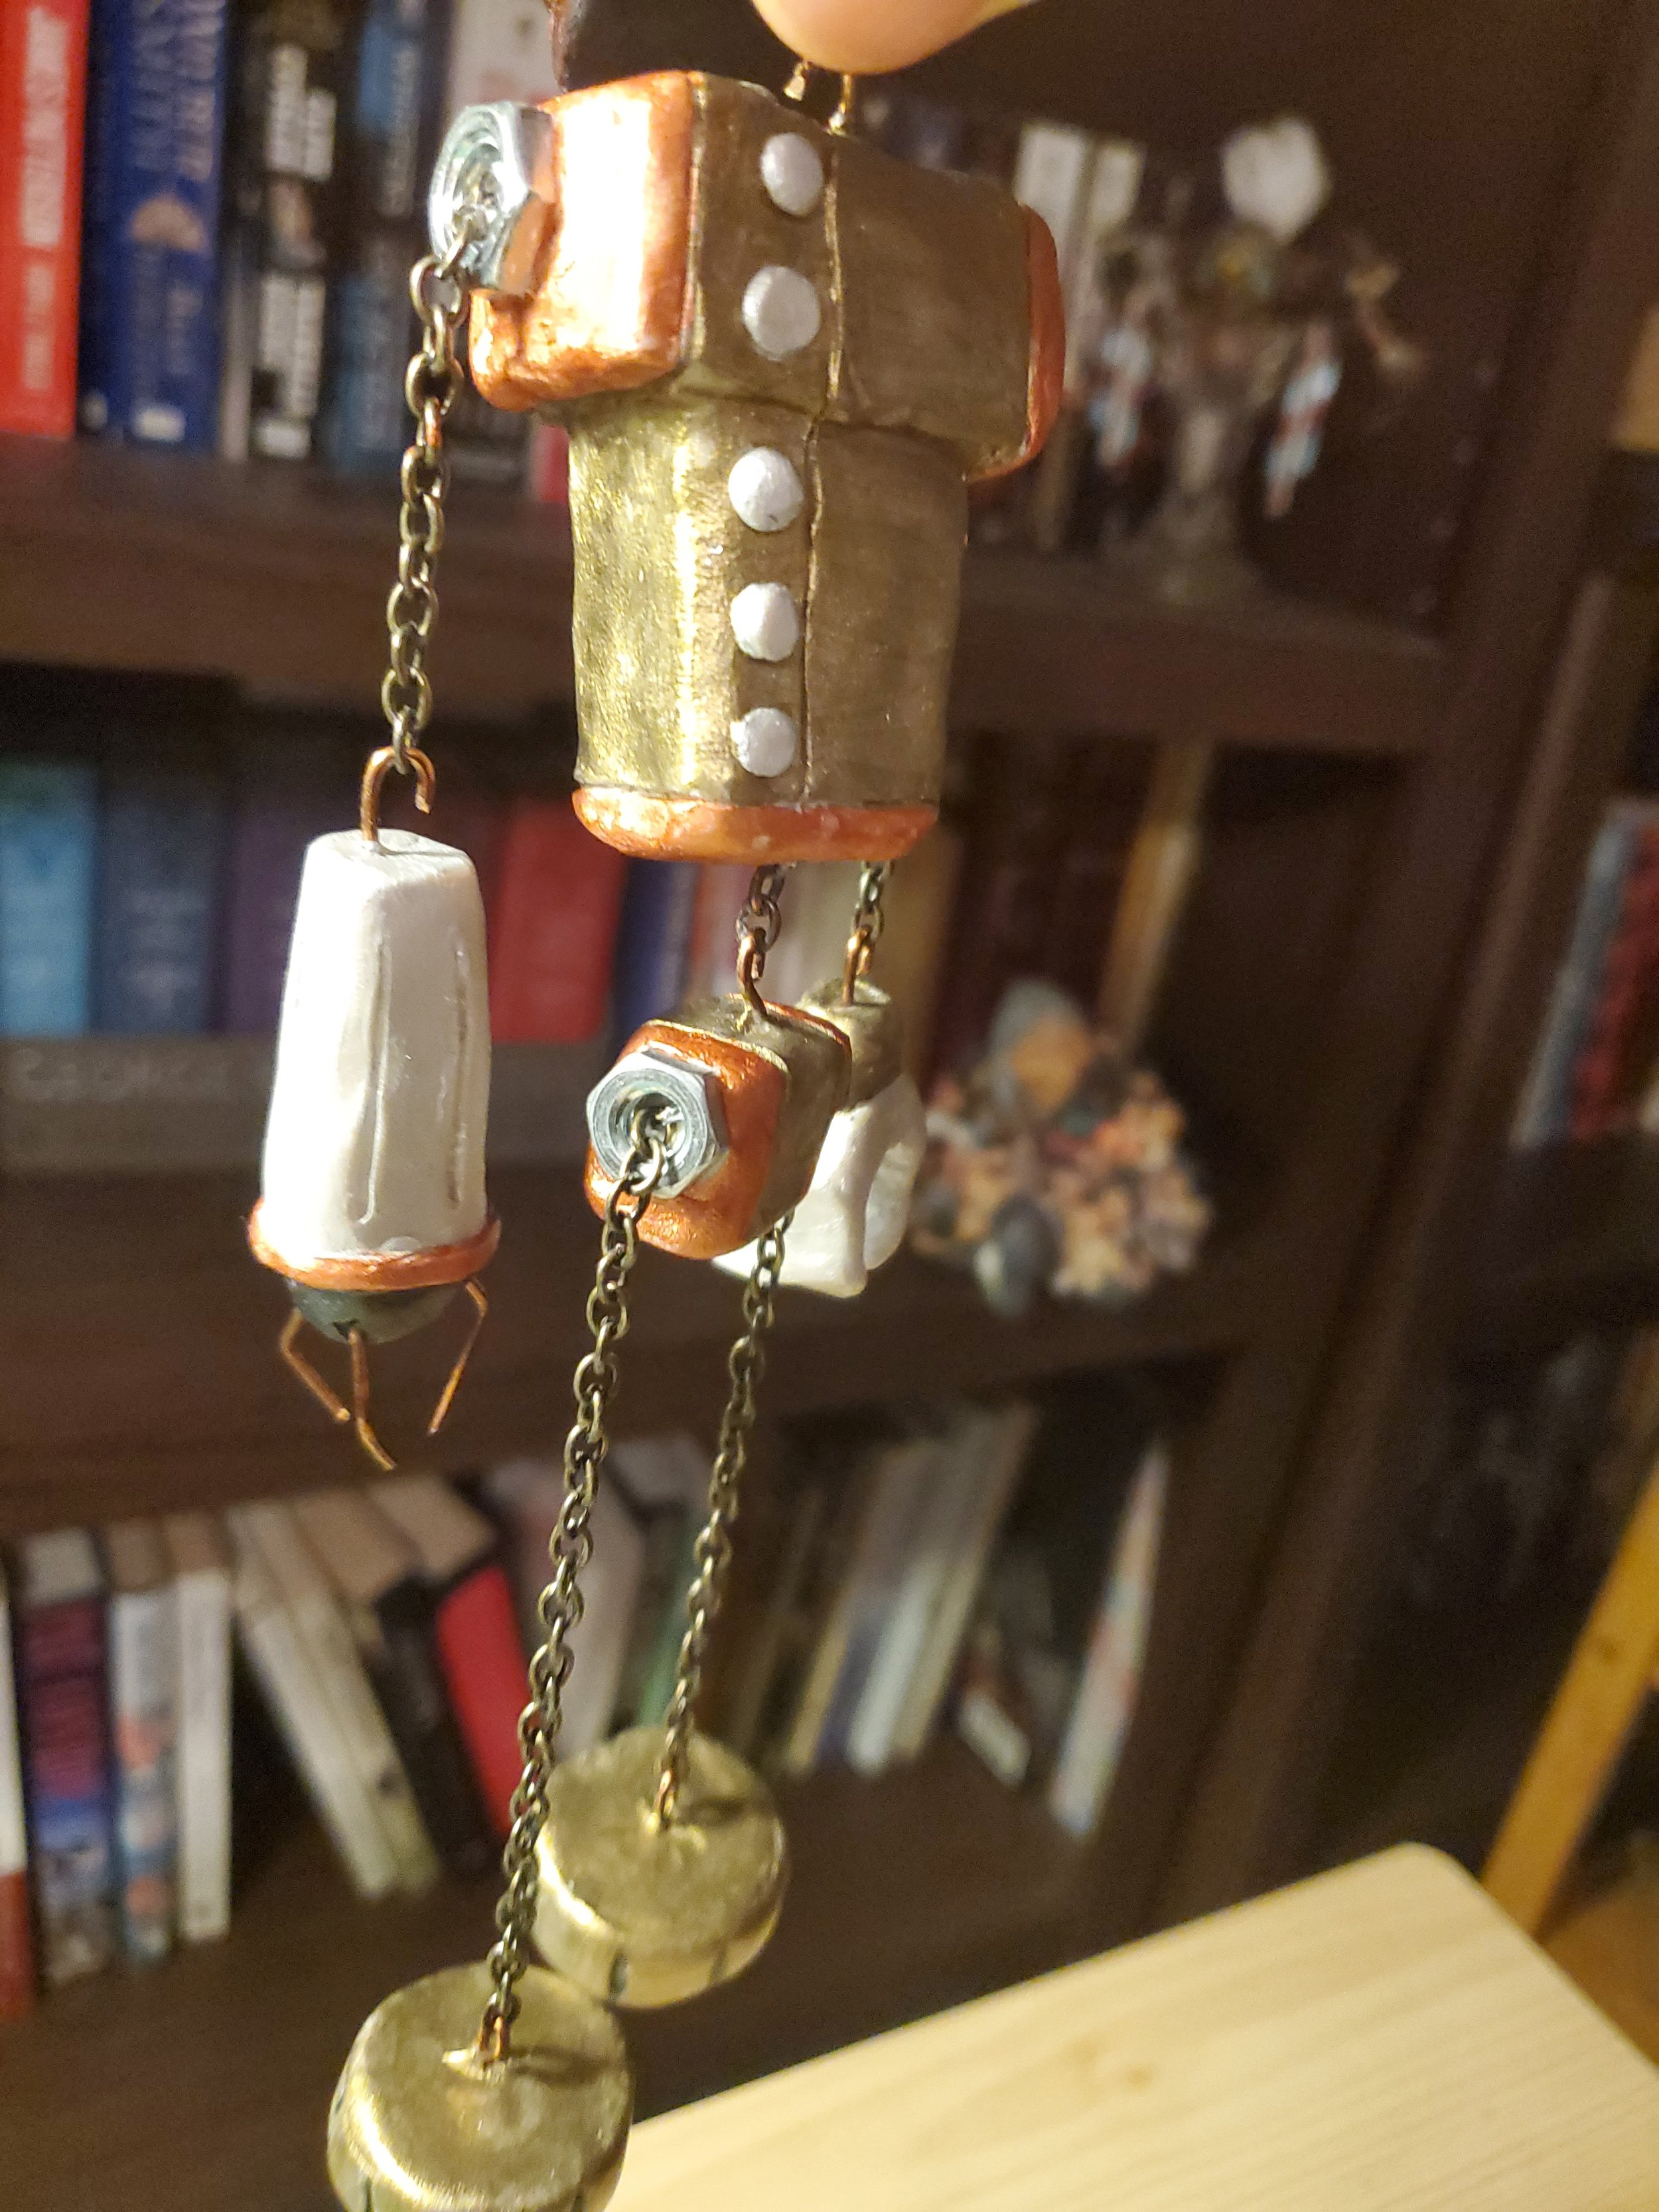
Robot #2 - The First Robot Puppet
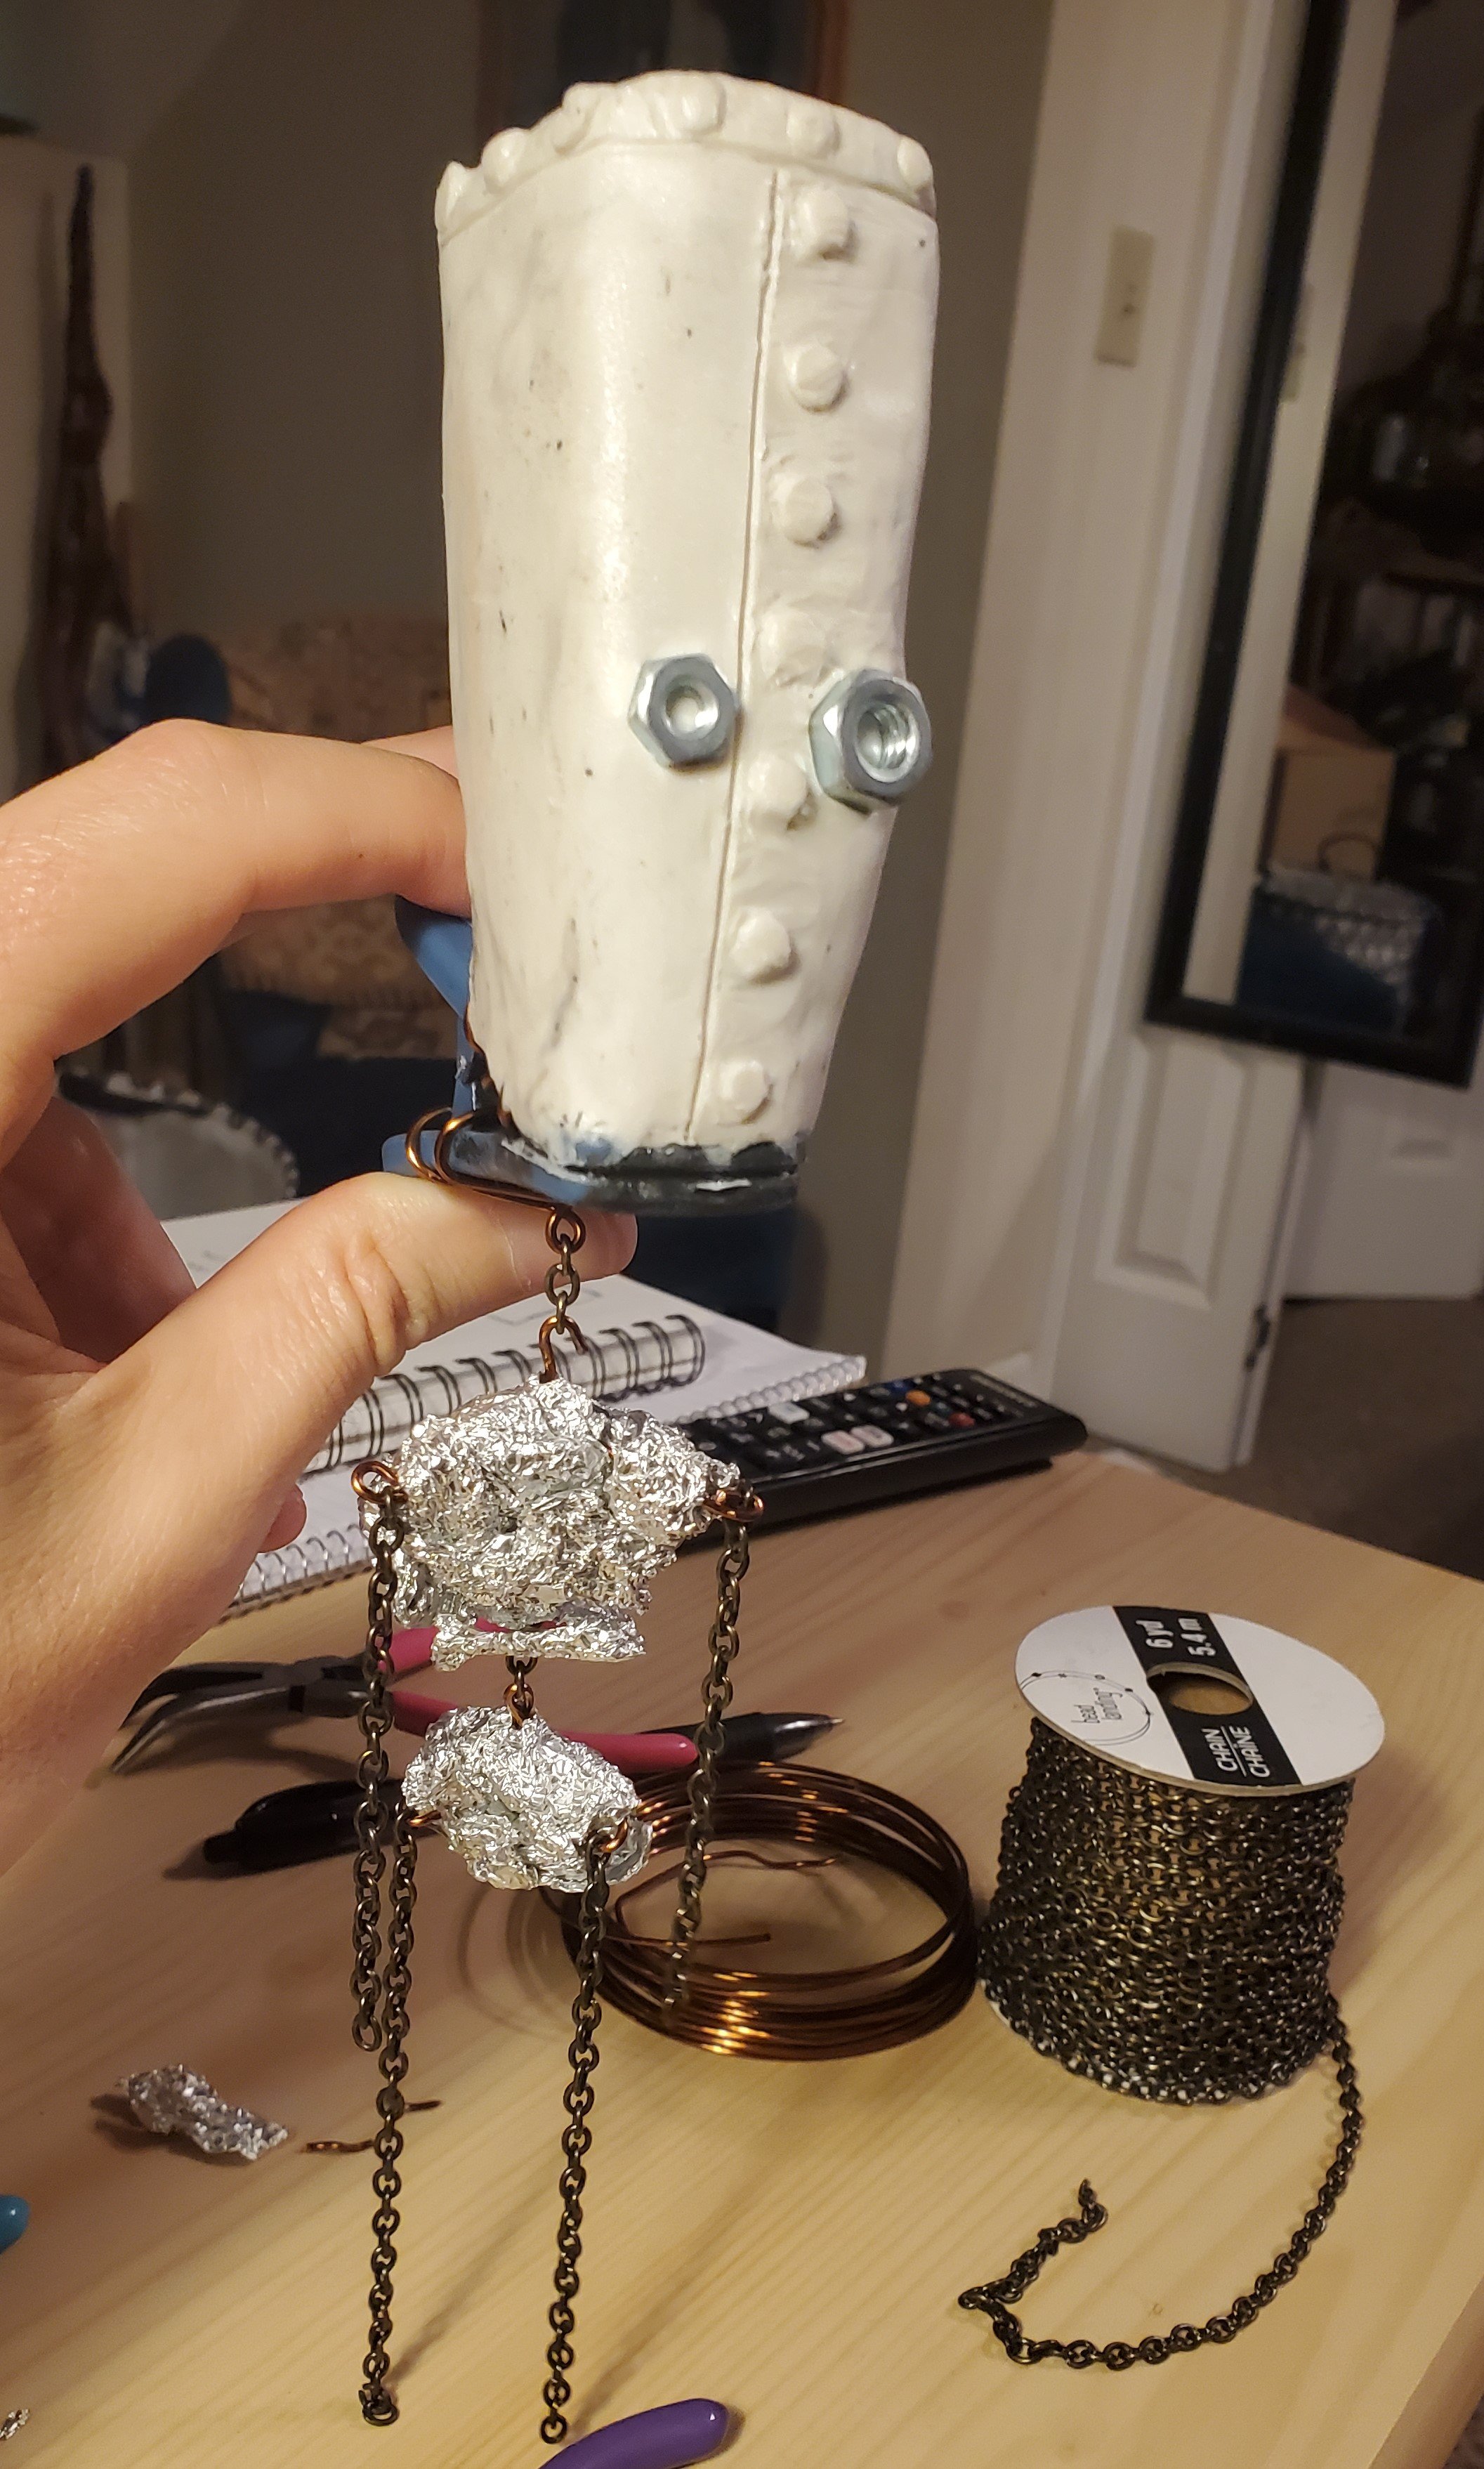
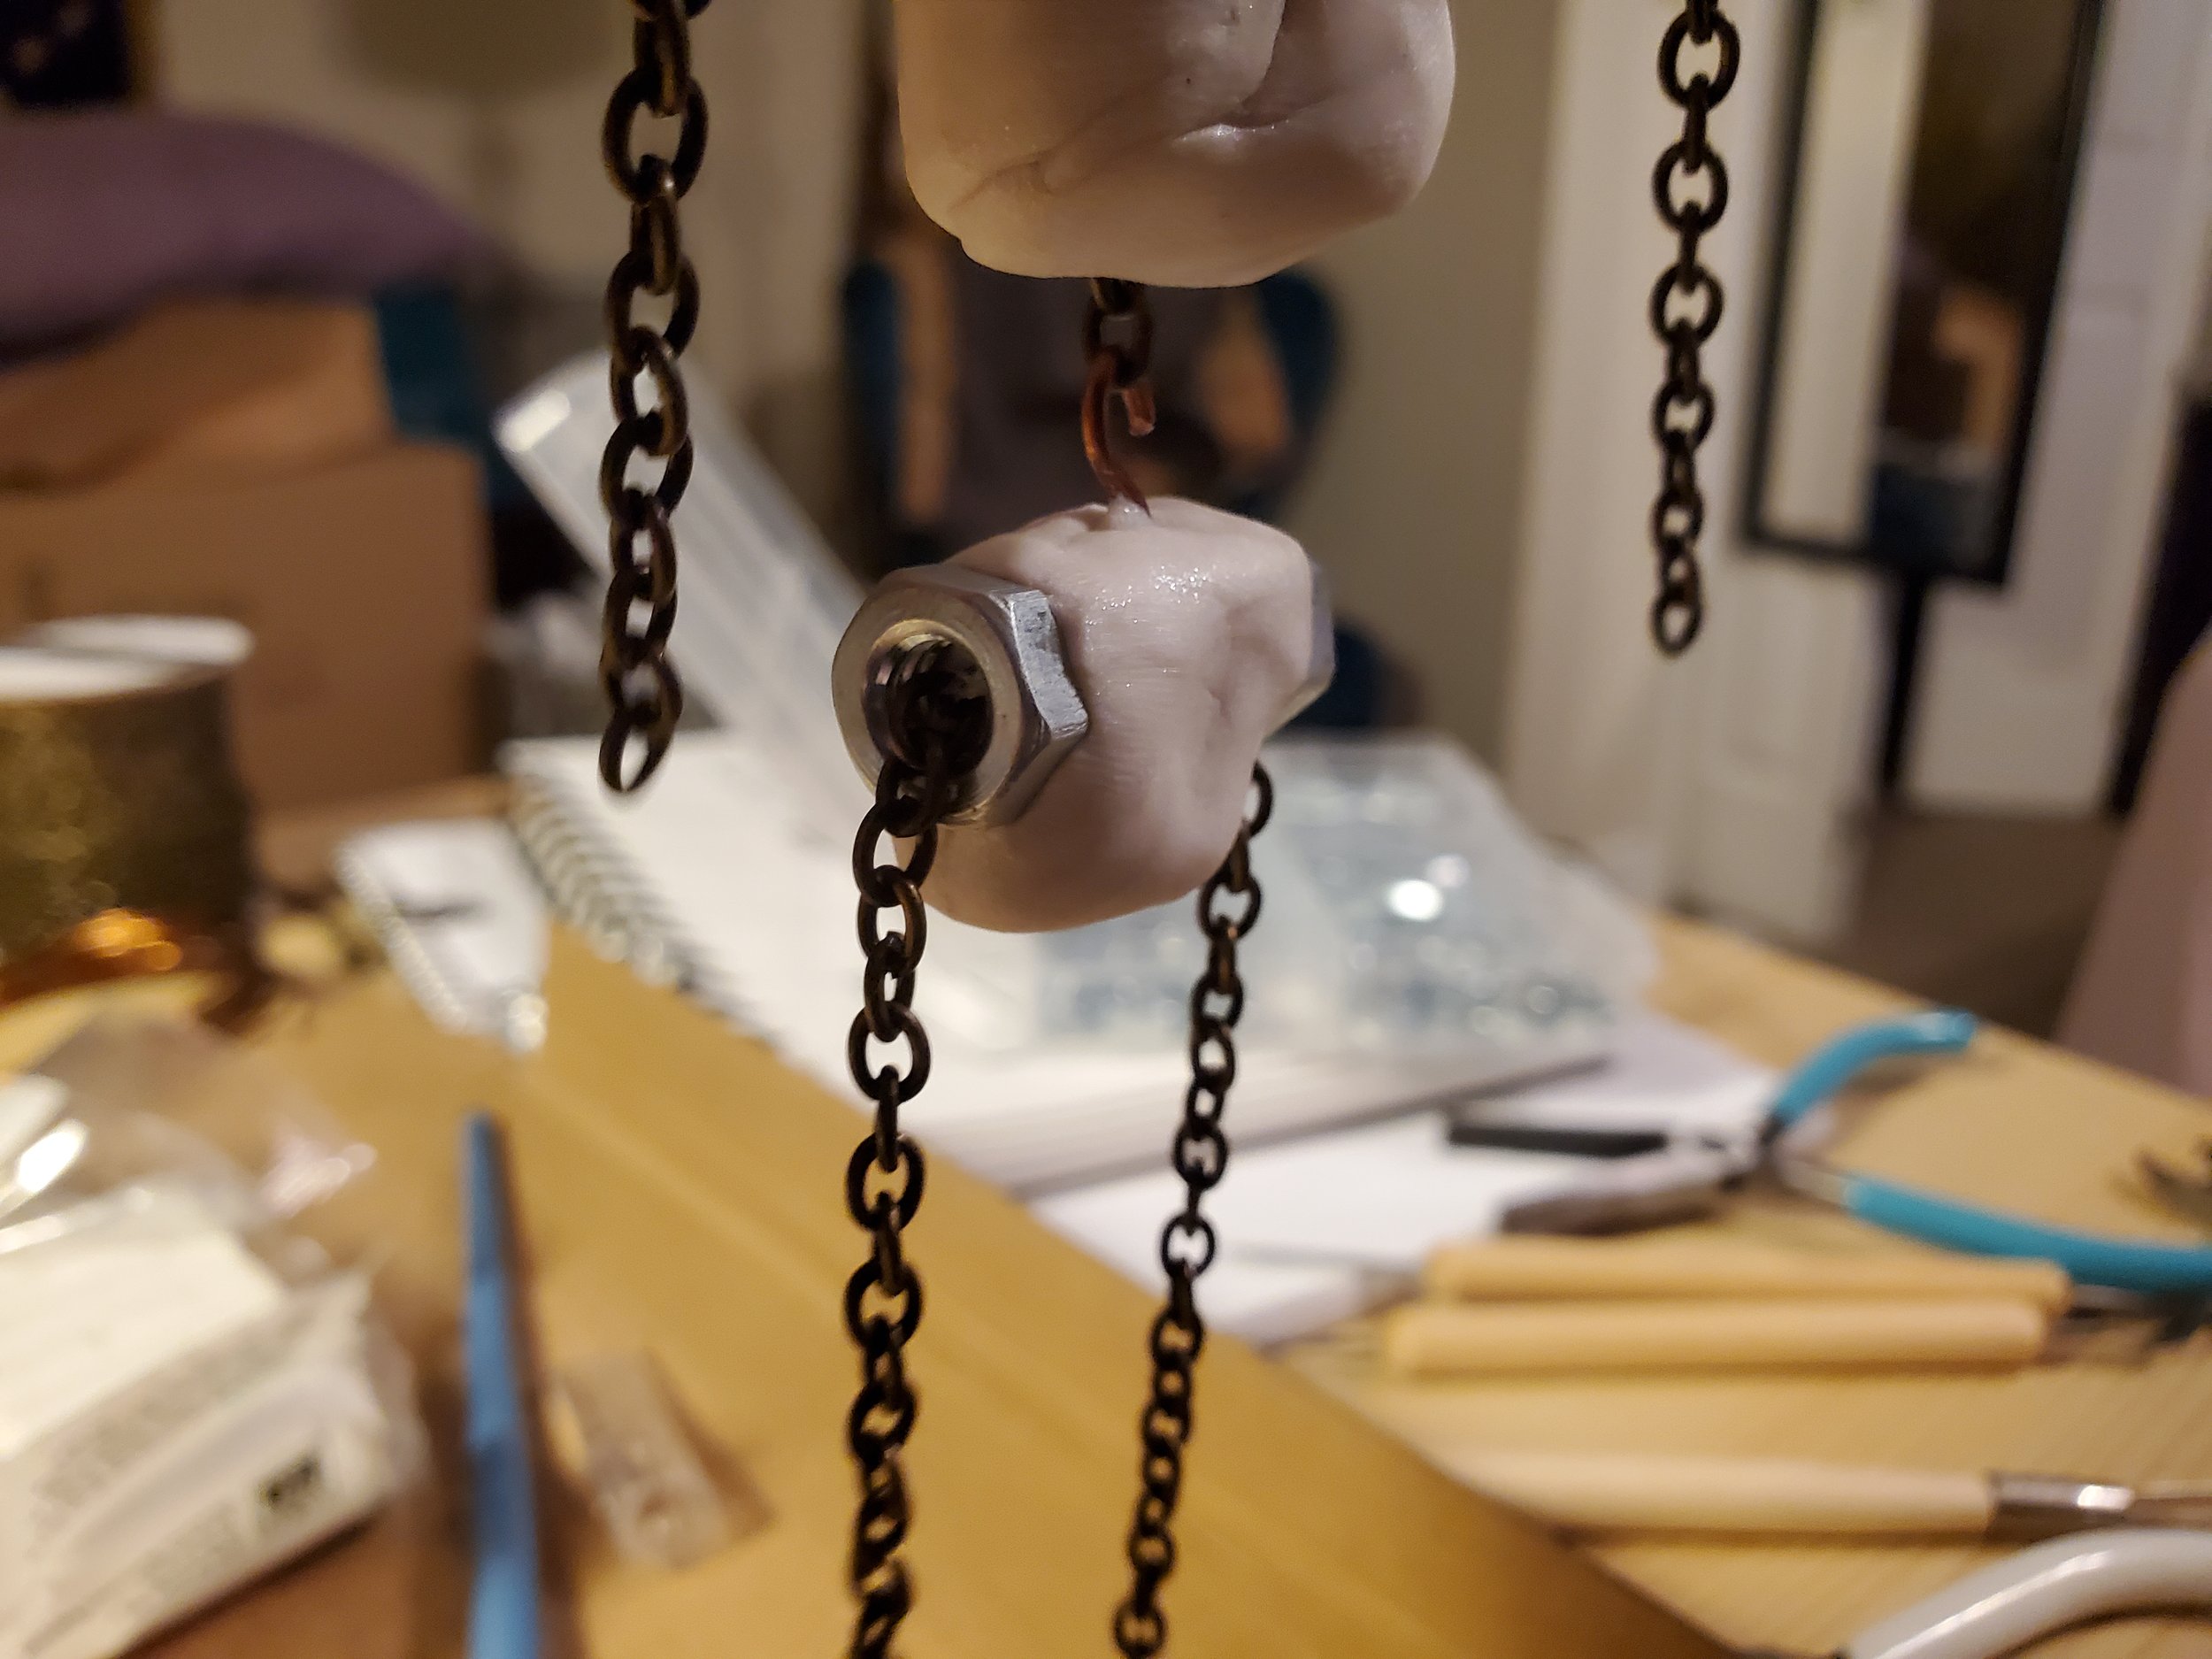
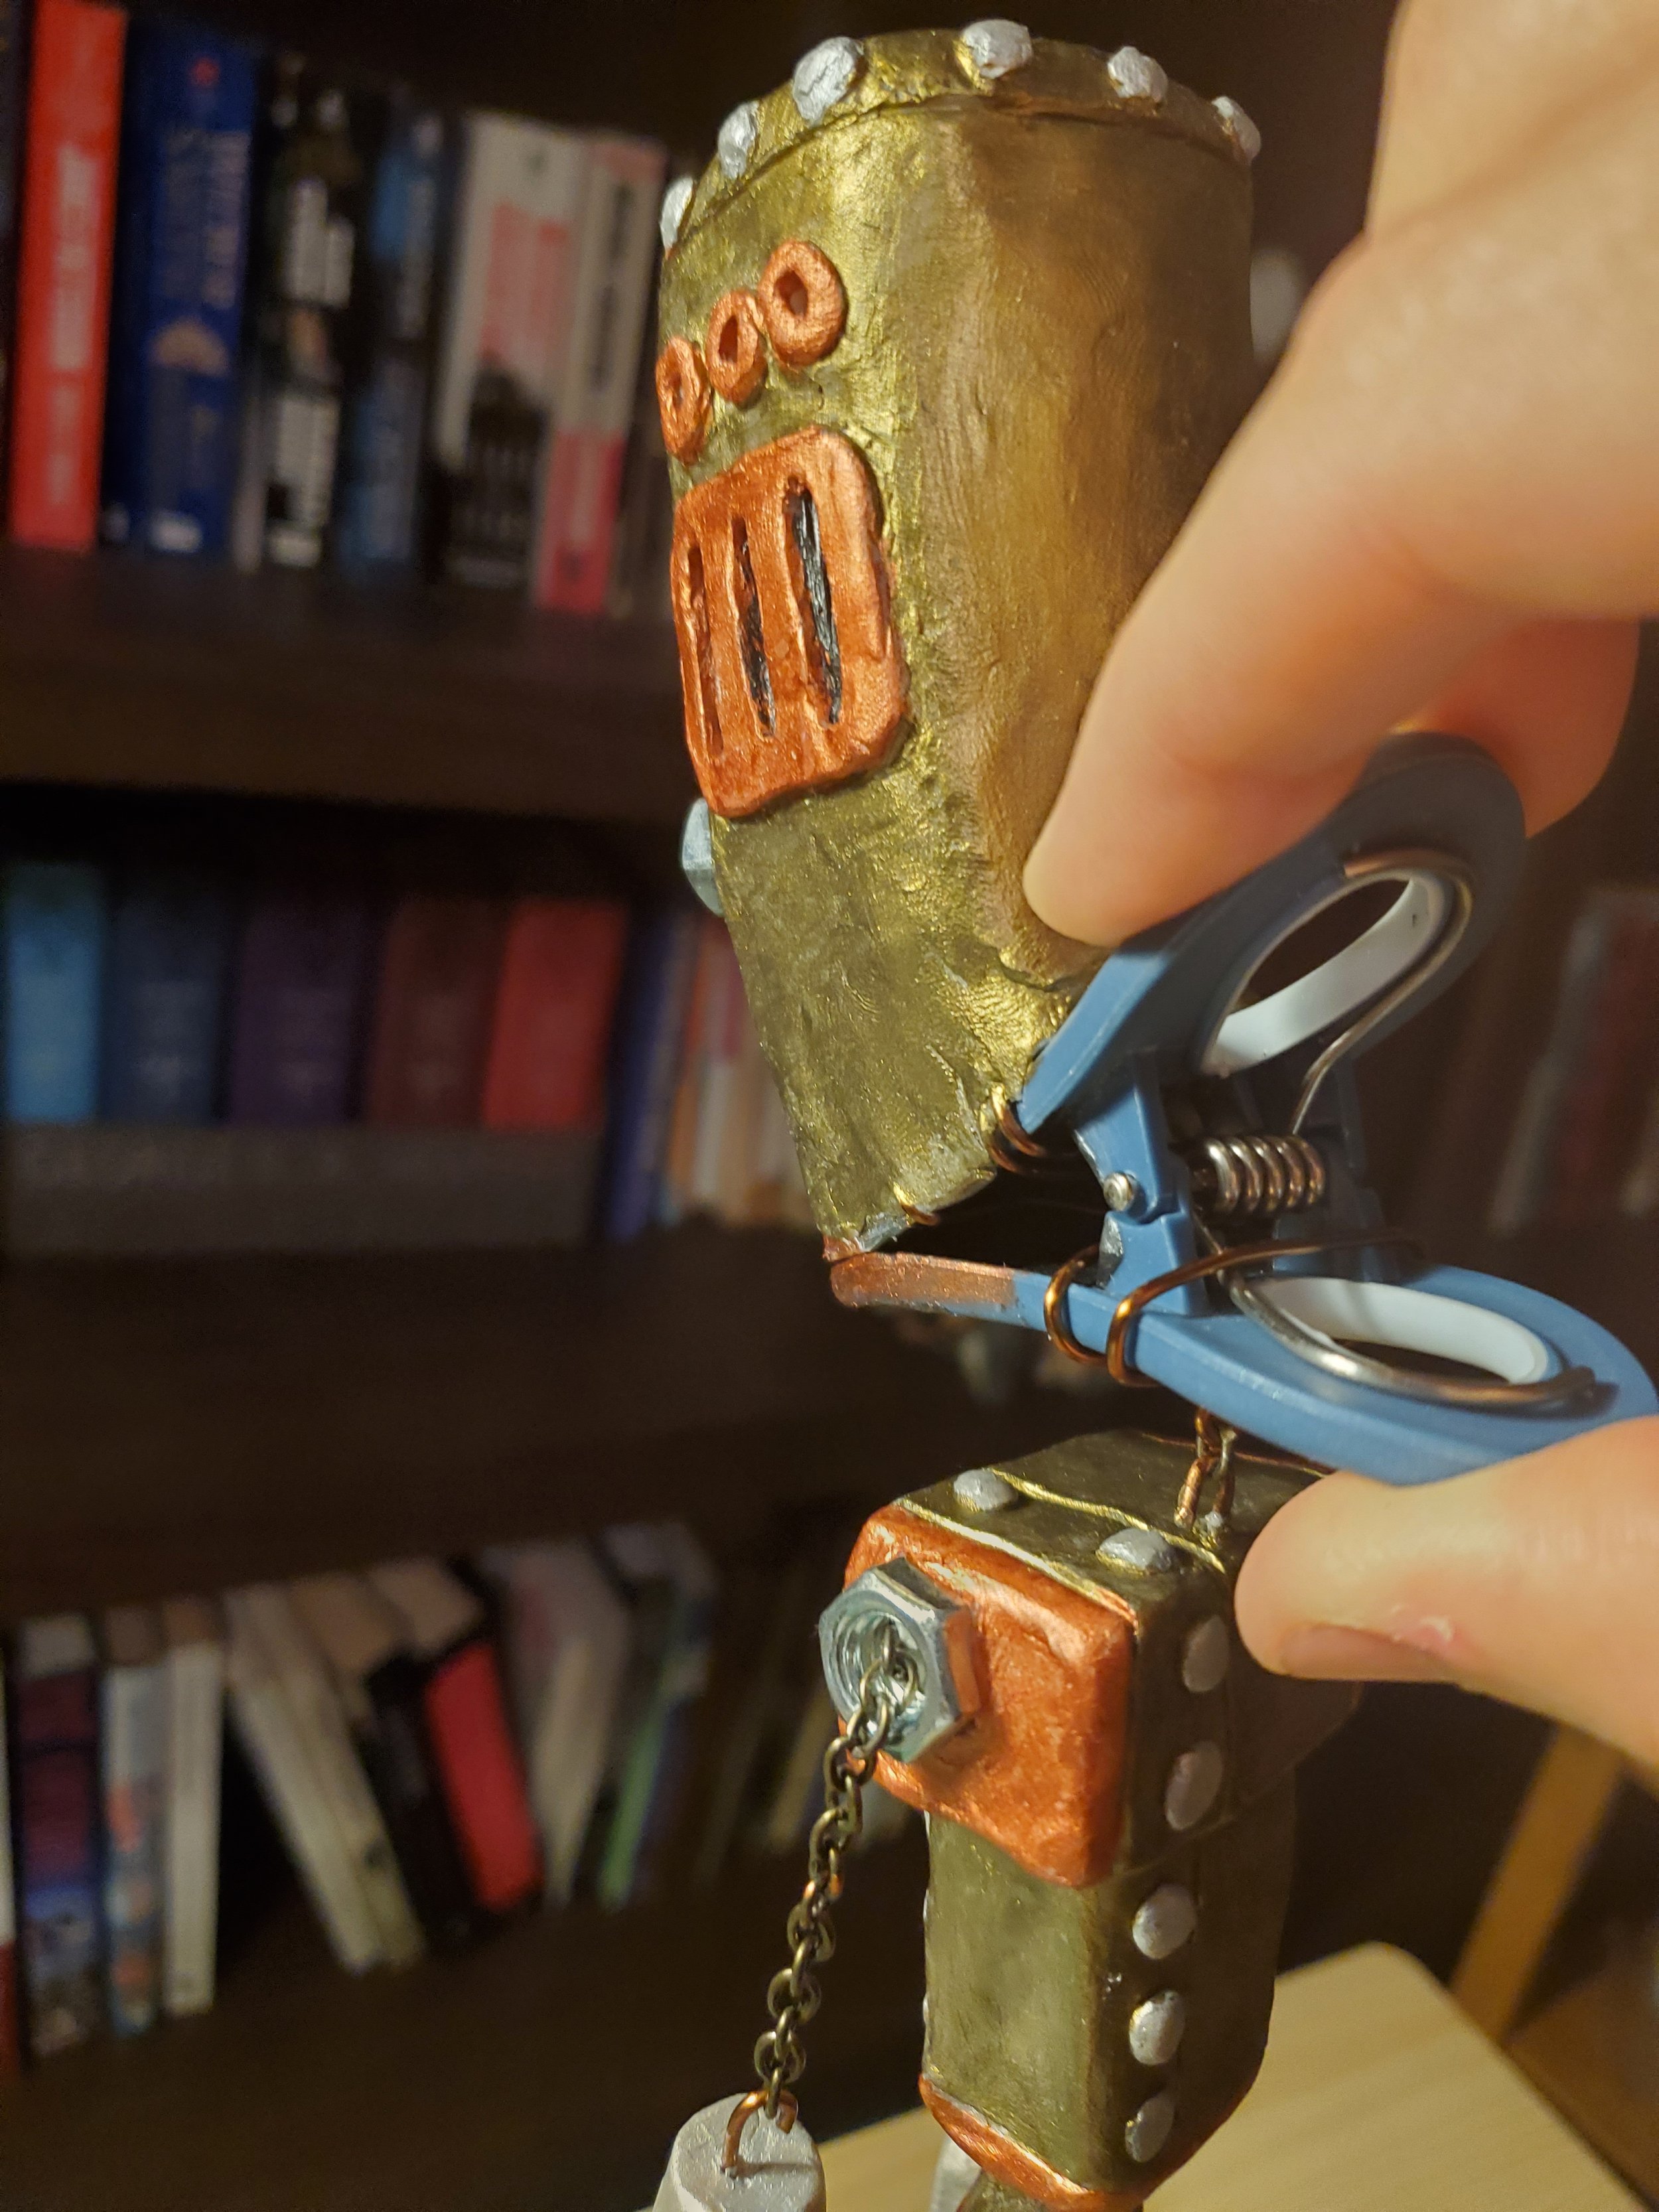
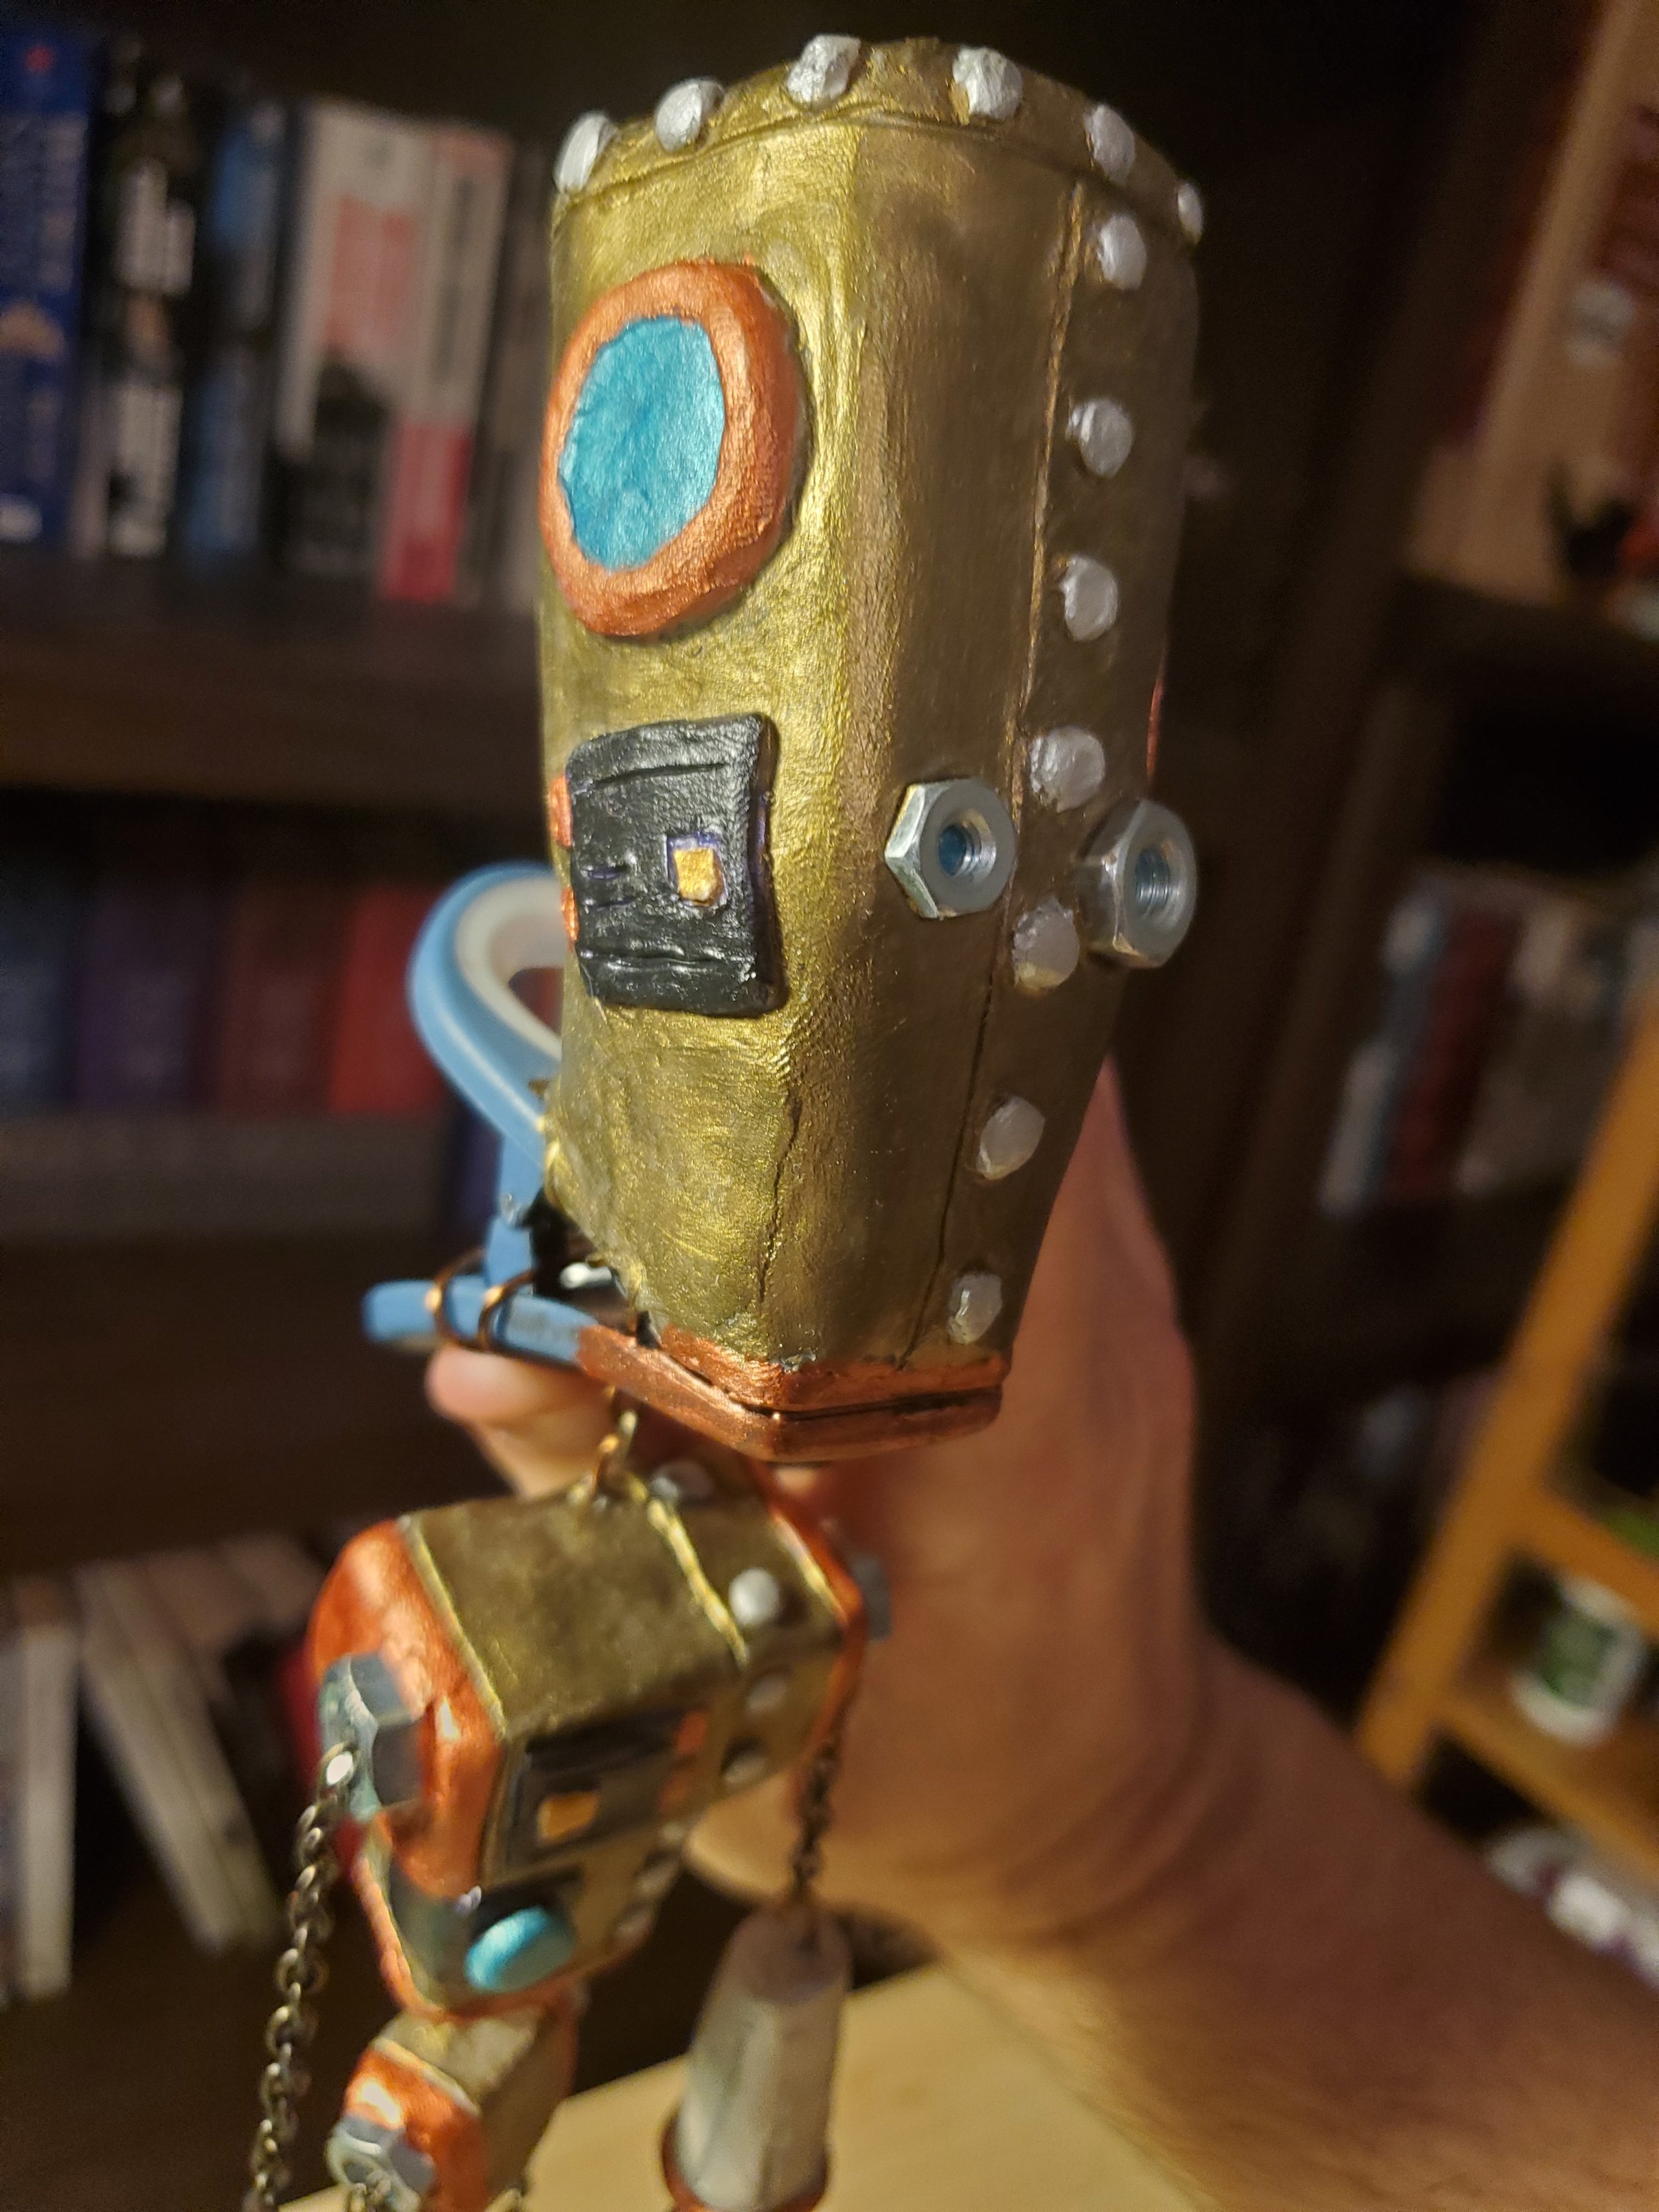
After the success of the first robot, I set out to design a puppet. Originally, to have the robot “talk” I was thinking of a light bulb that I could turn on and off while he “spoke.” But now that I was baking the robot, I didn’t want to use a light bulb.
Ever since I was a kid, I’ve always taken anything I could make “talk” and made it say silly things, so almost immediately I thought of bag clips — the clips you use to keep food fresh after the bag is open. I bought a package of nice ones that looked like they would last a while.

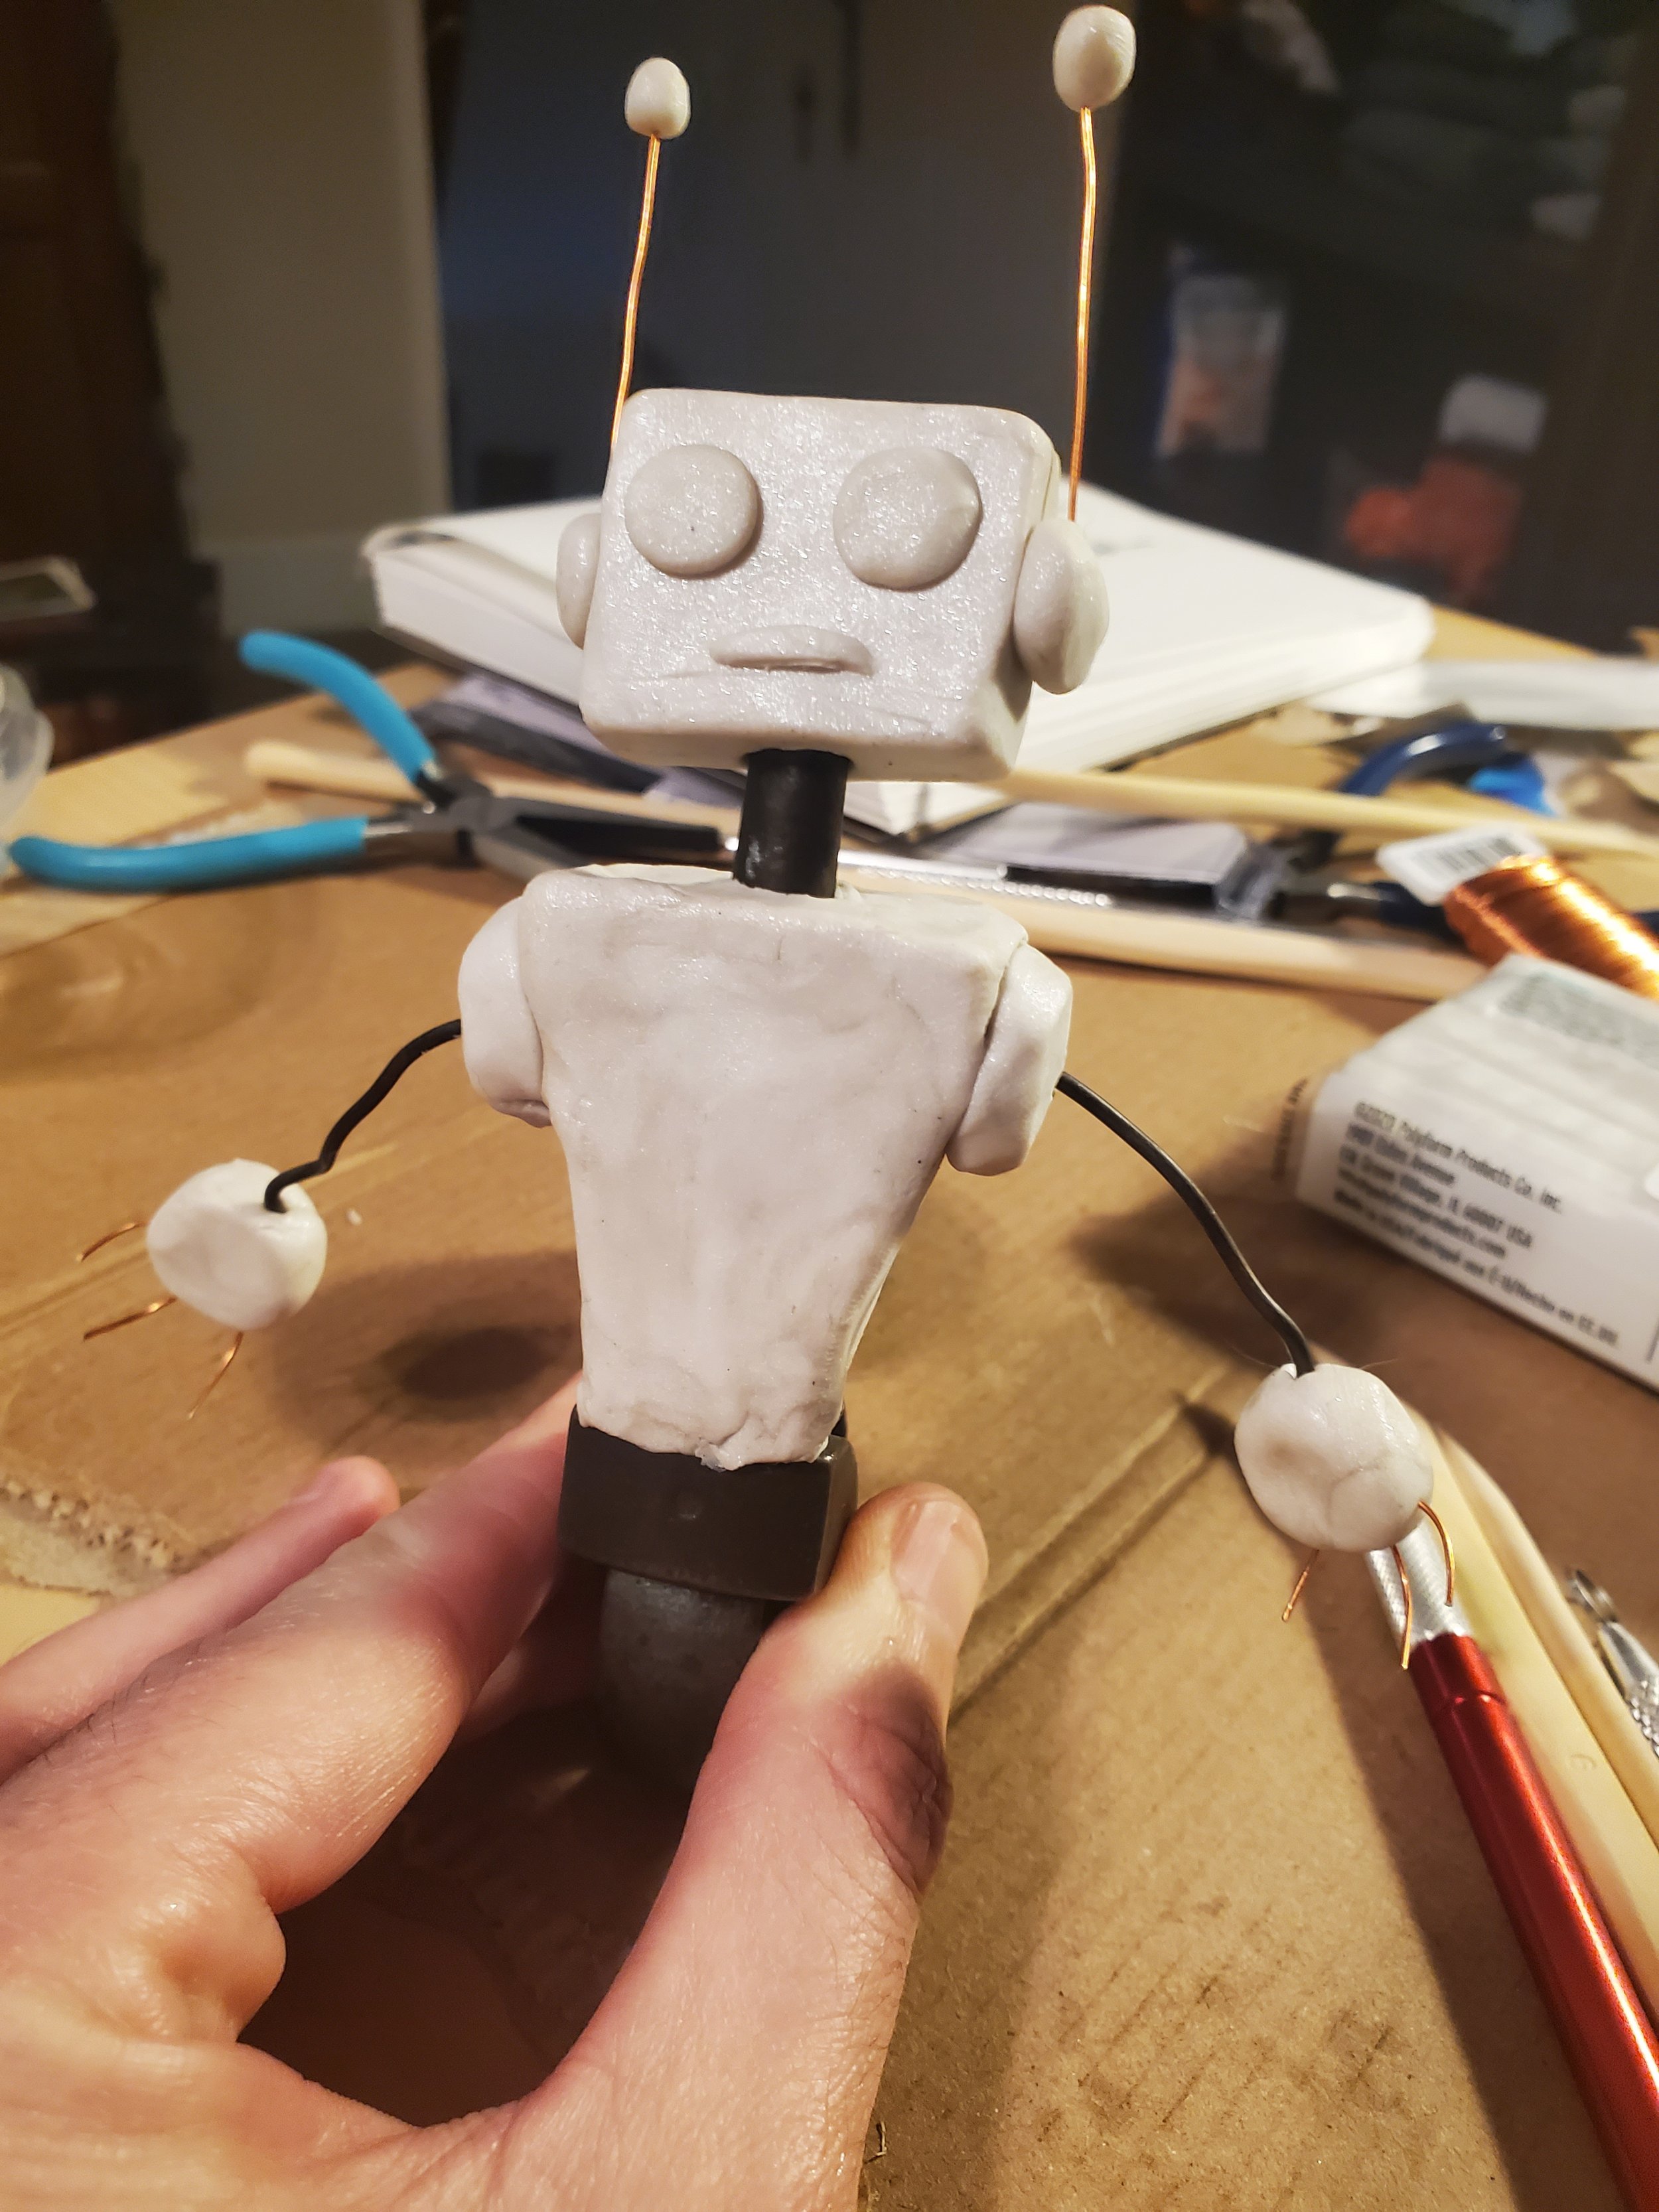
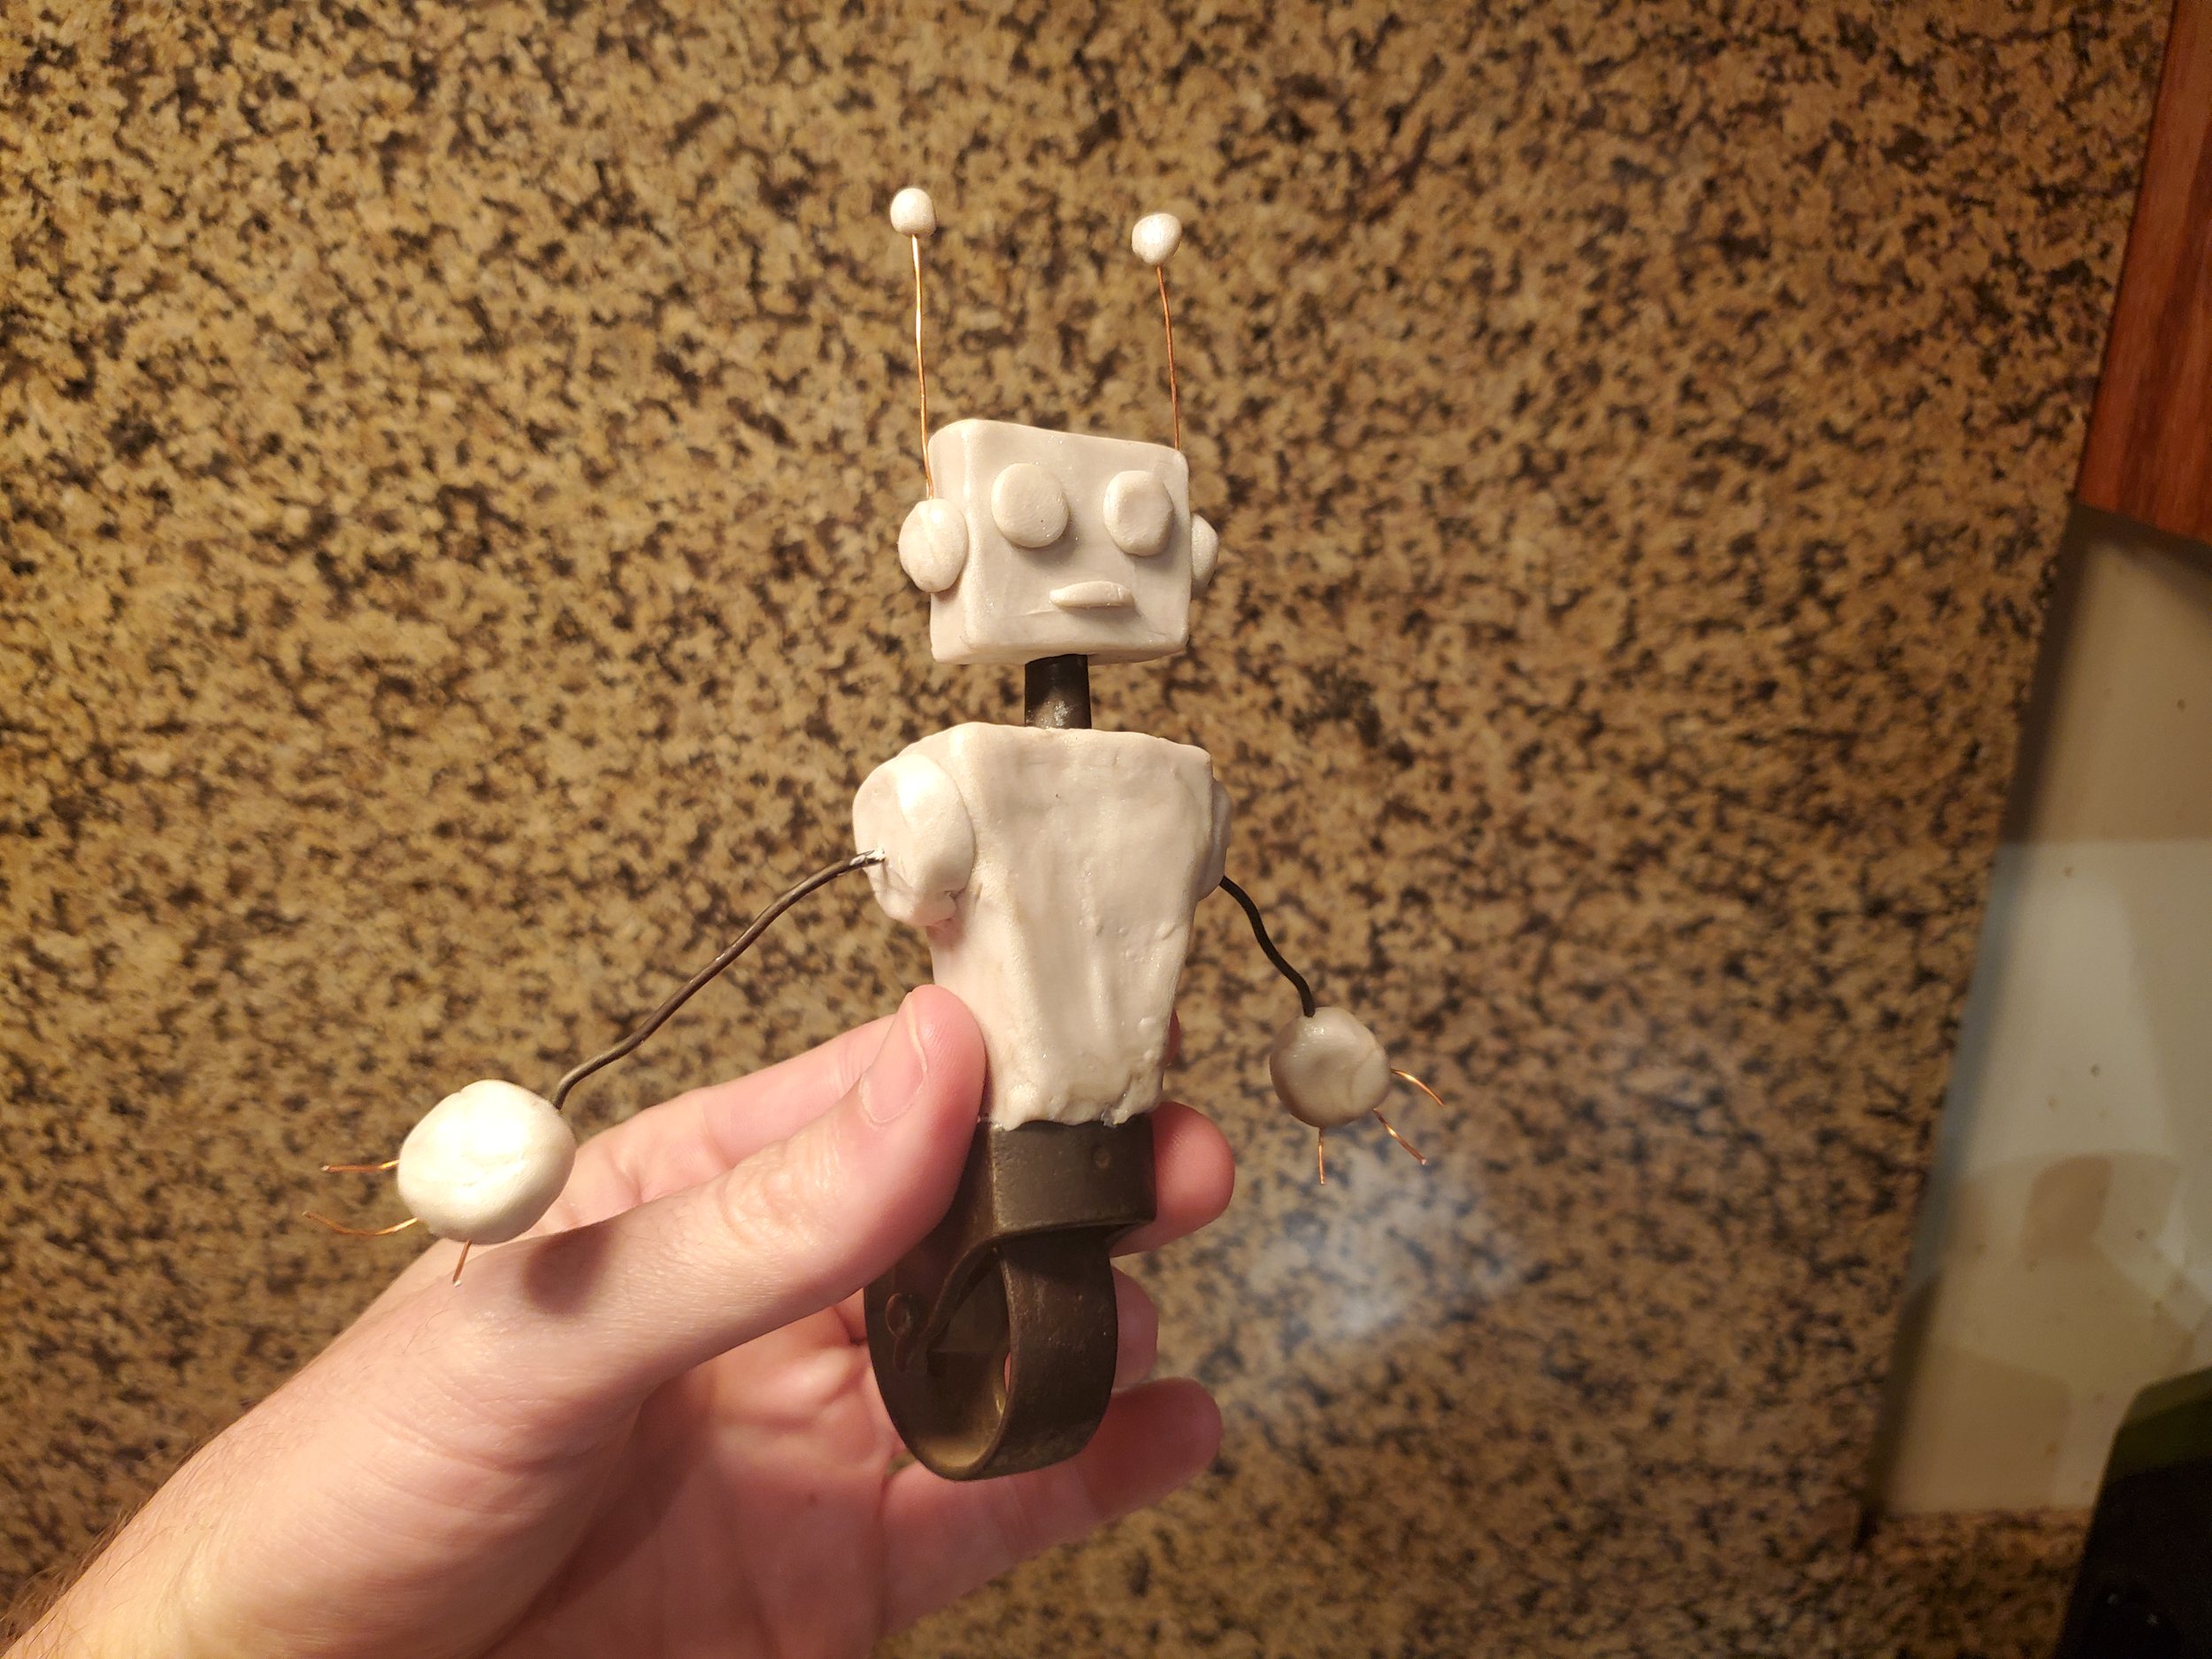
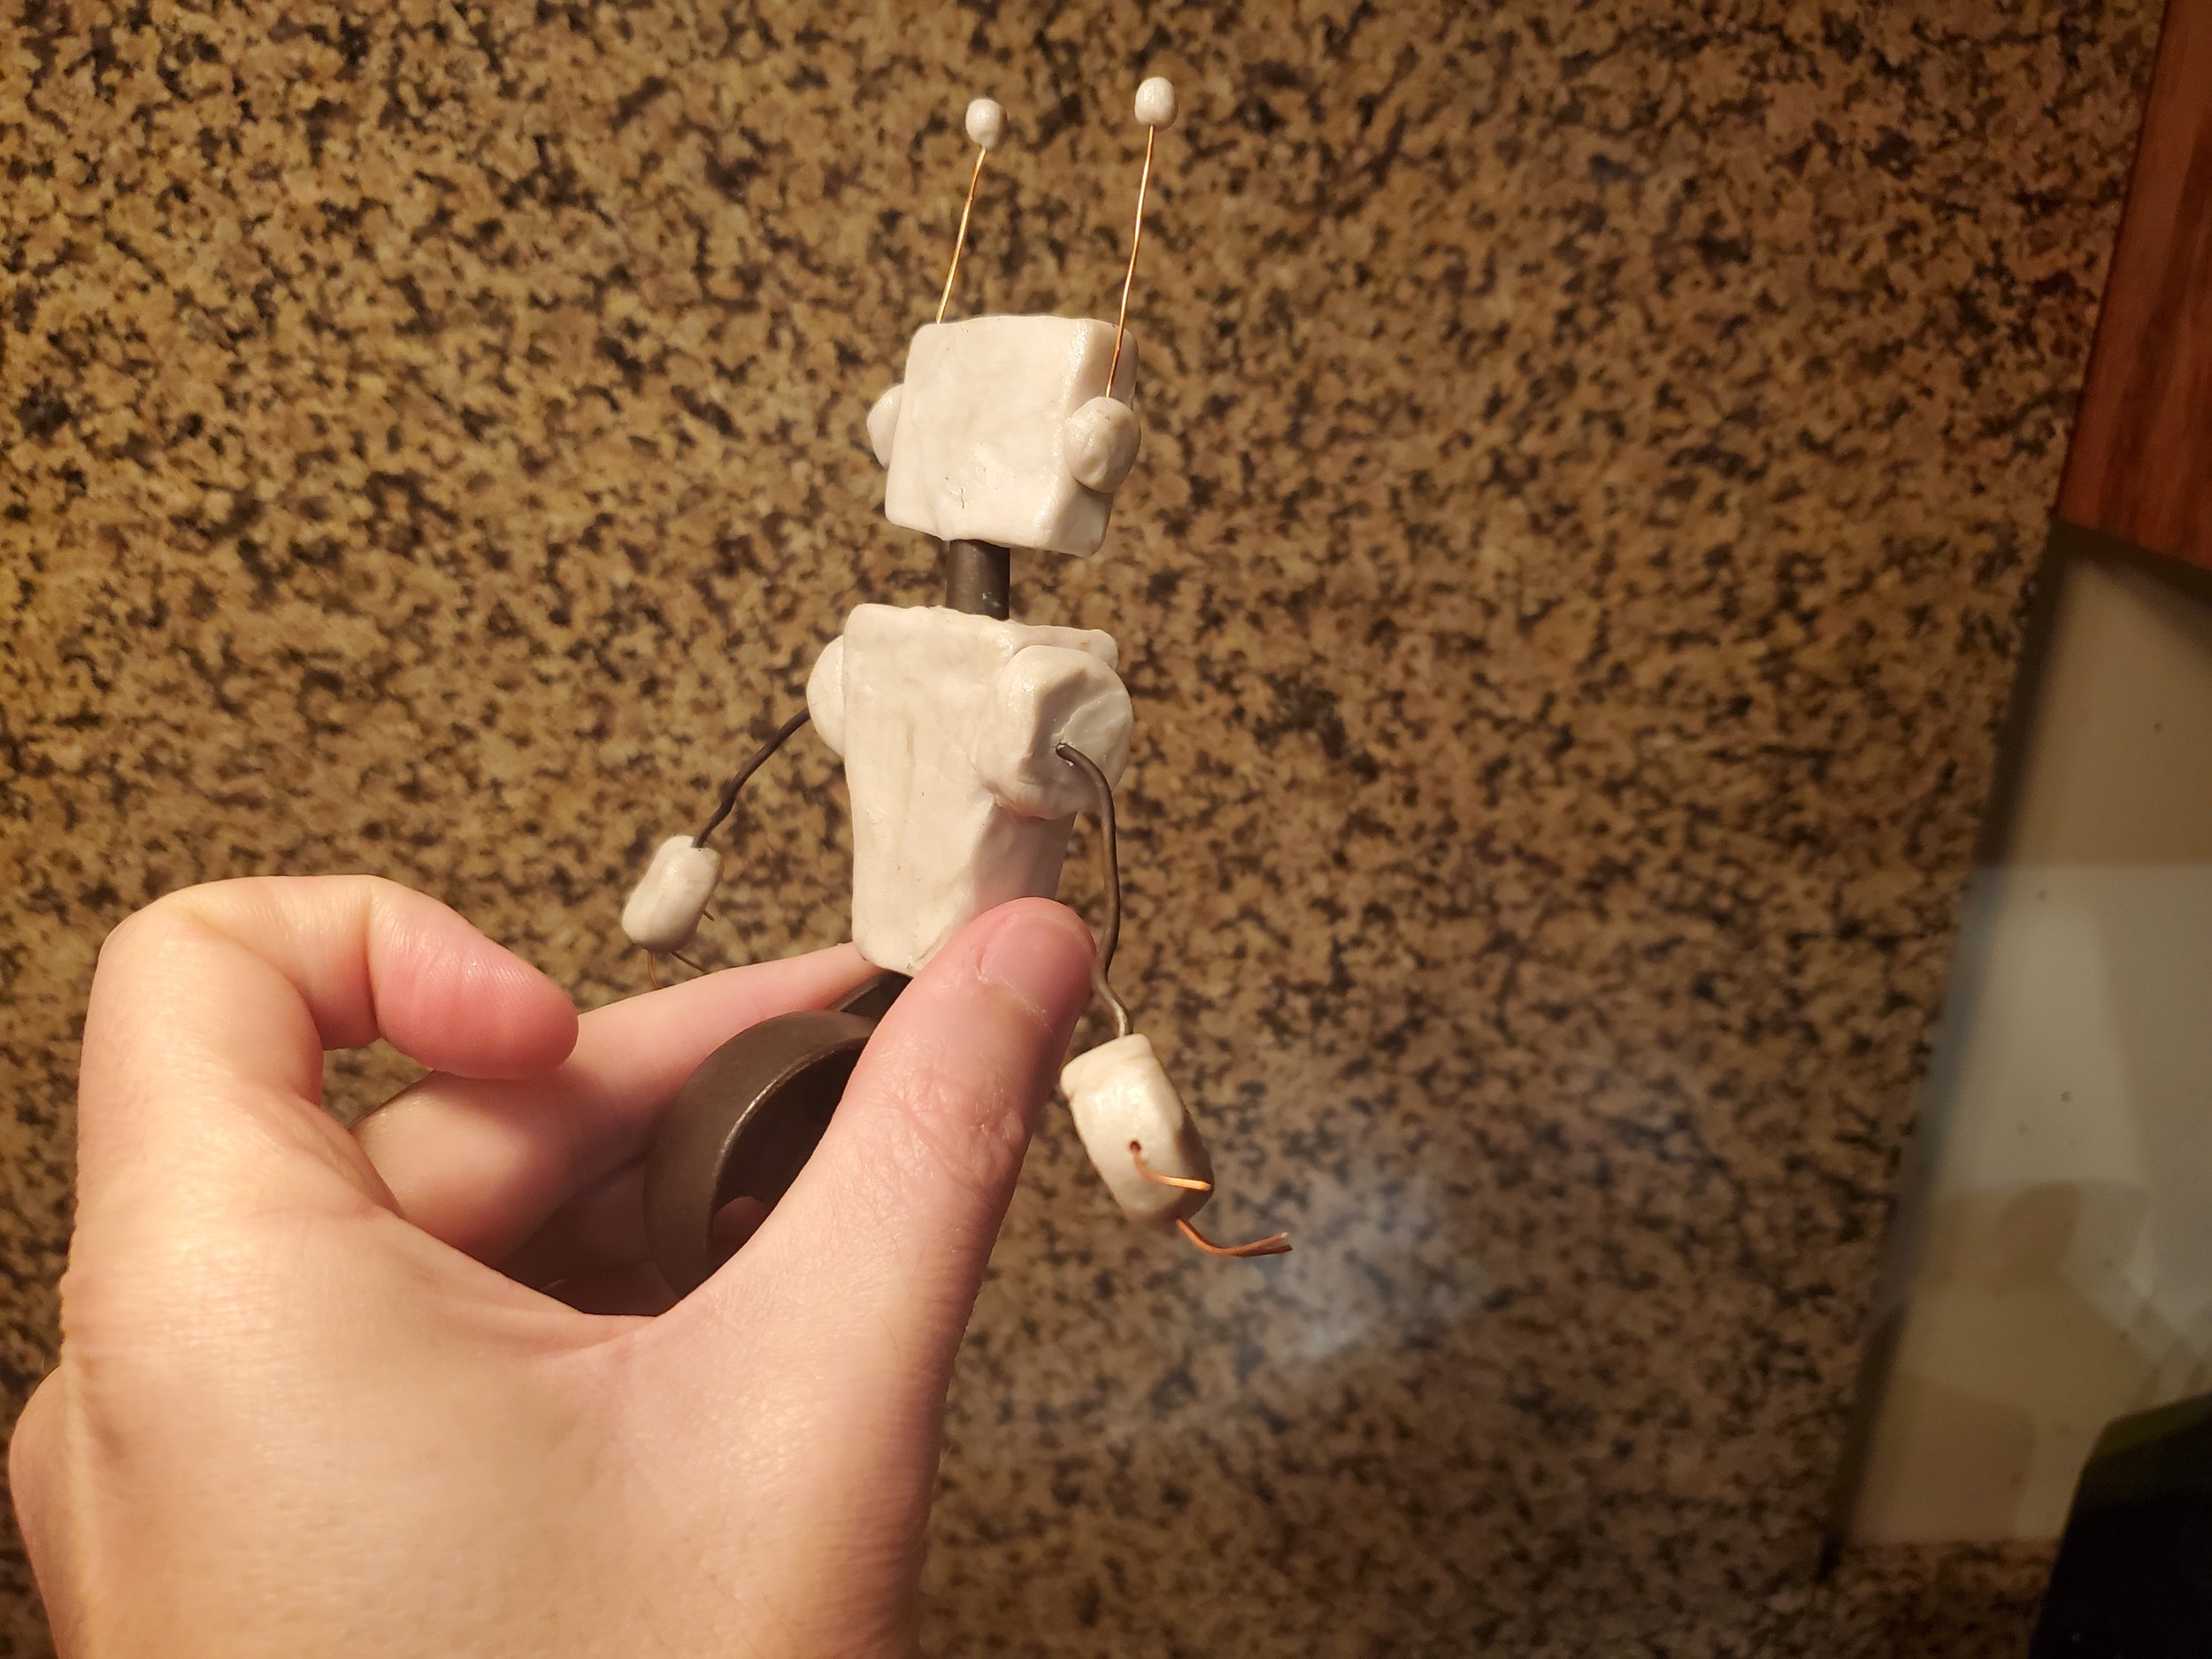
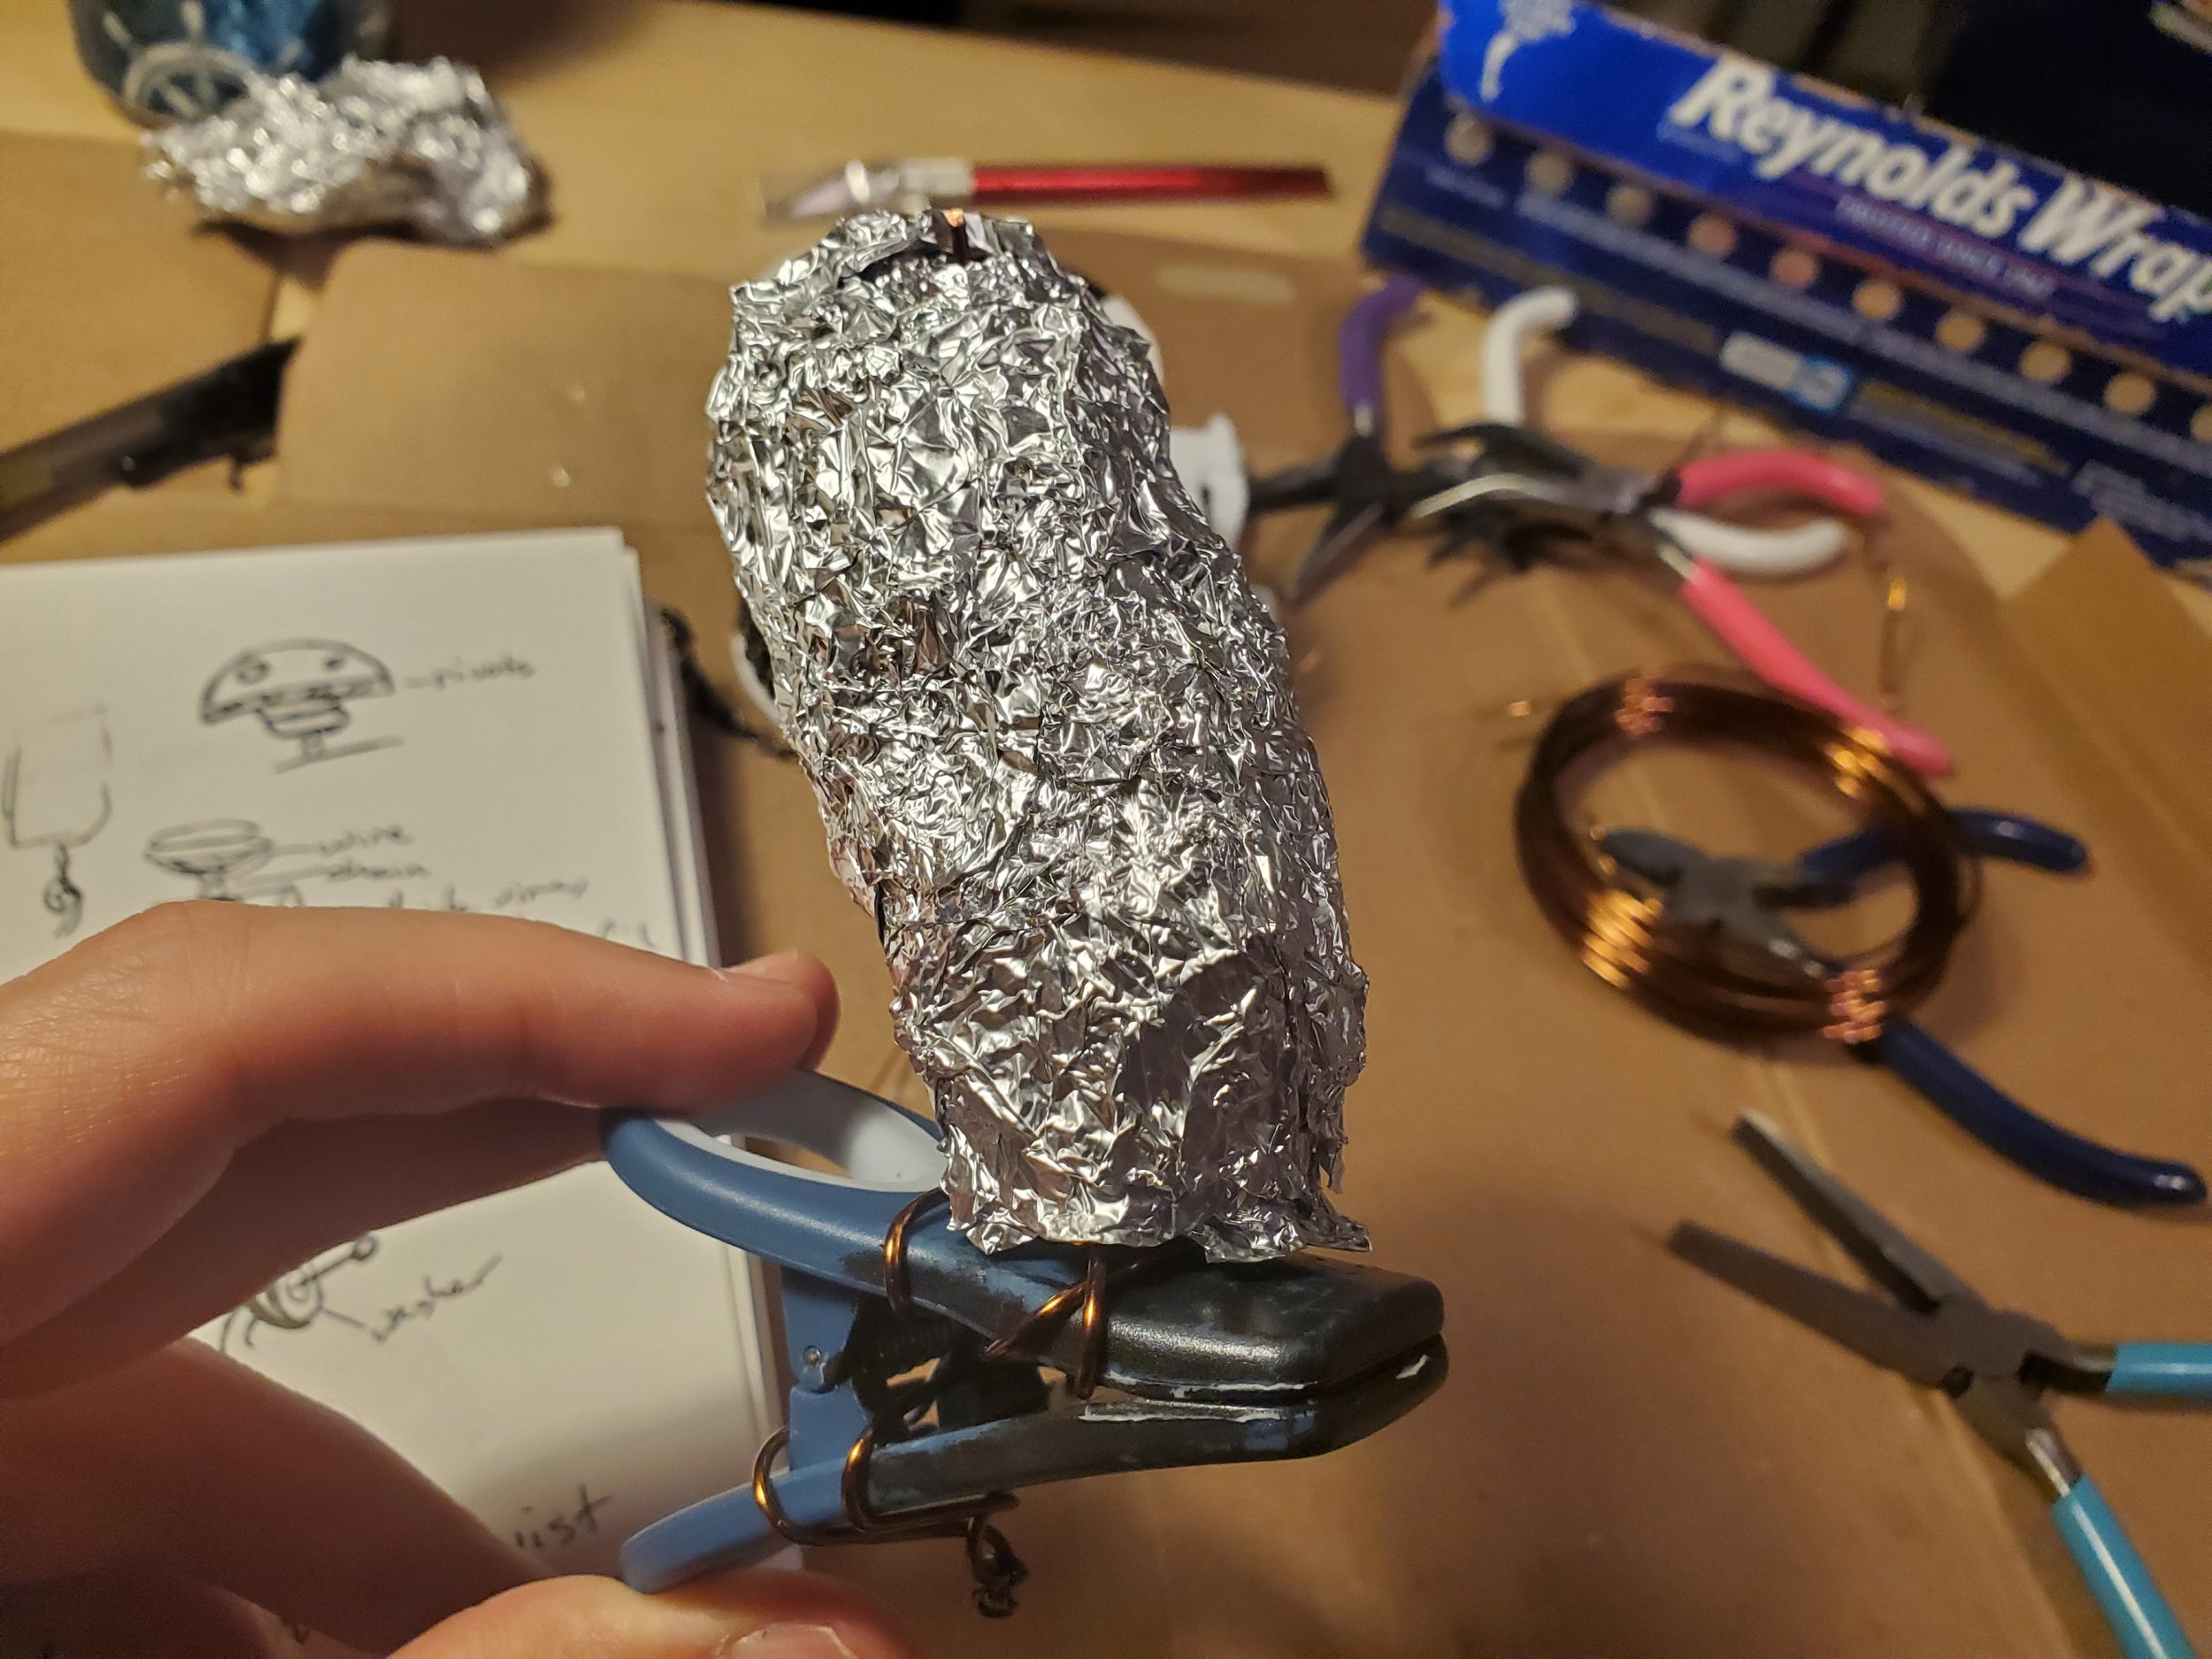
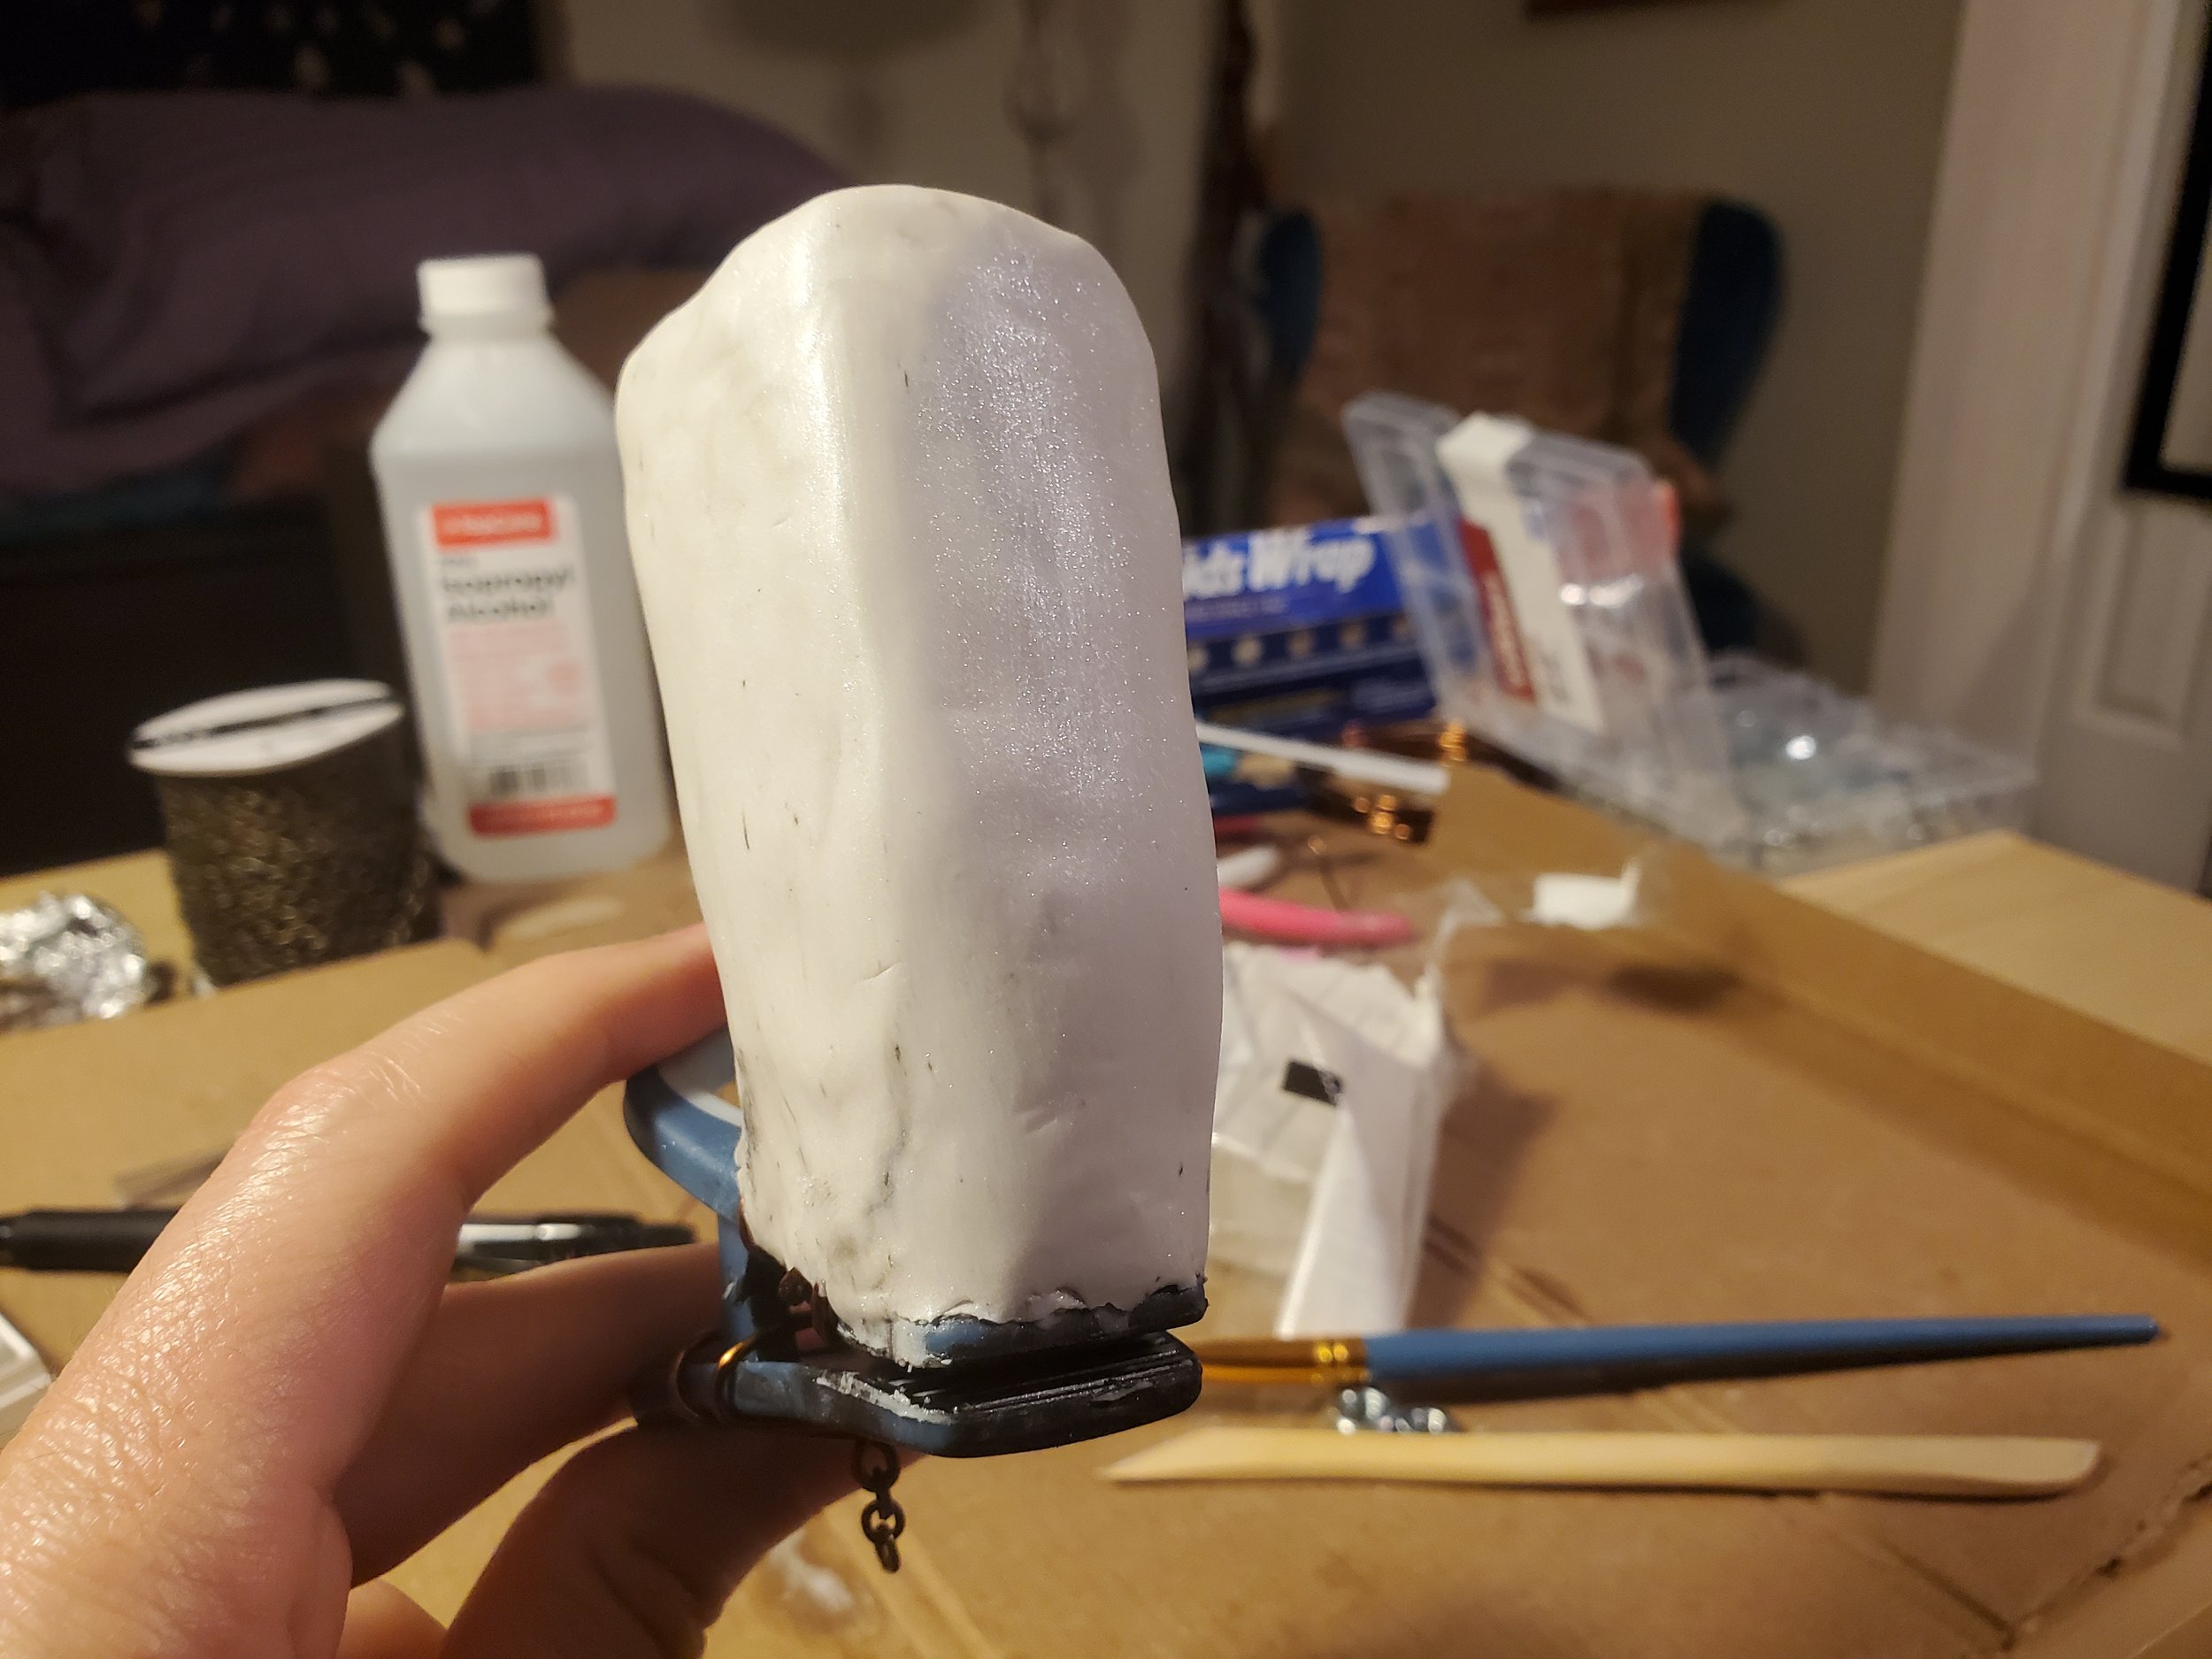
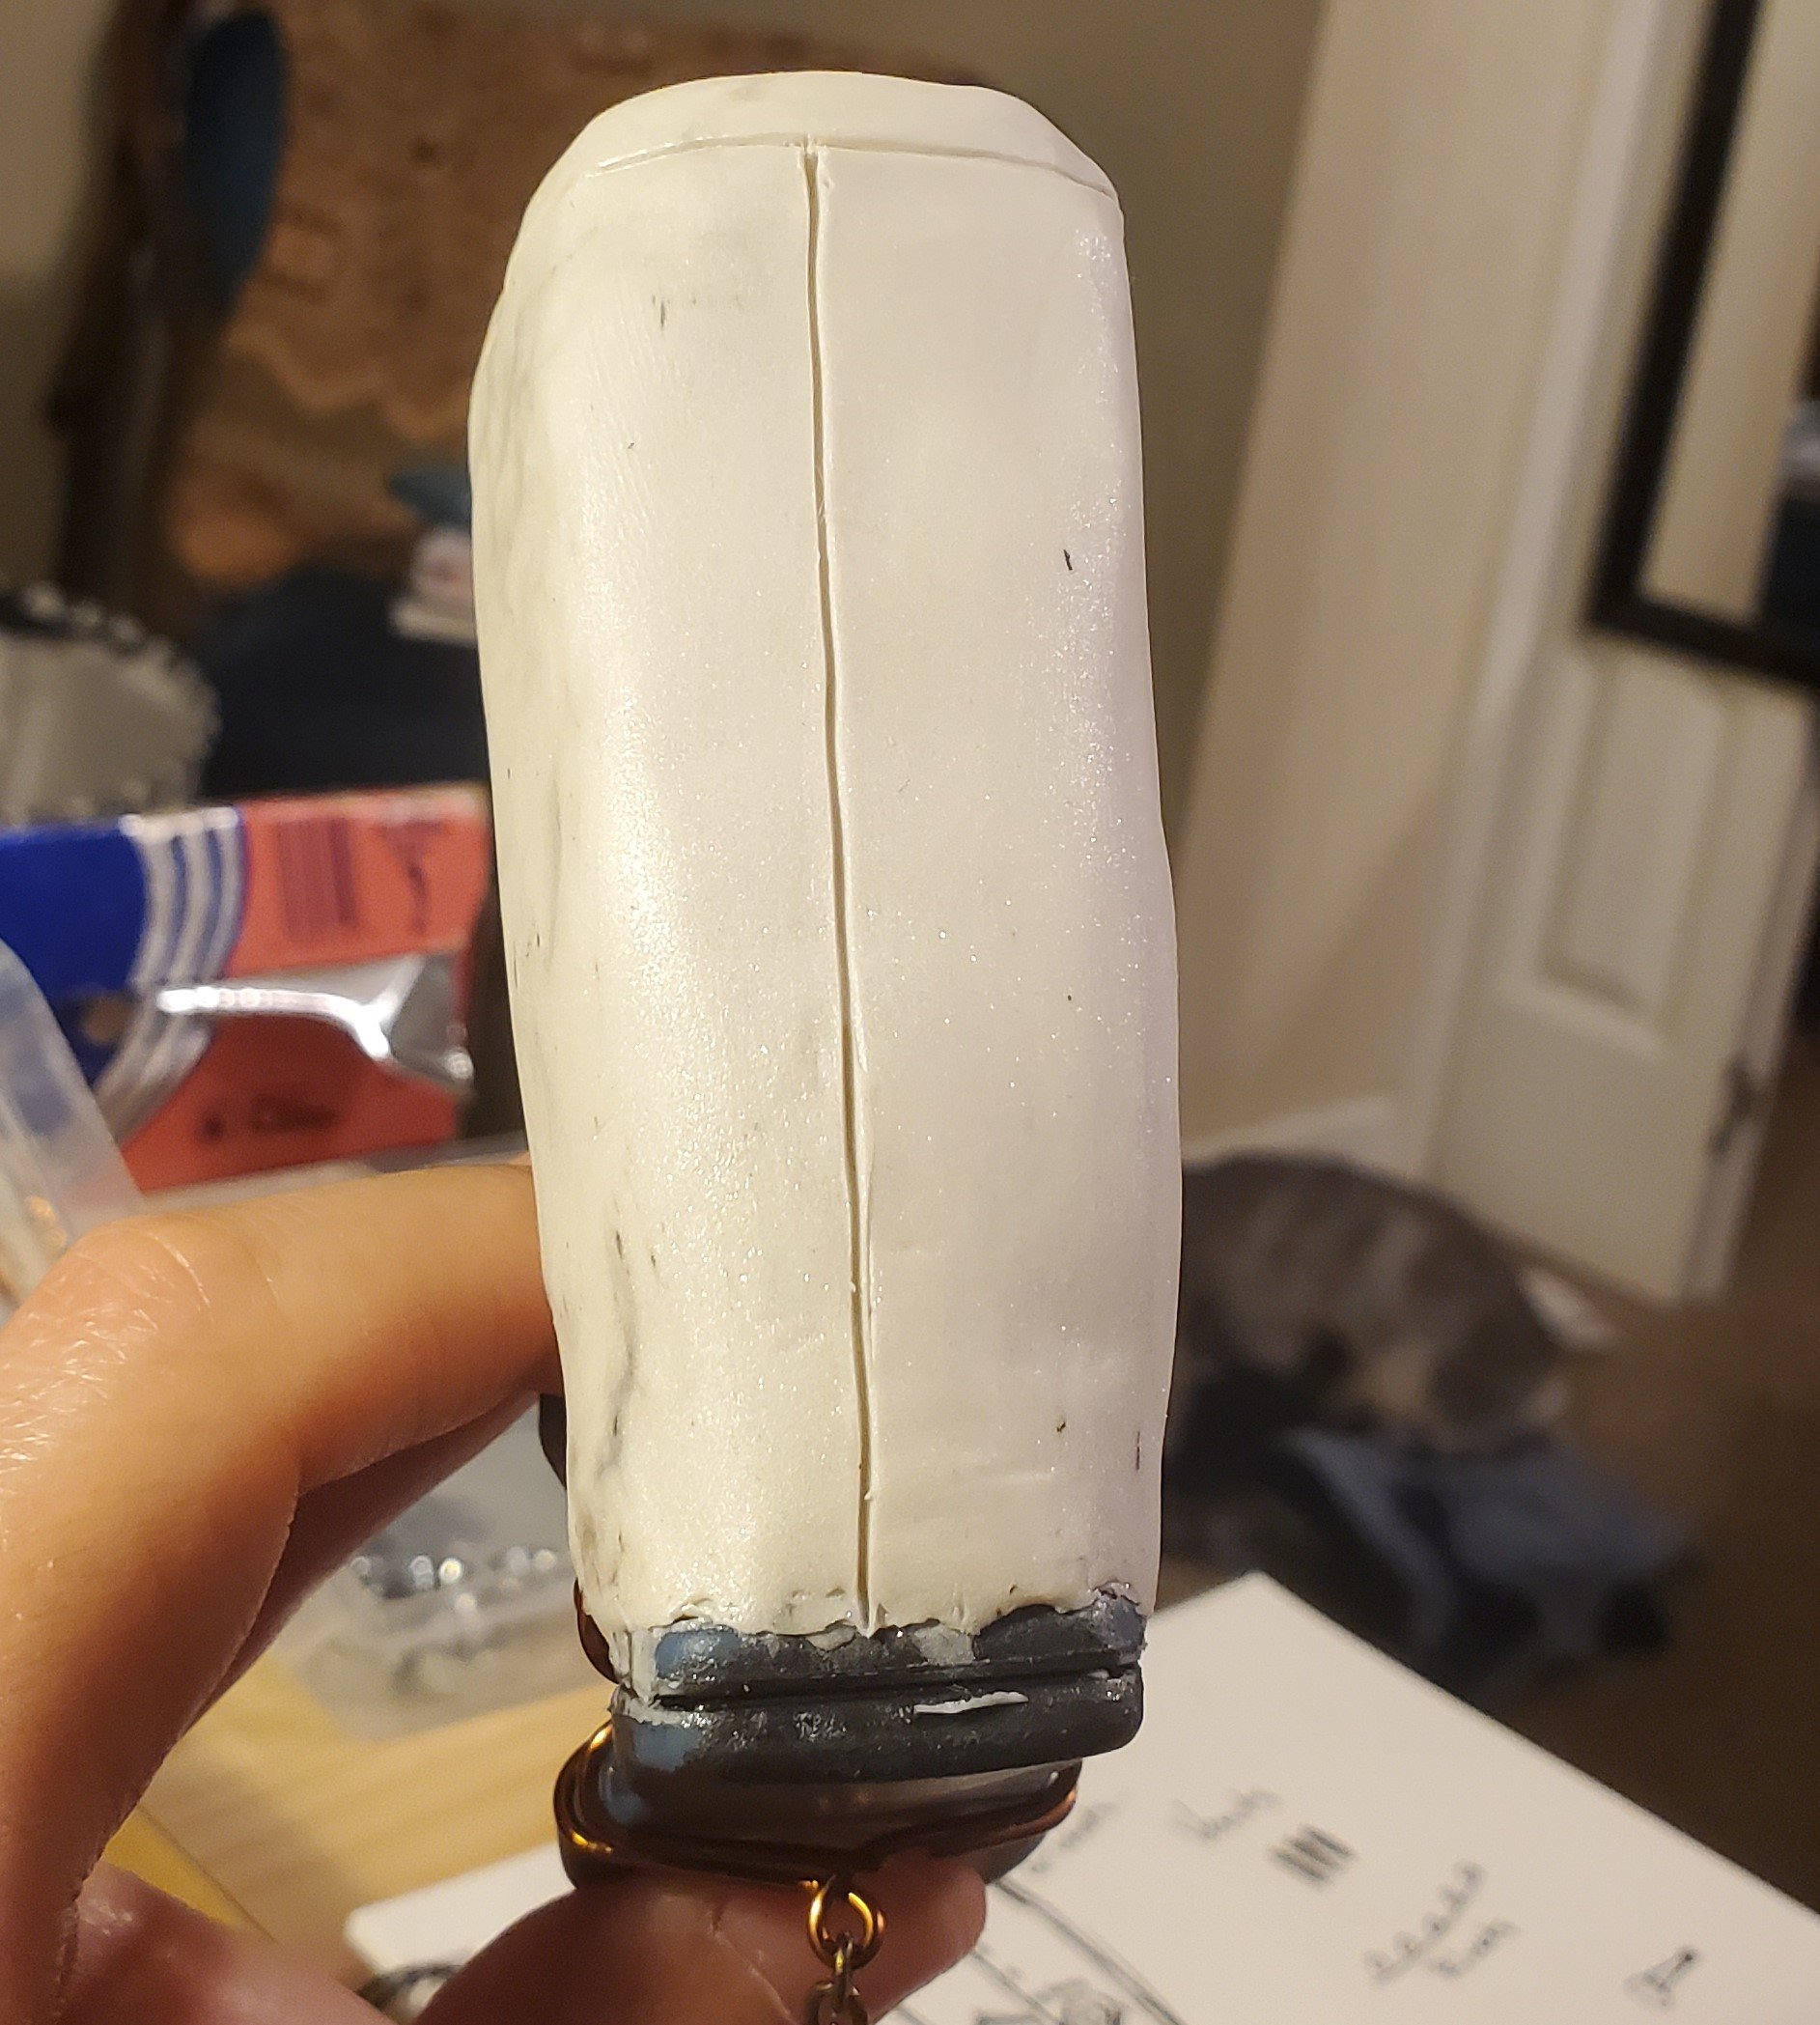
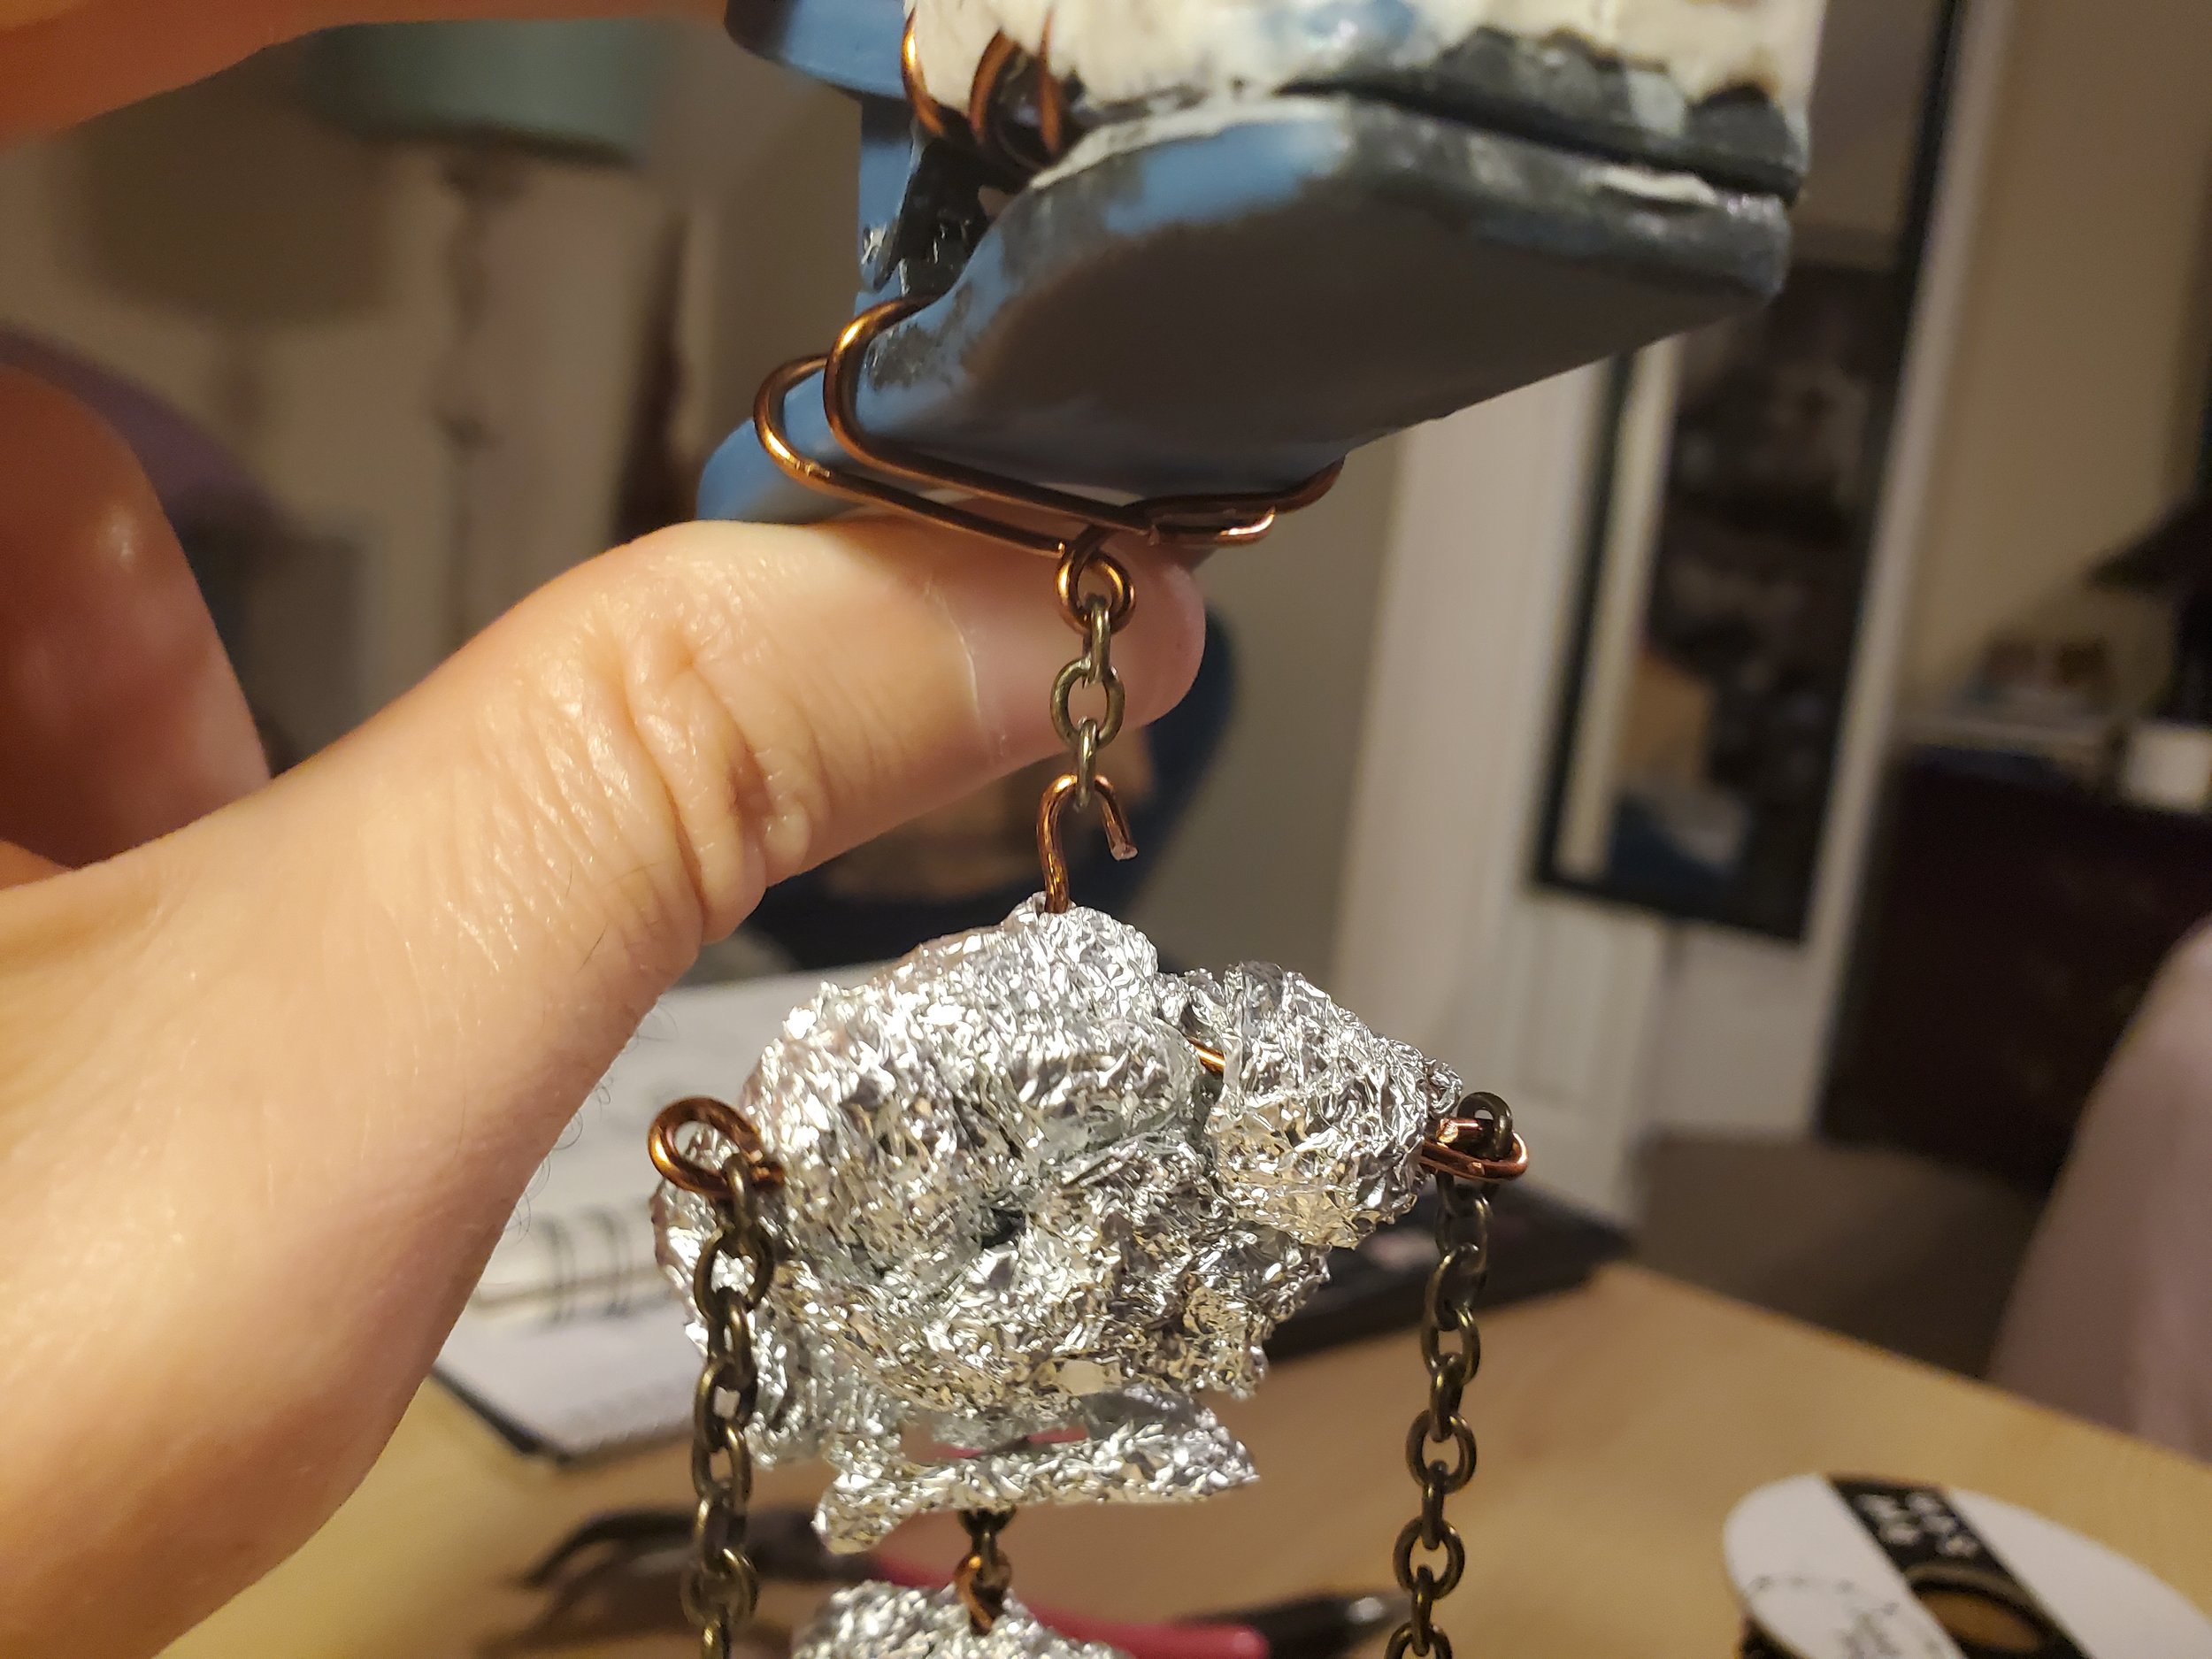
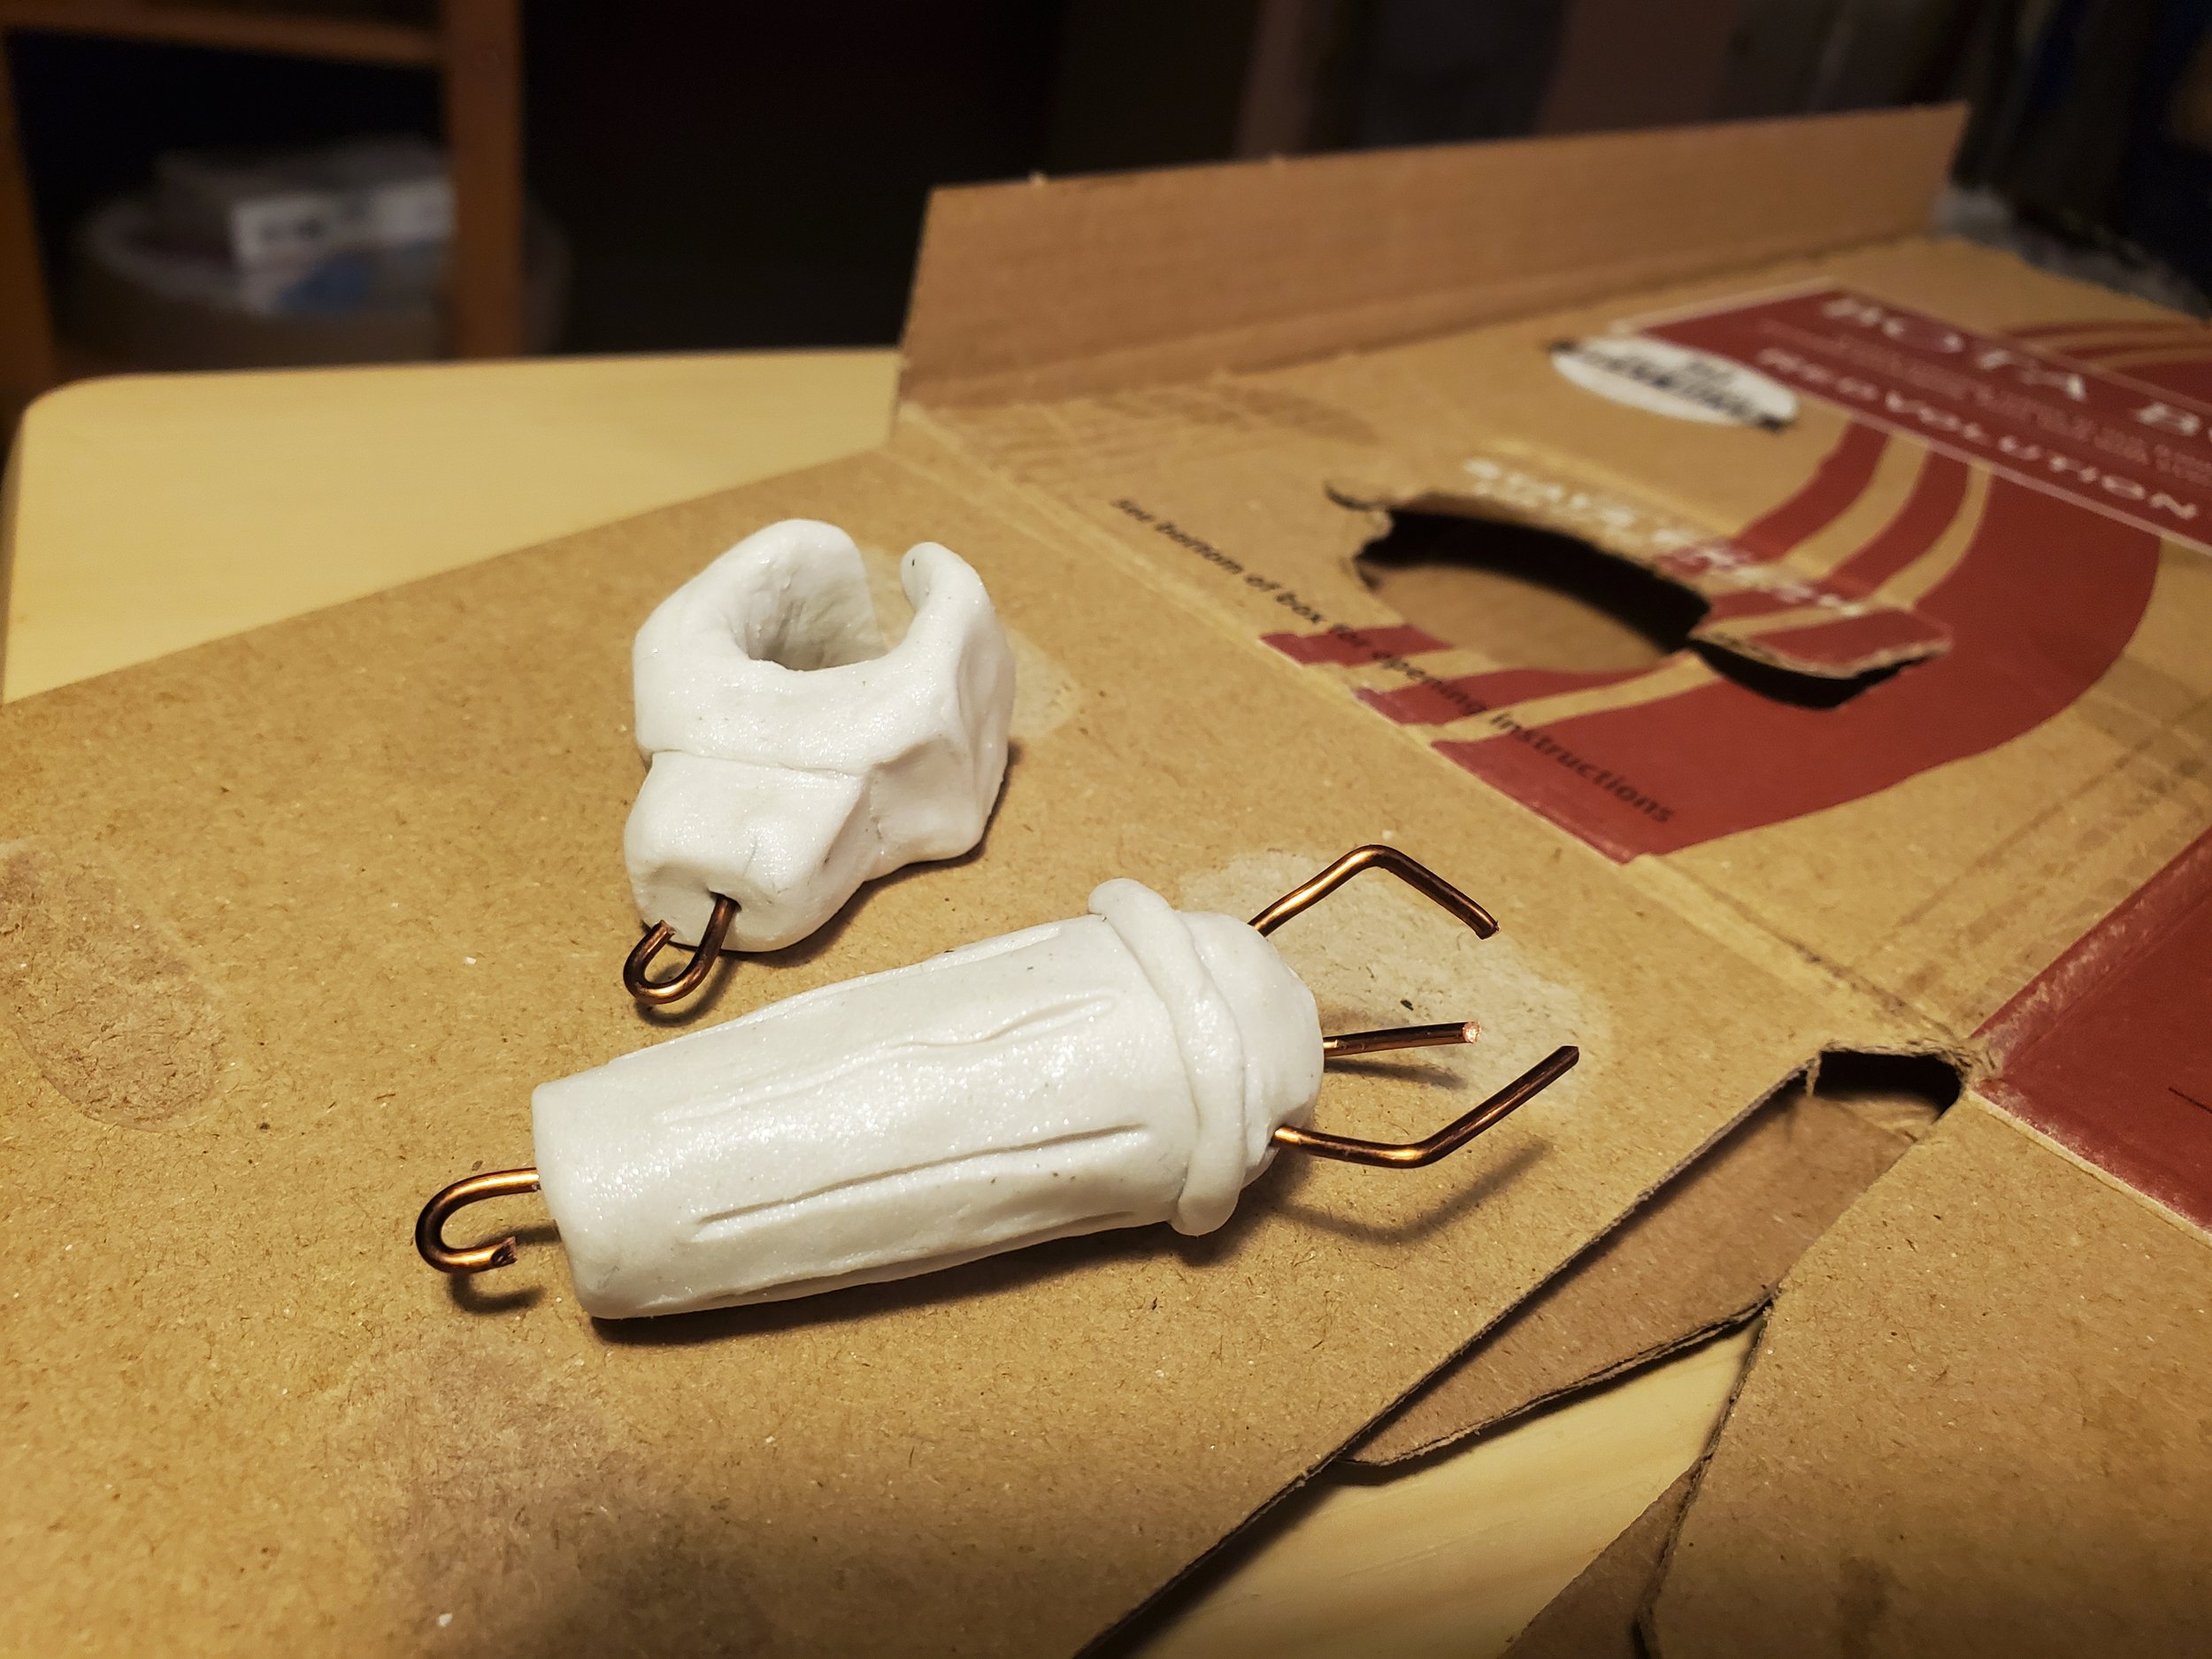
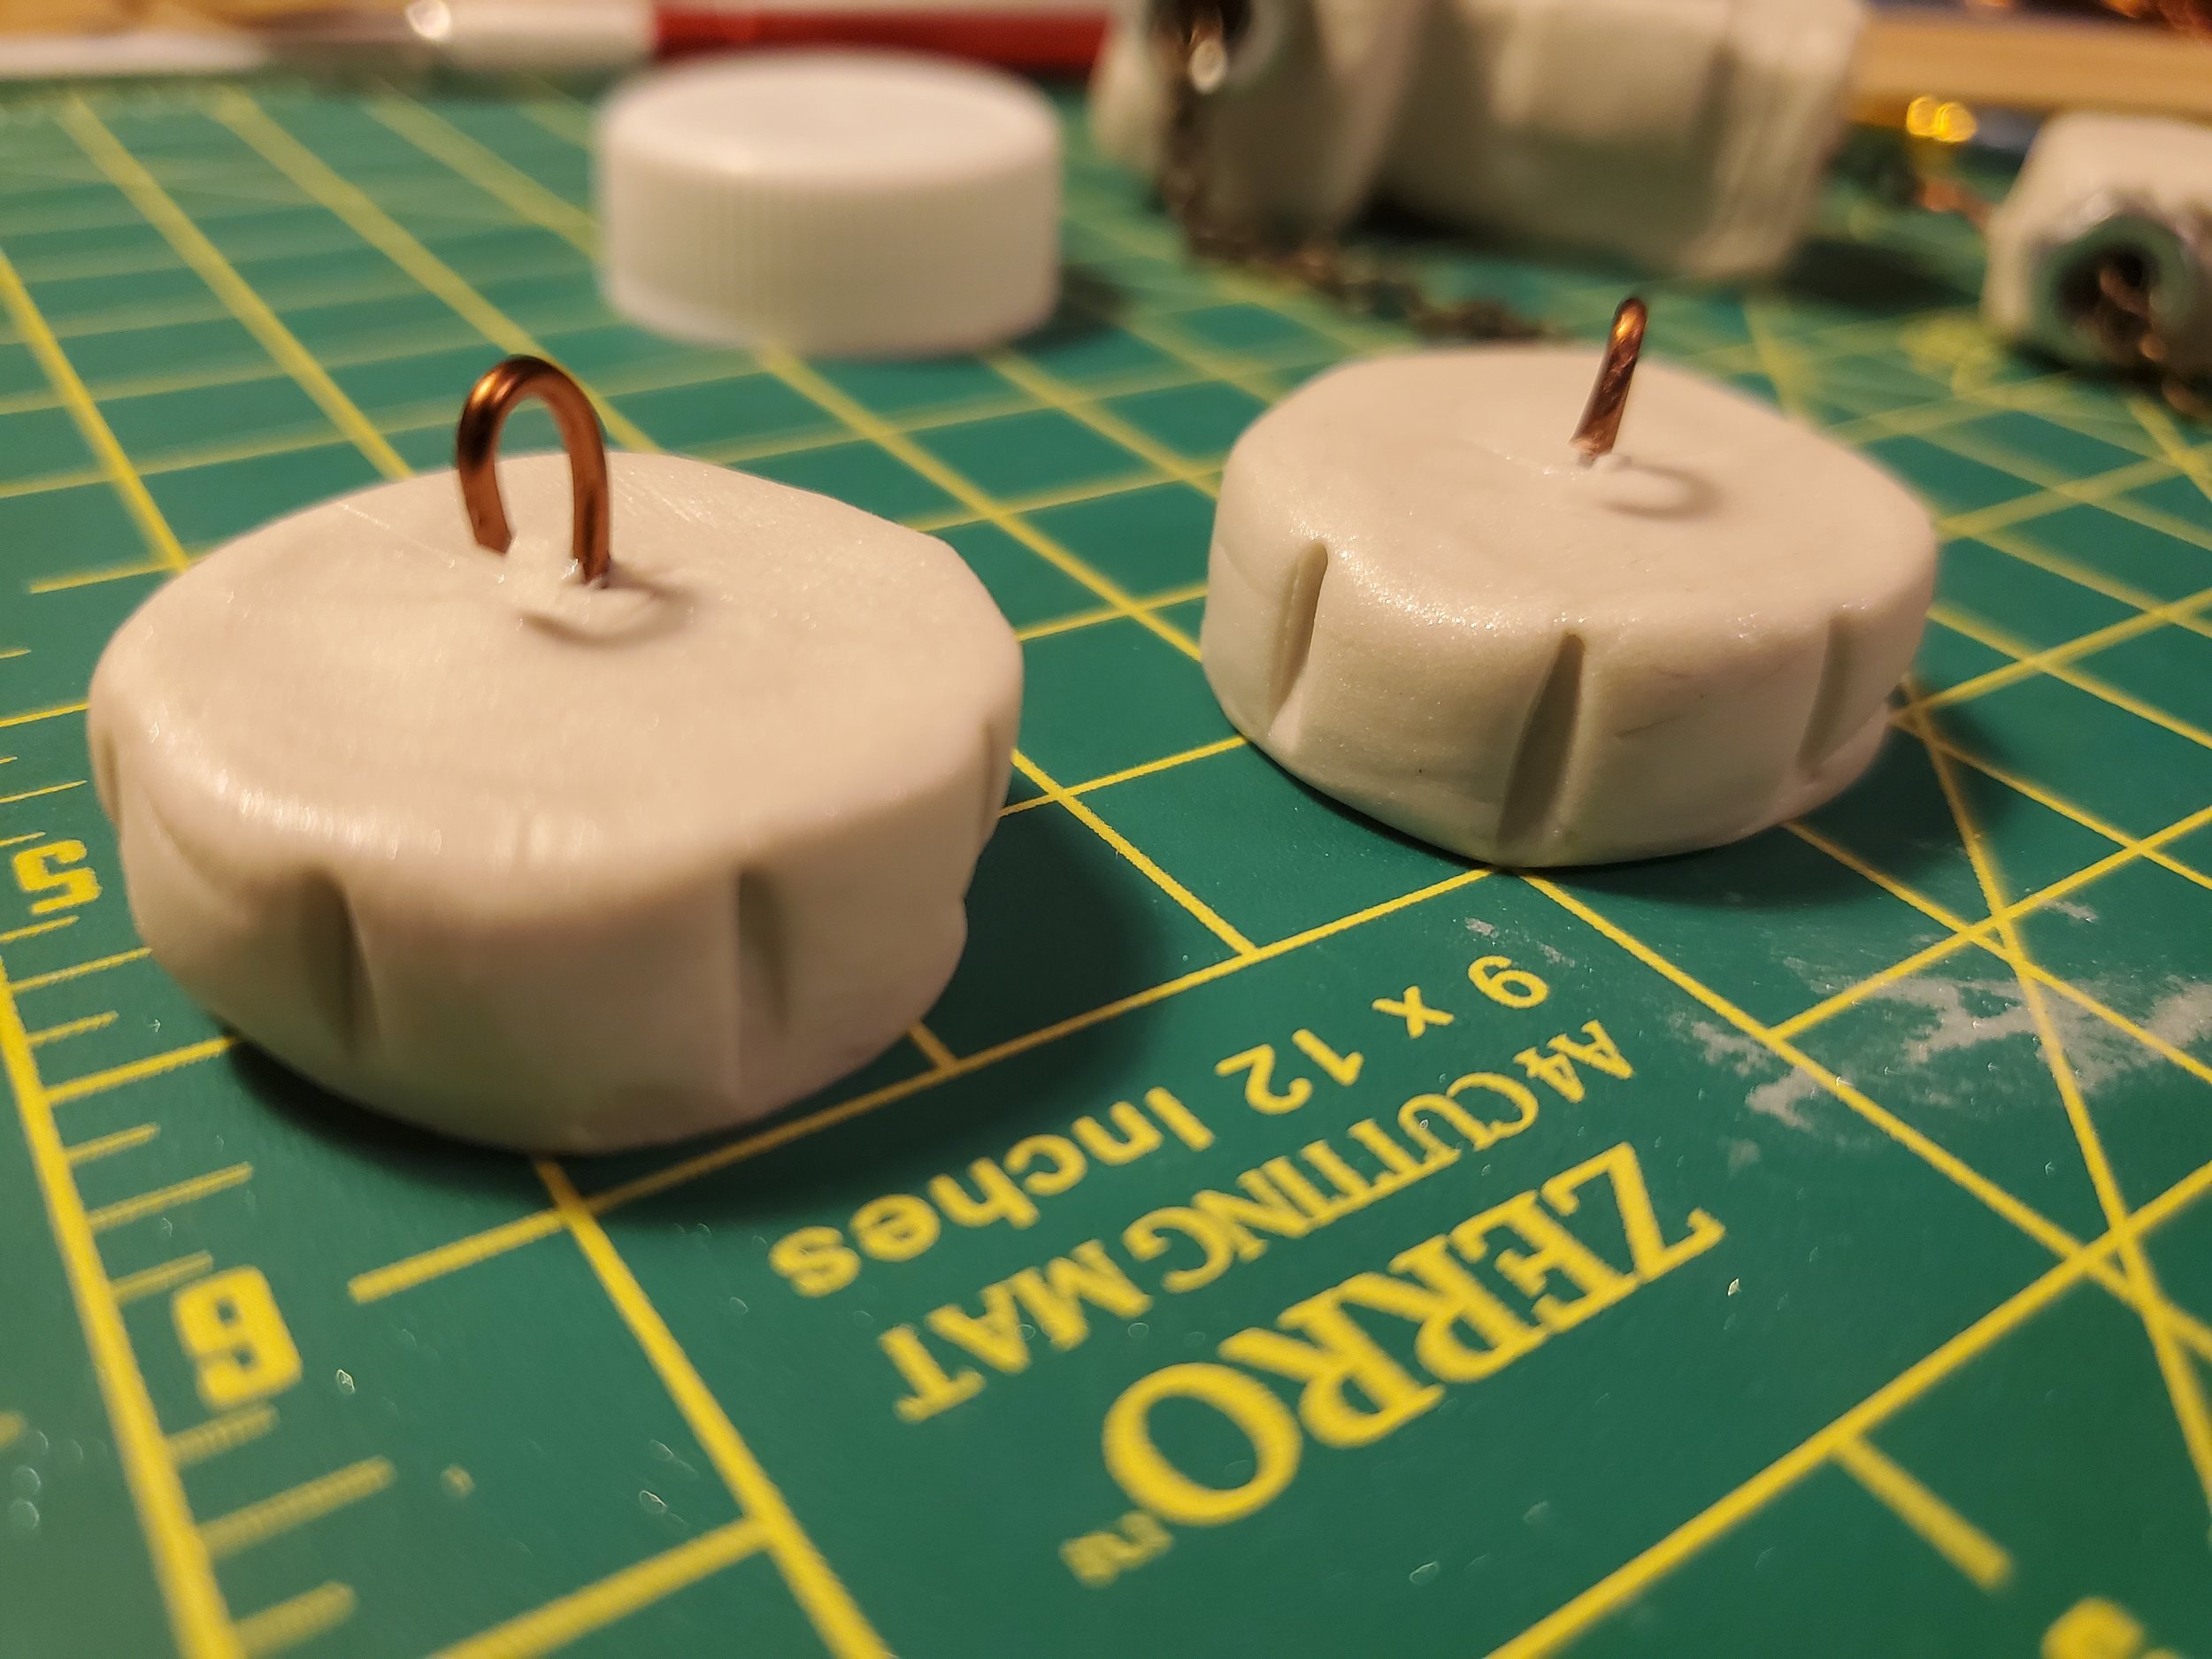
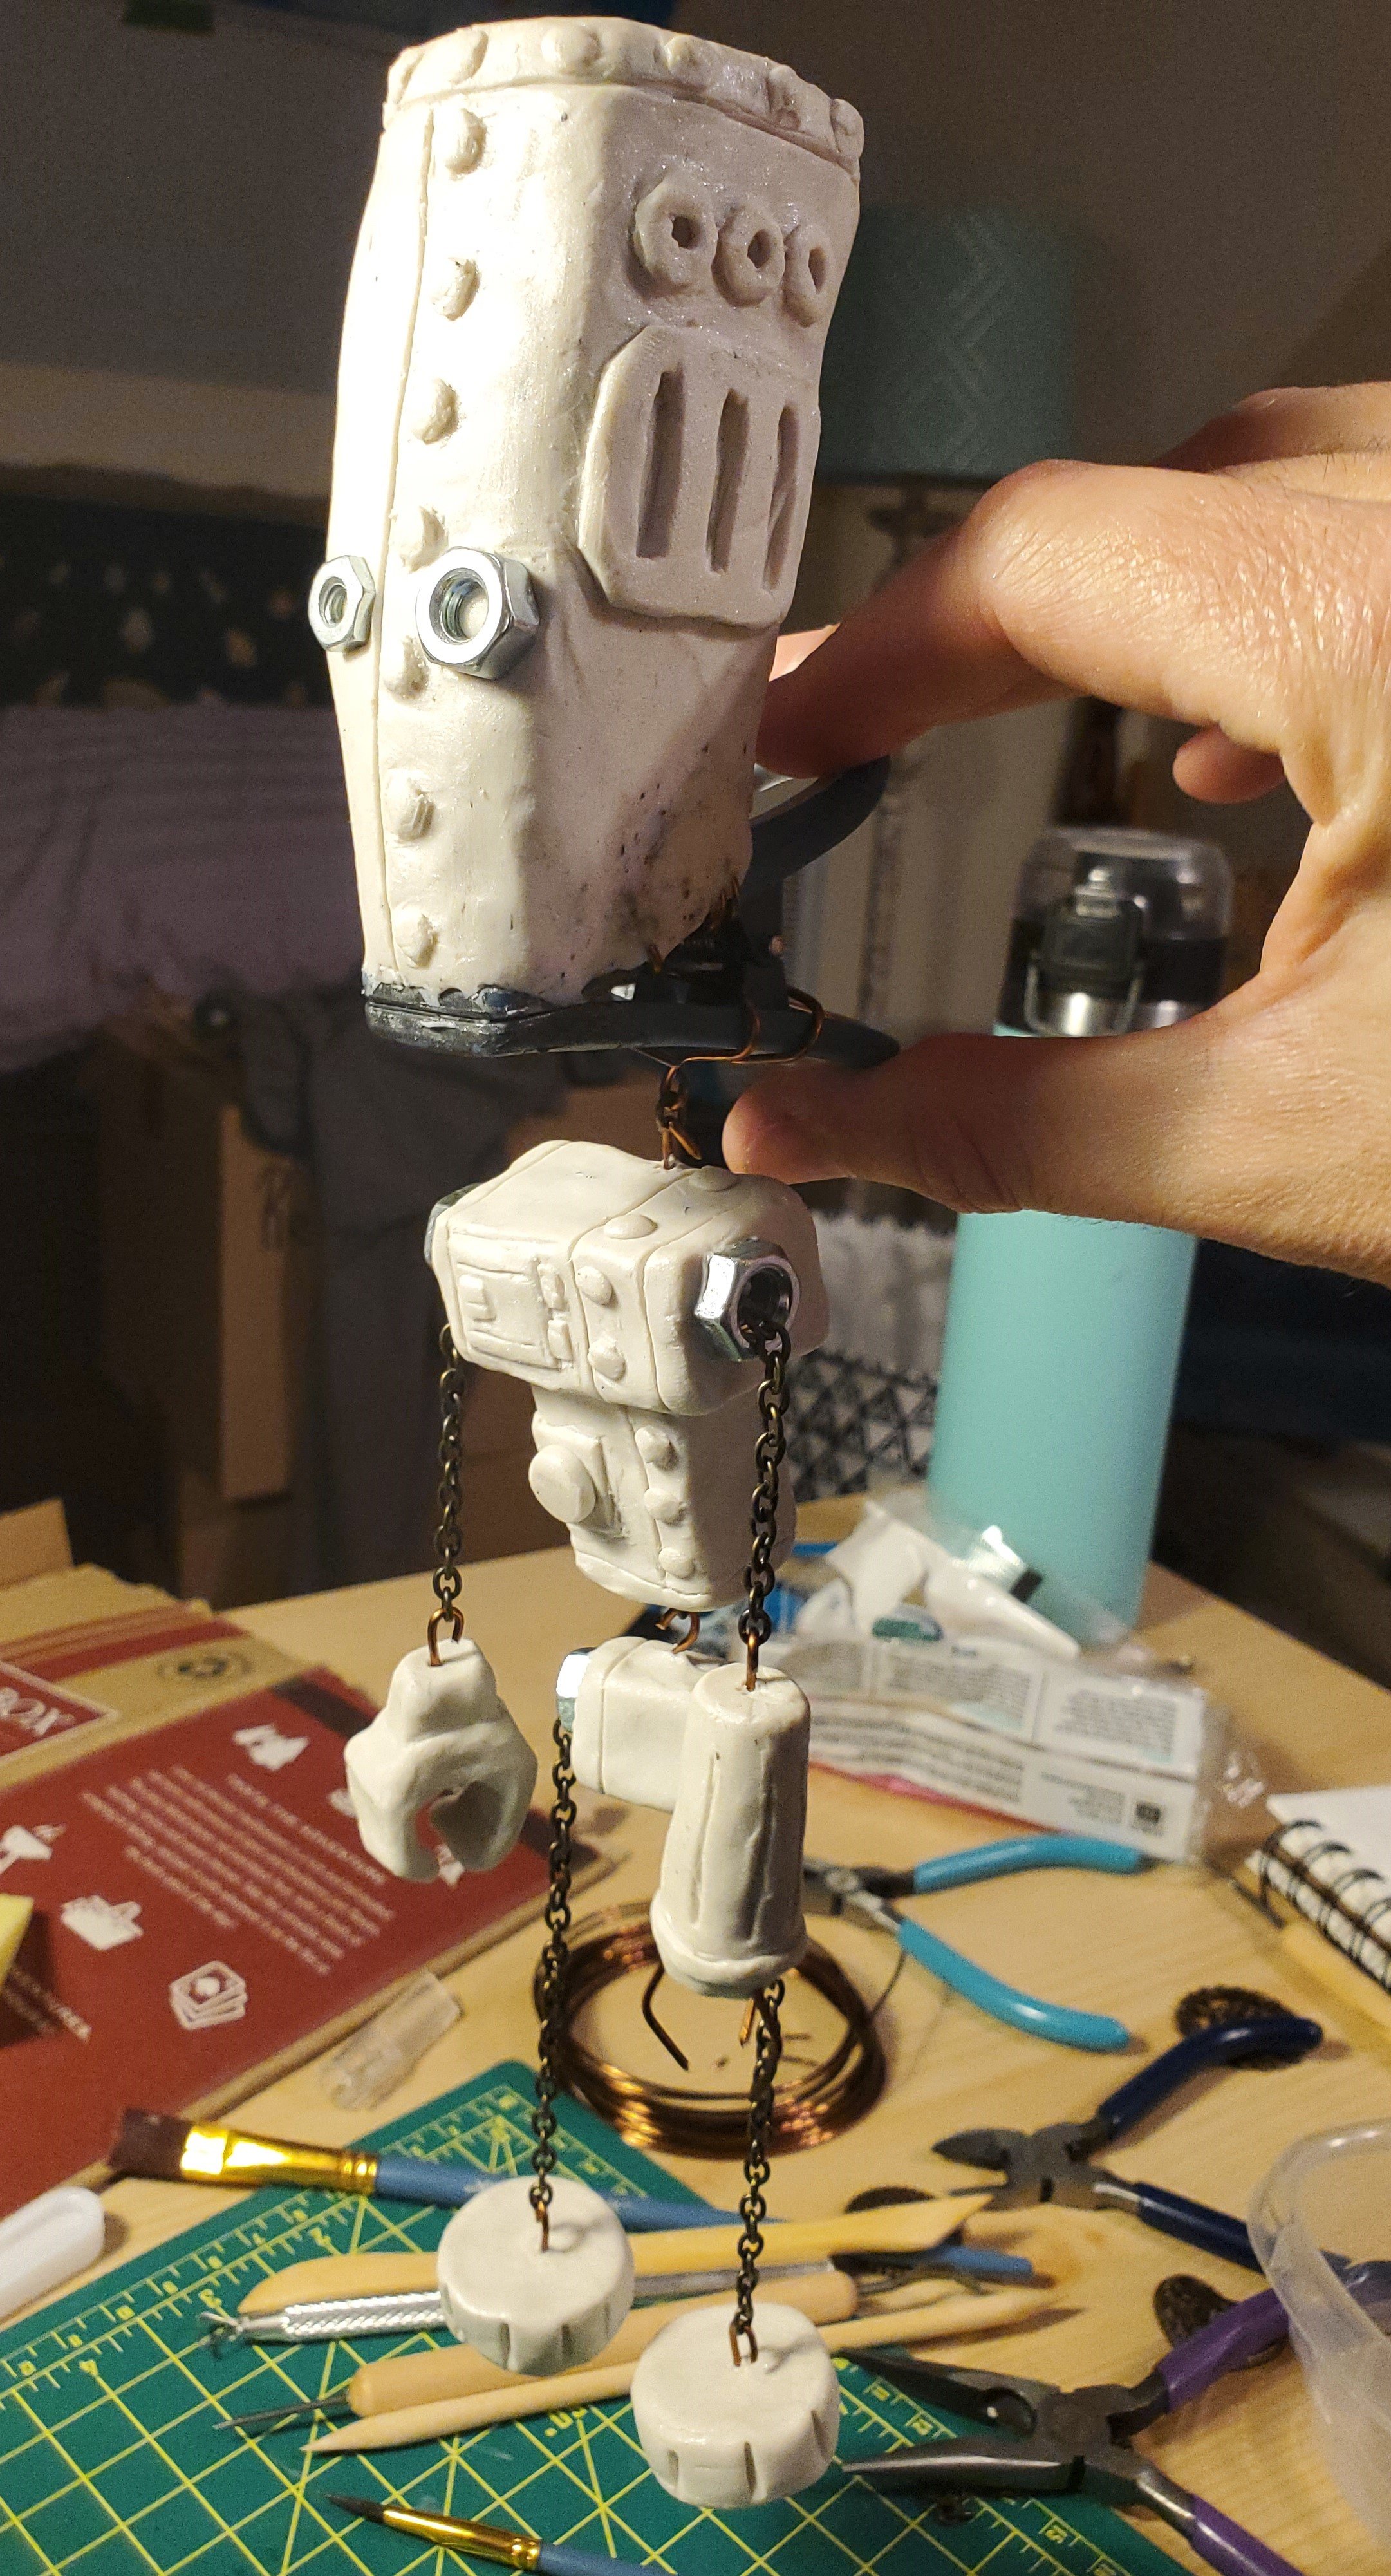
I used foil for the inside of the body and head (standard for polymer clay sculpting, which I learned by watching Youtube videos) and used wire to attach the foil to the top and bottom of the bag clip.
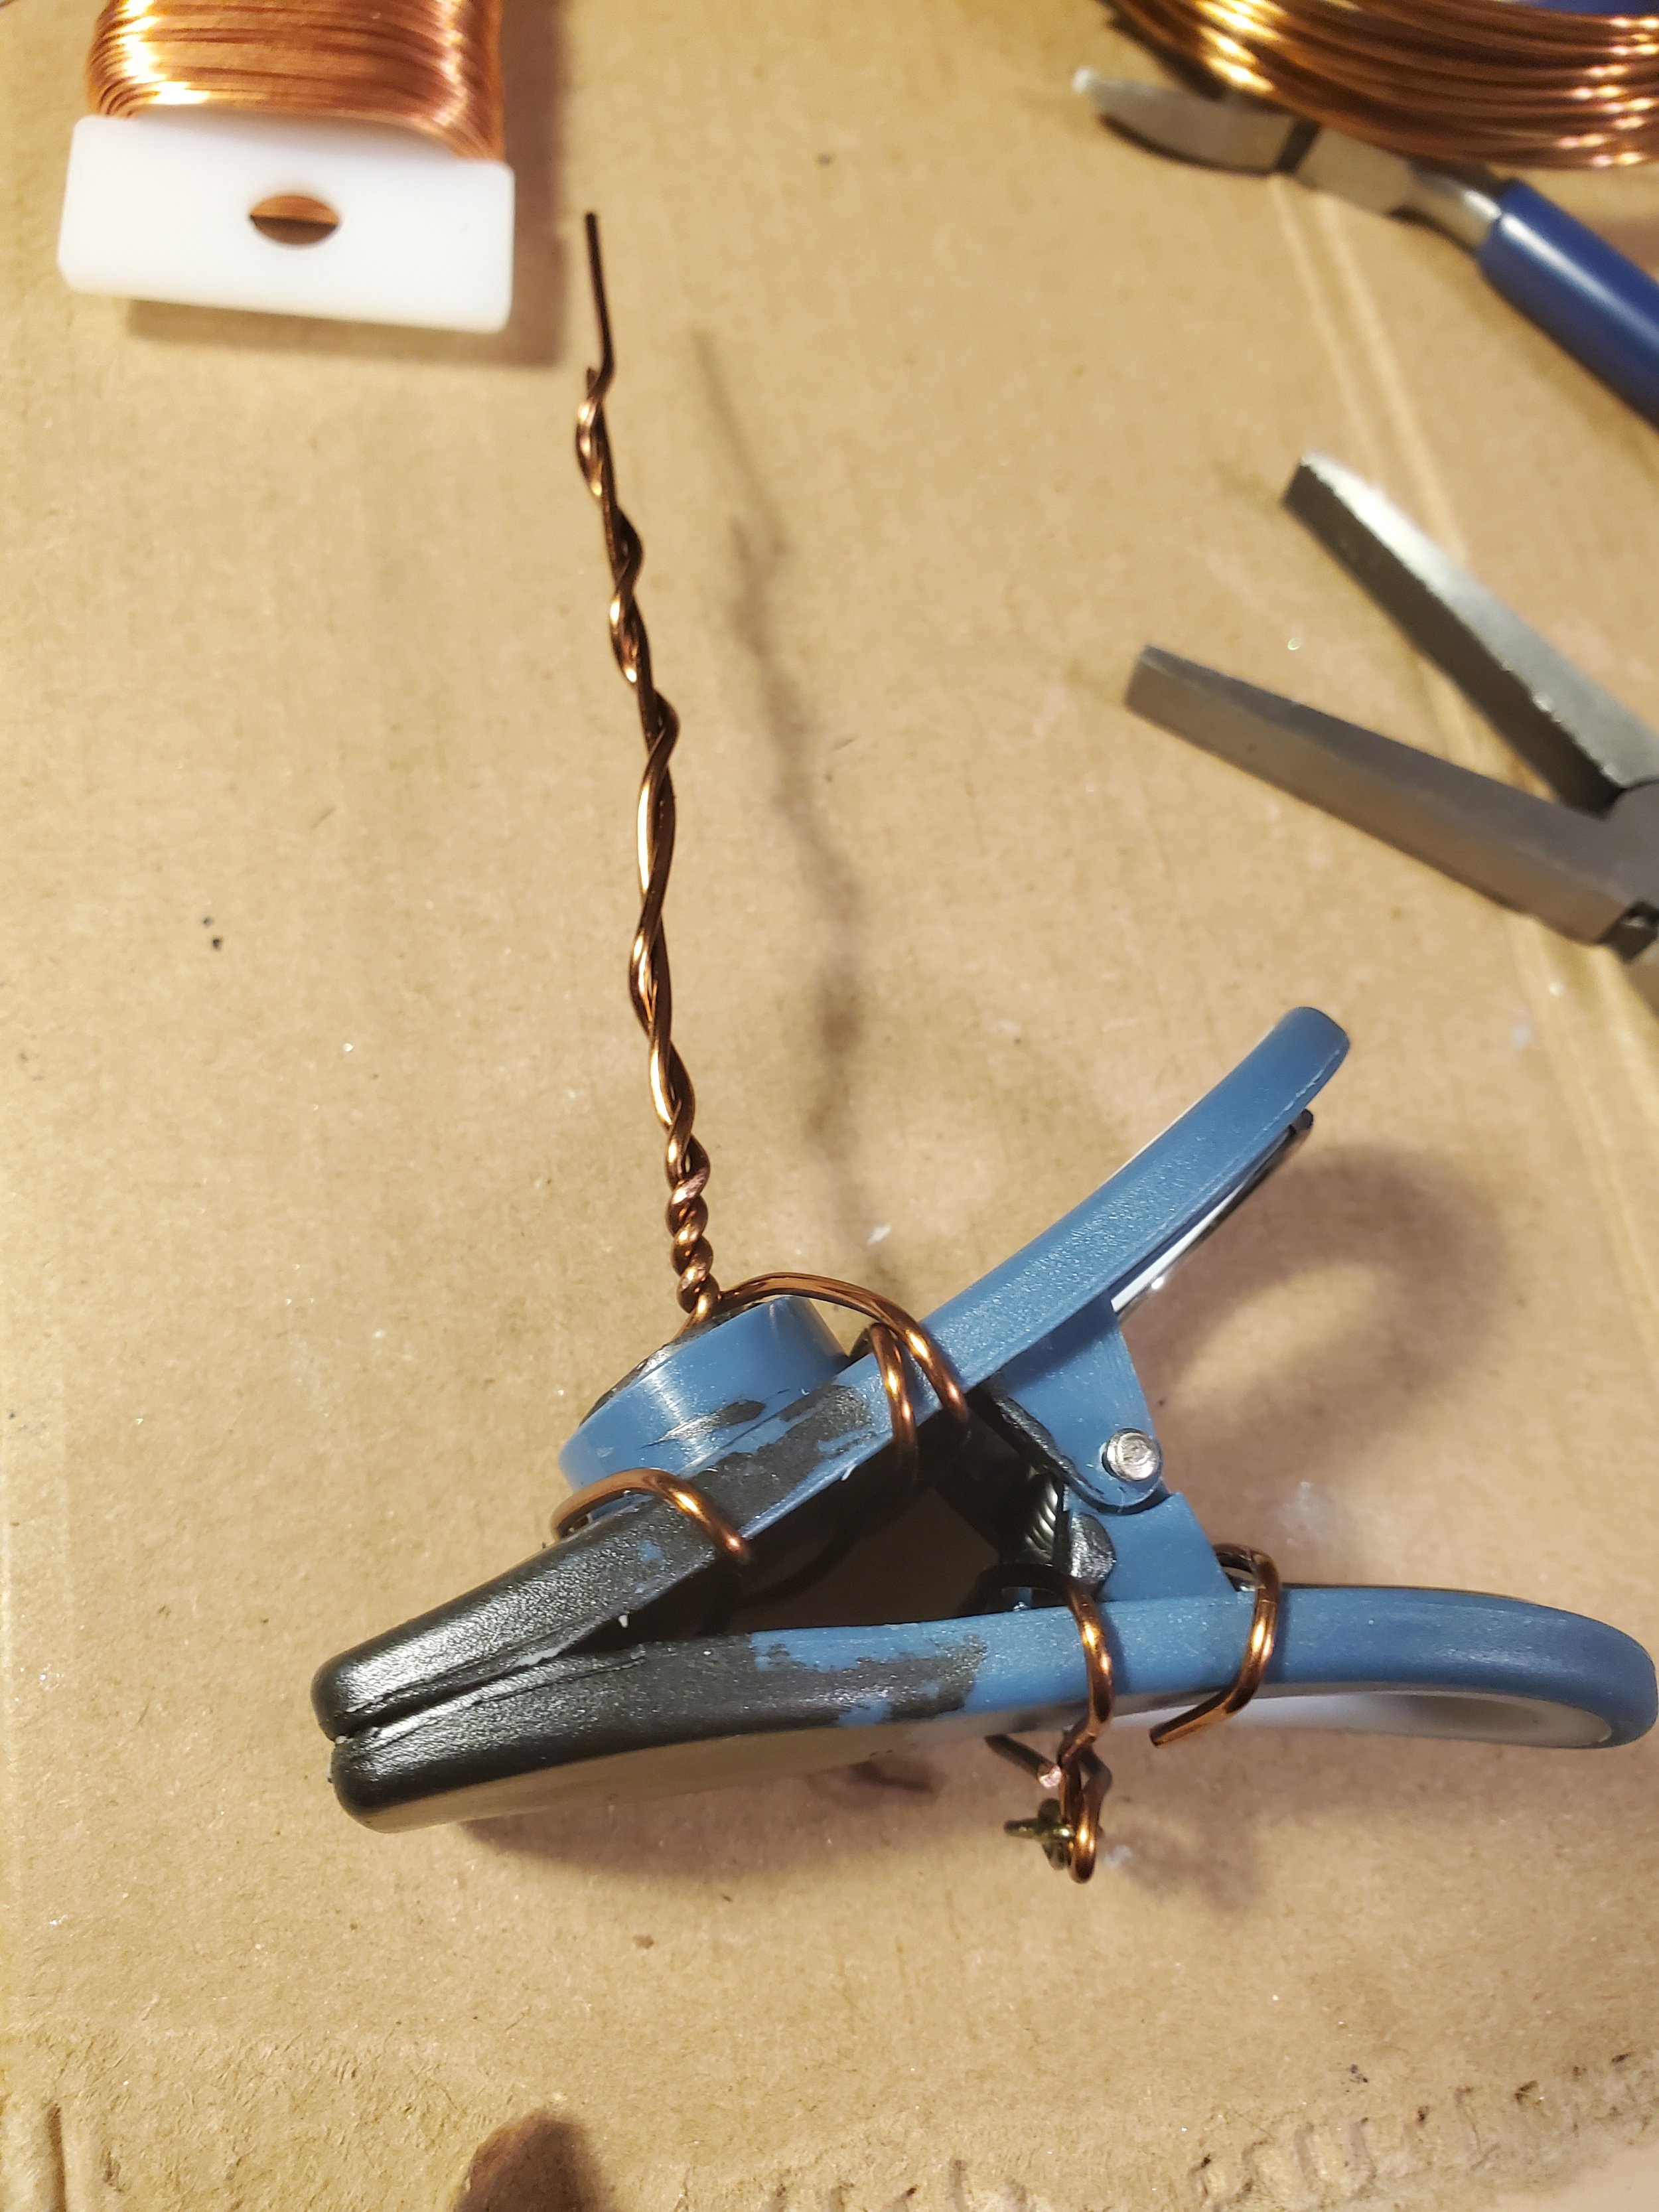
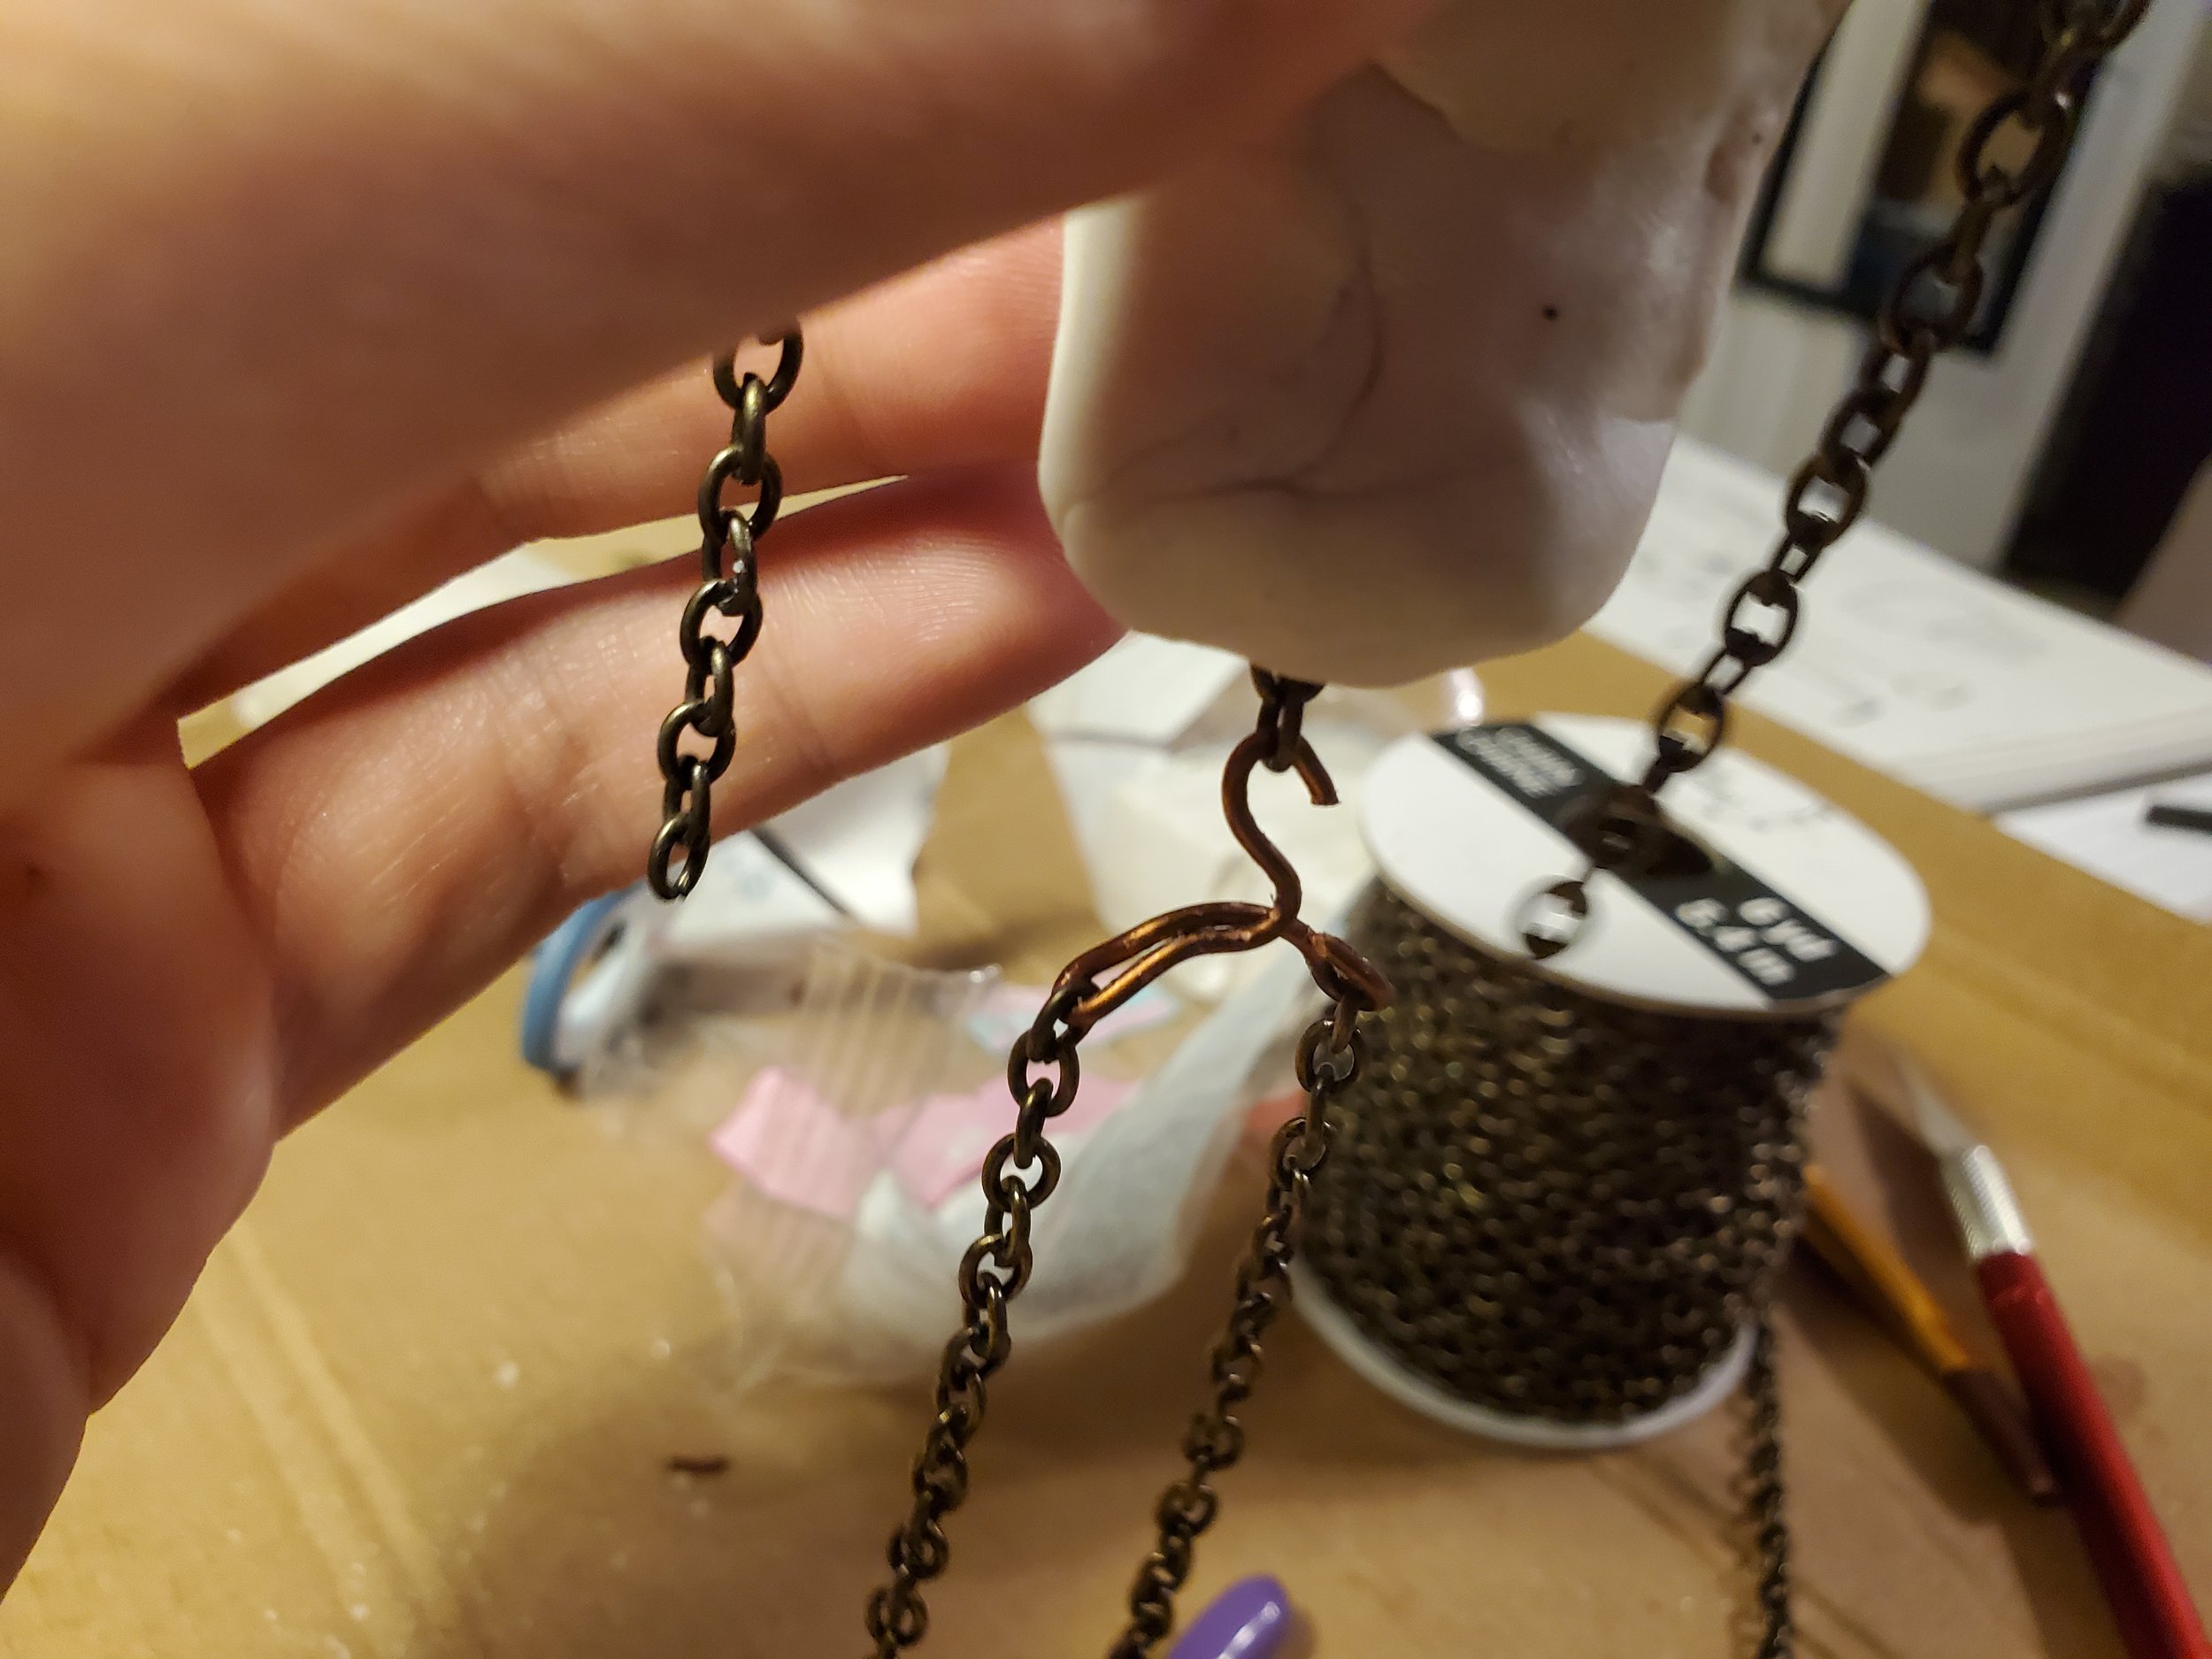
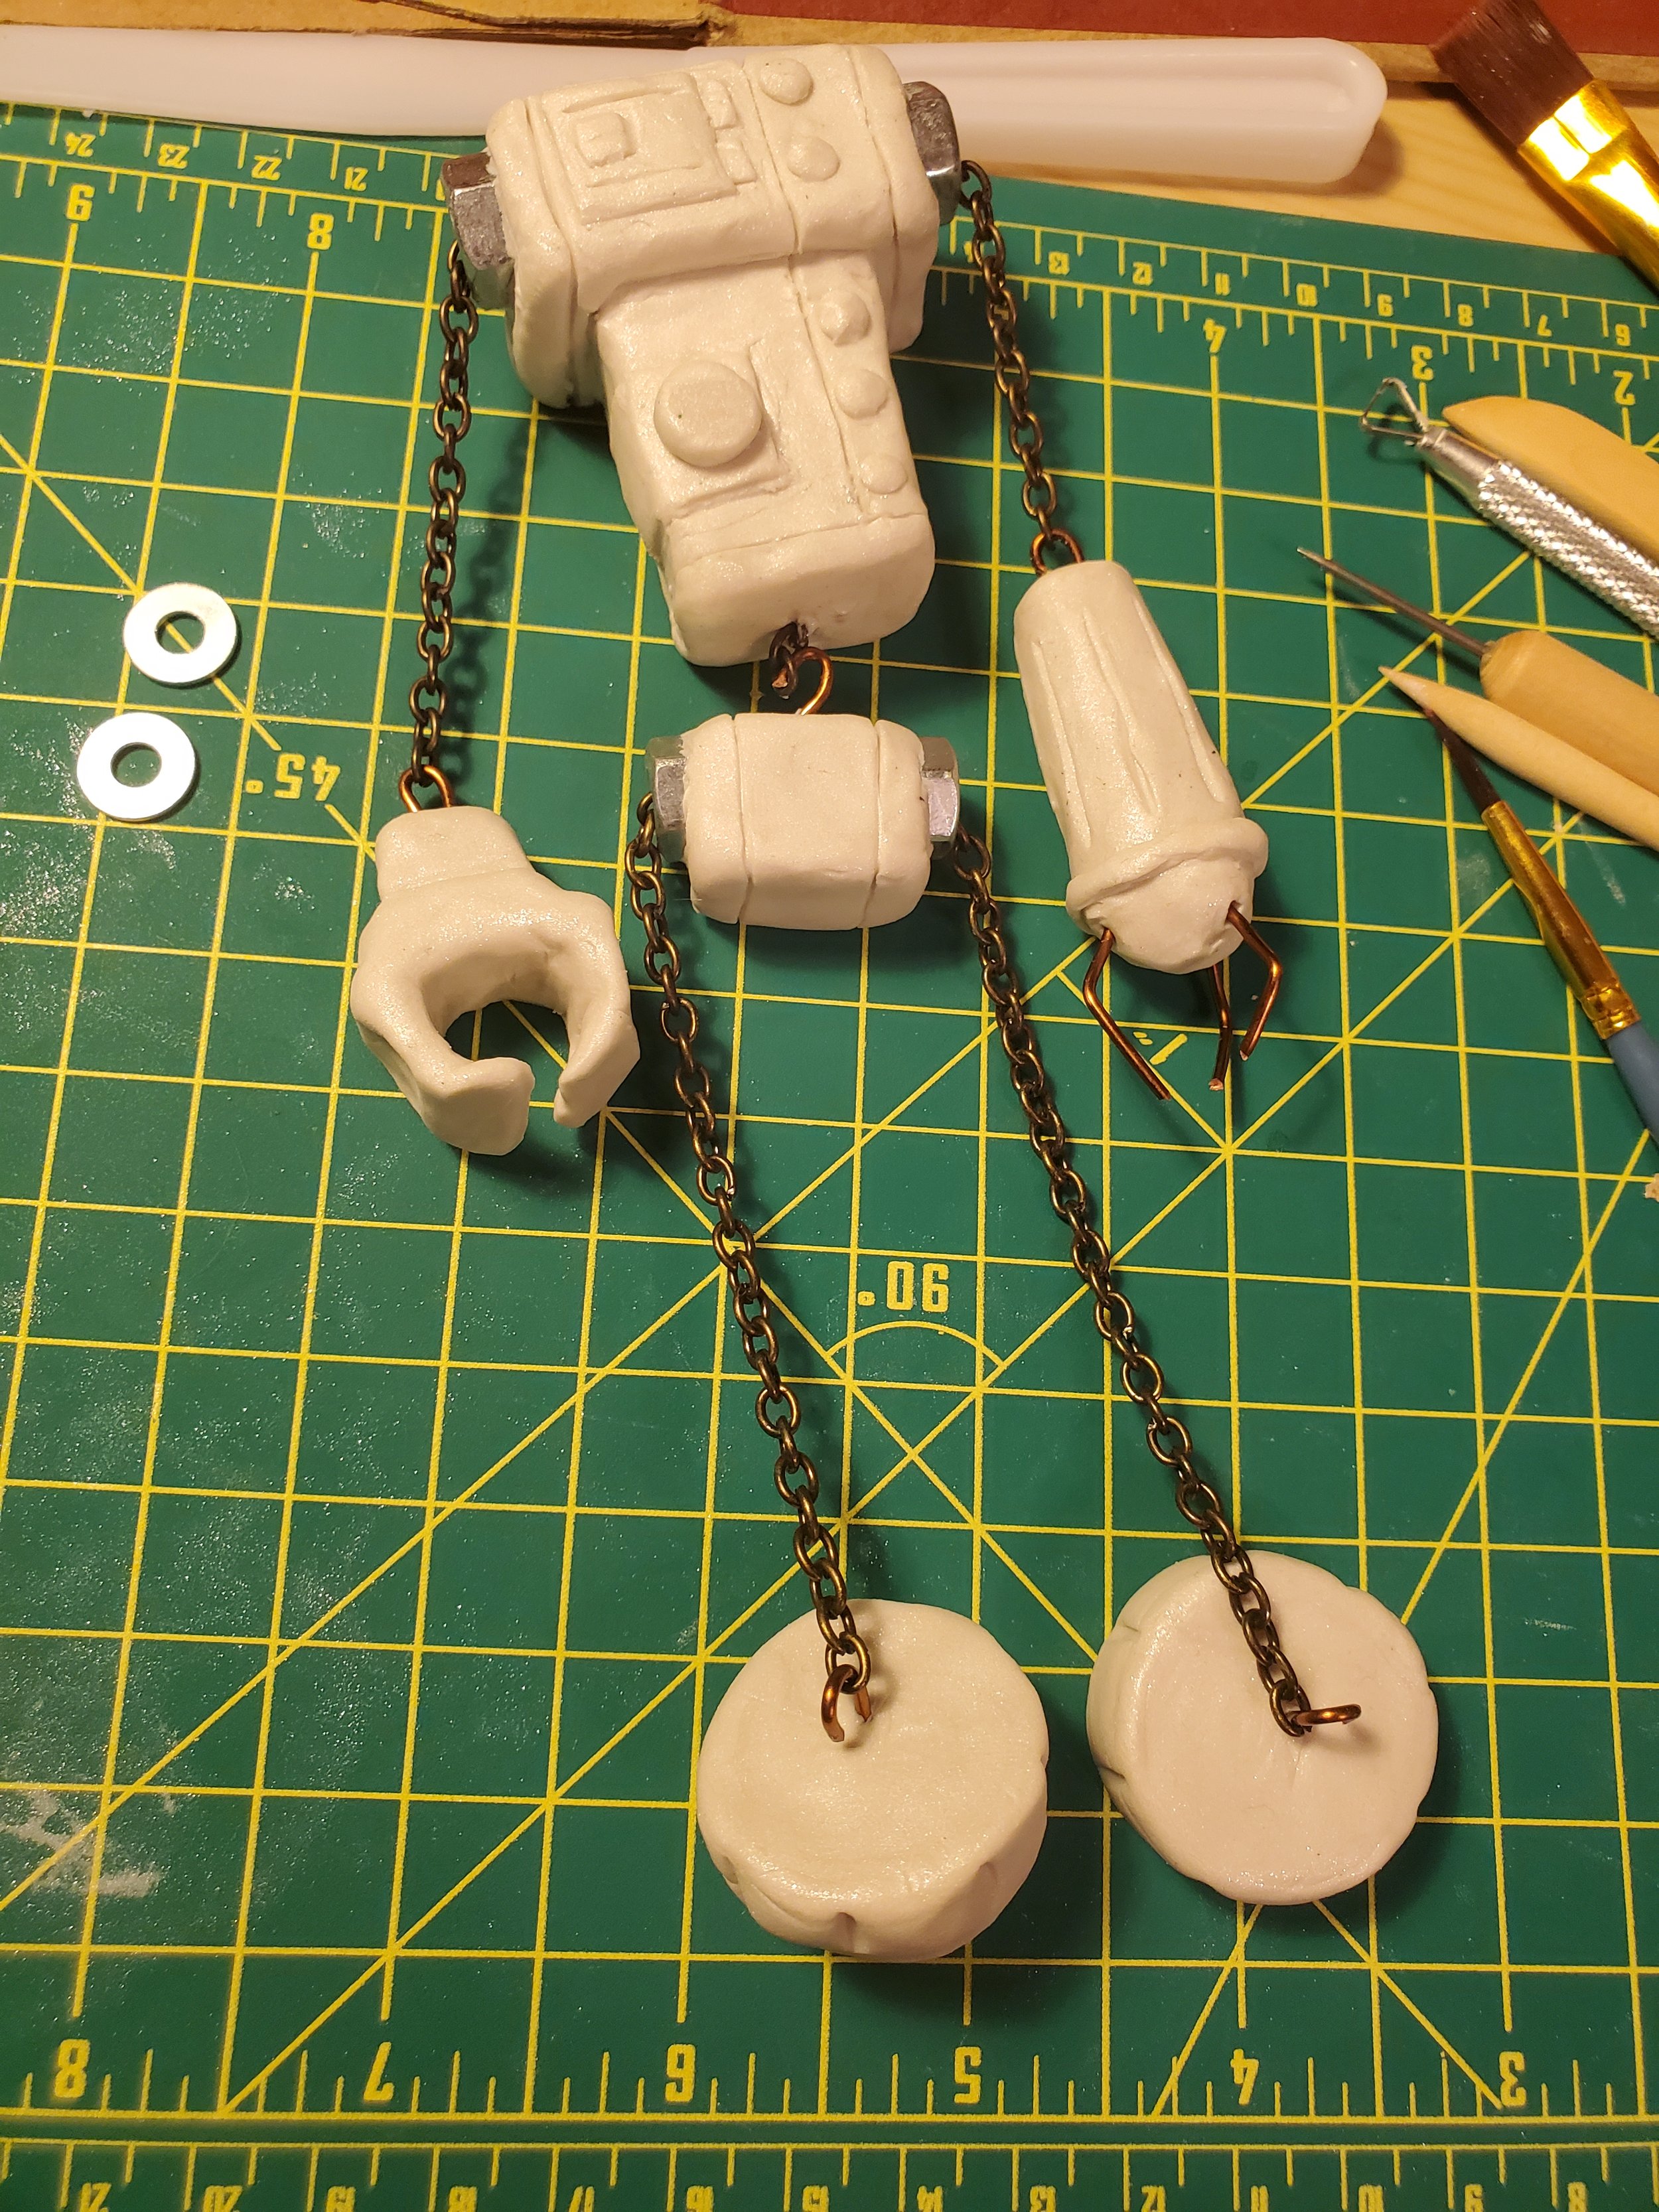
I knew I wanted the body to move, to not just be a solid piece below the puppet mouth, so I decided to use chain as the neck, arms, and legs. This way the robot would move around while I made him speak, so he’d seem a little more alive.
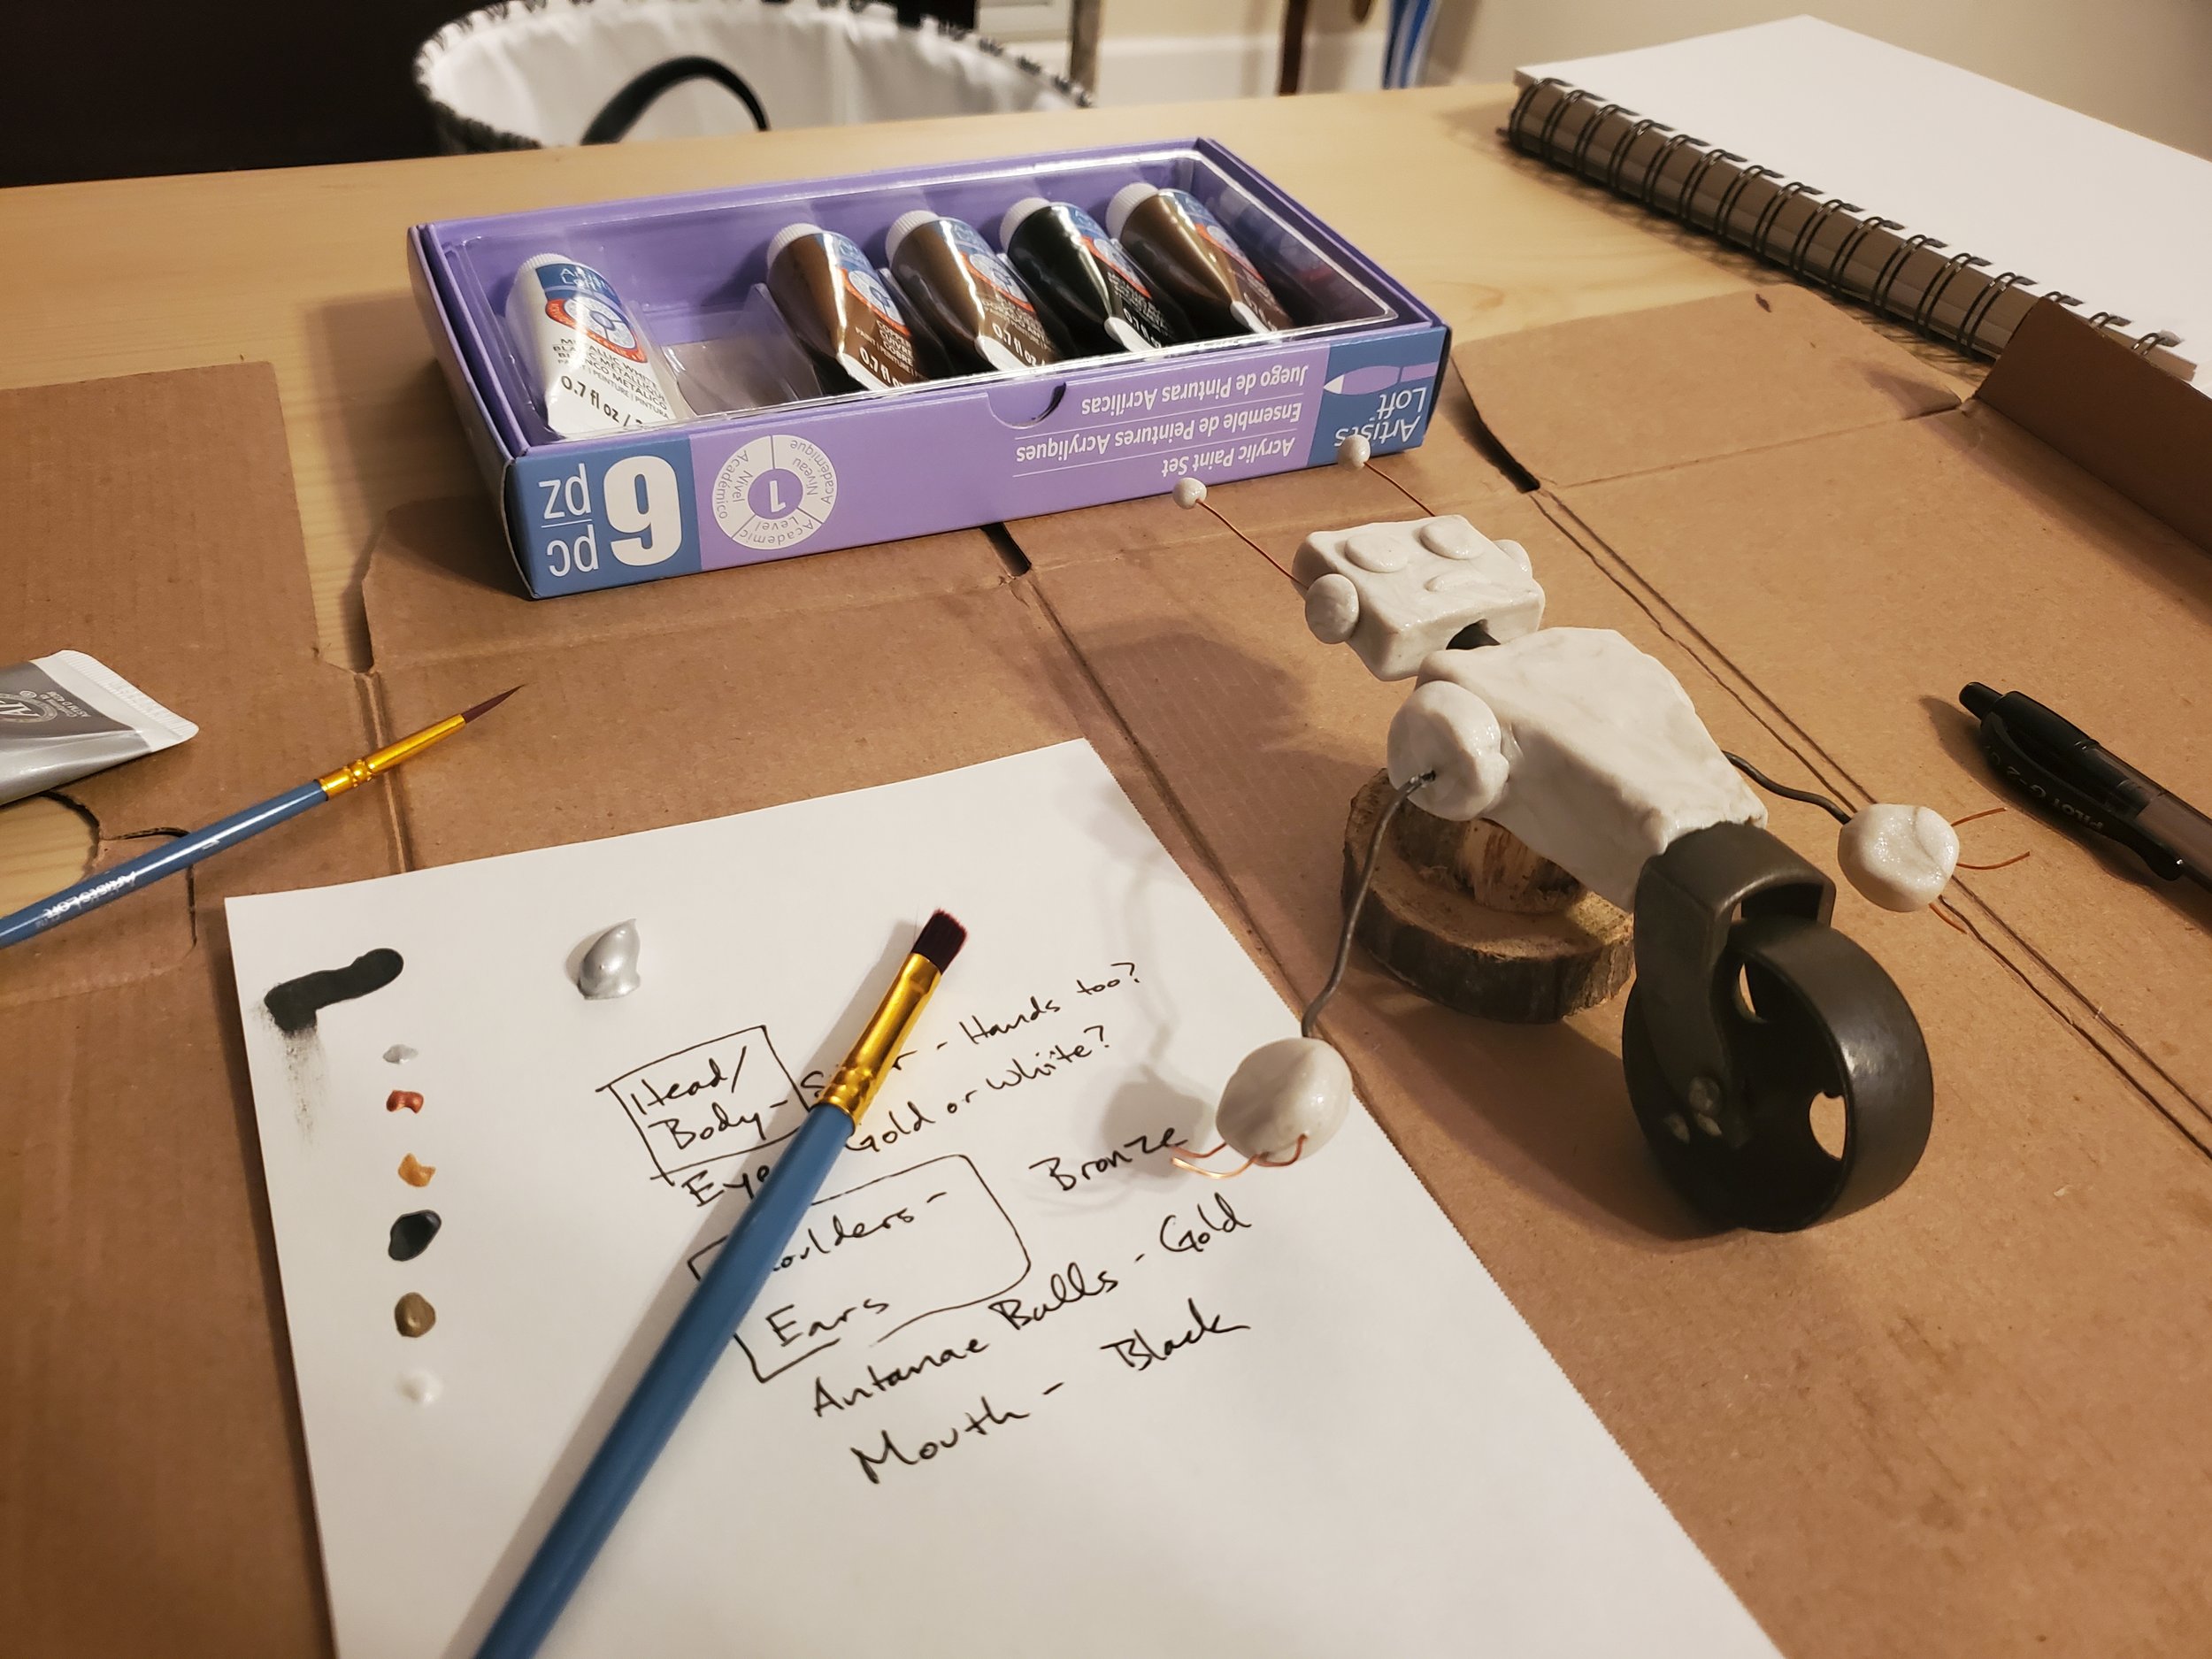
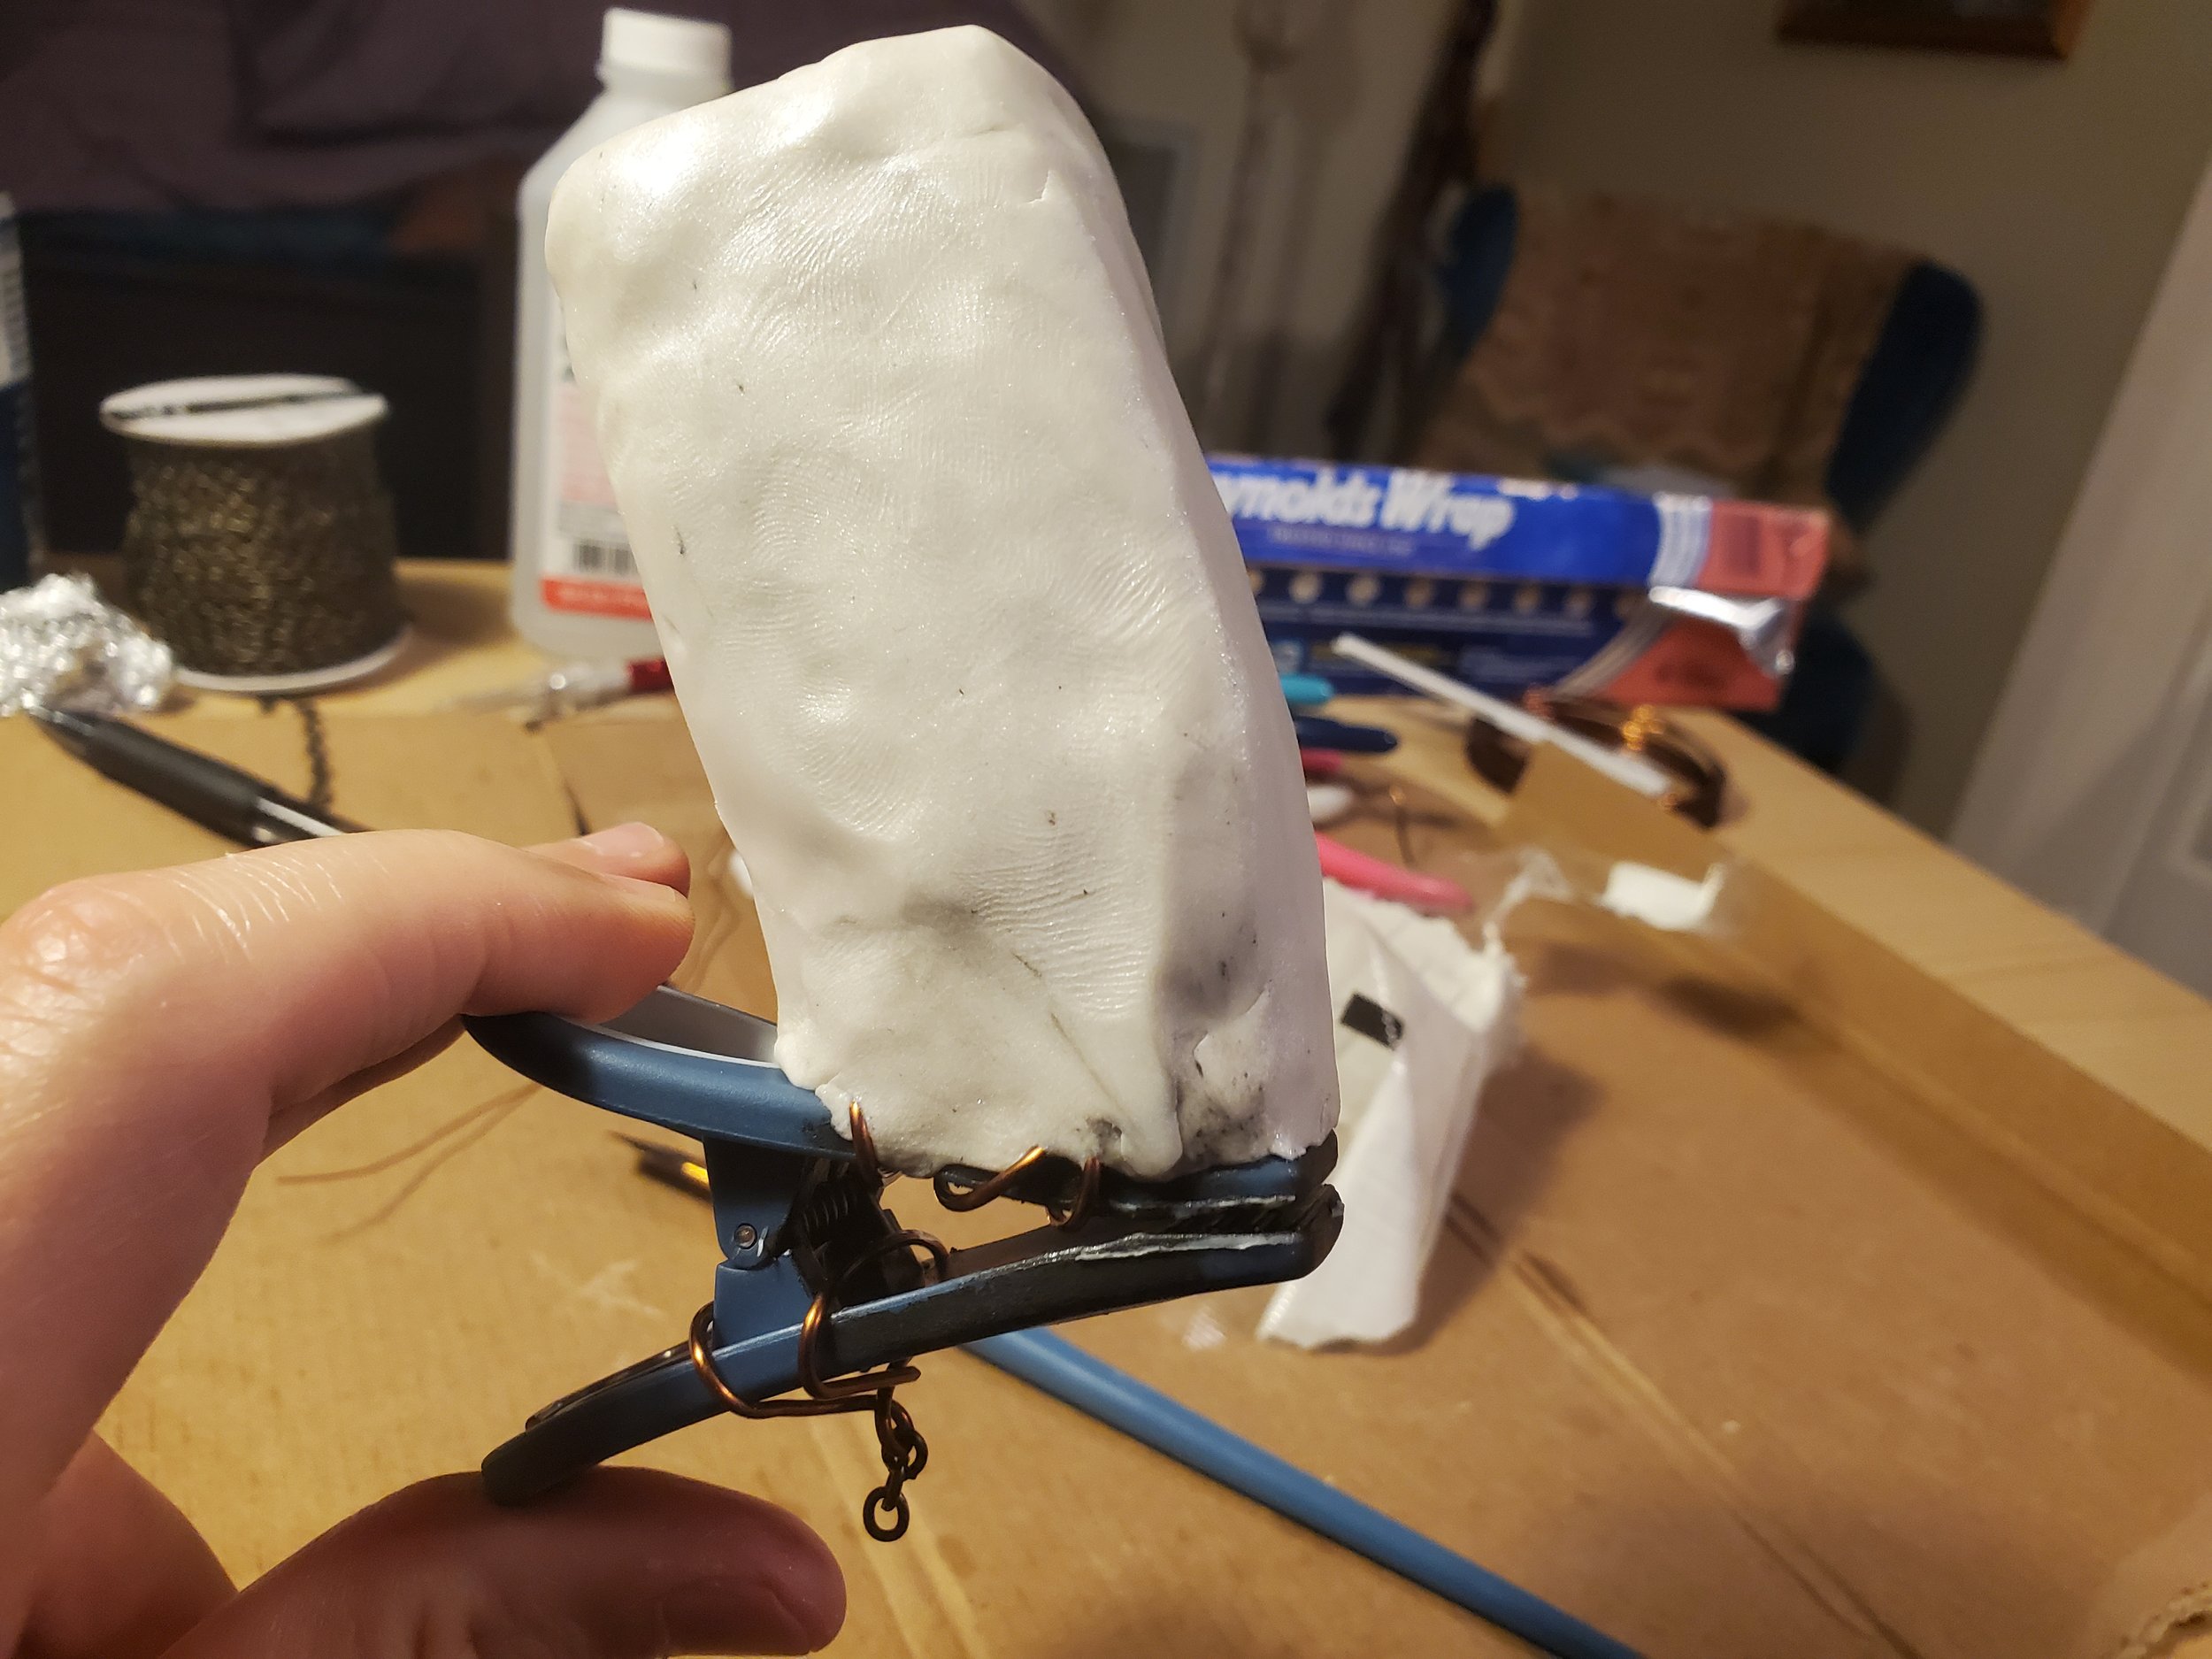
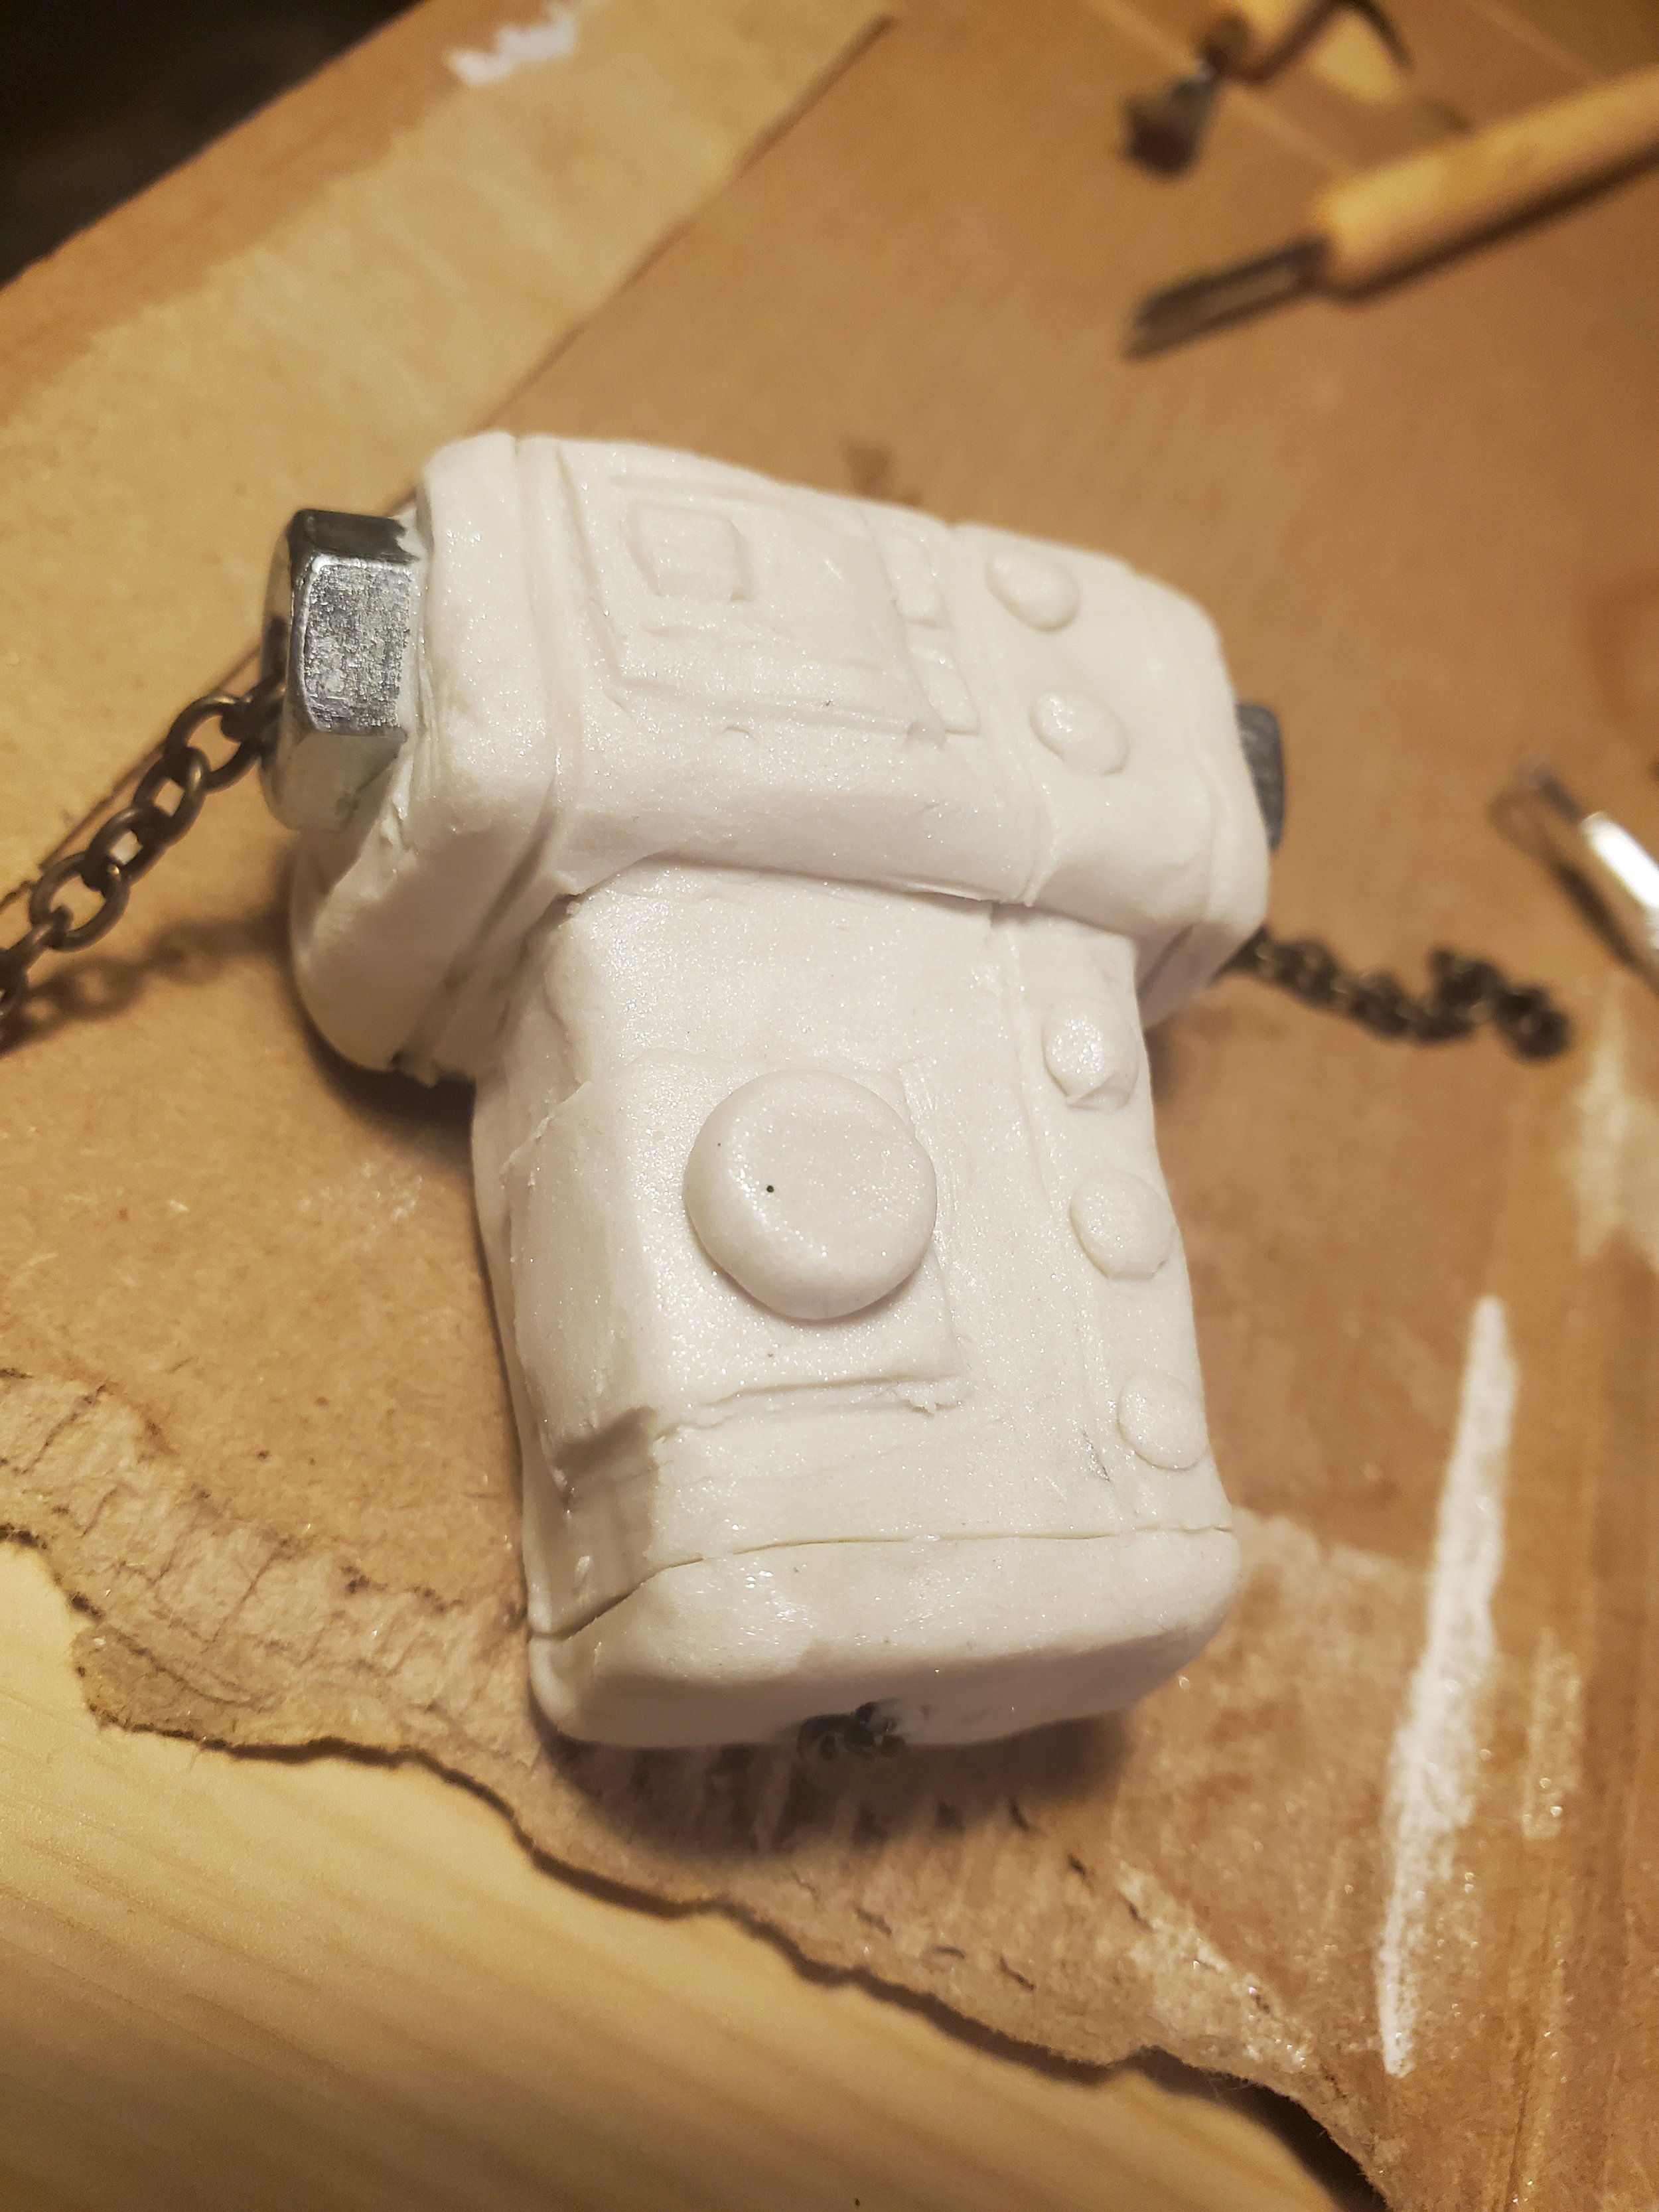
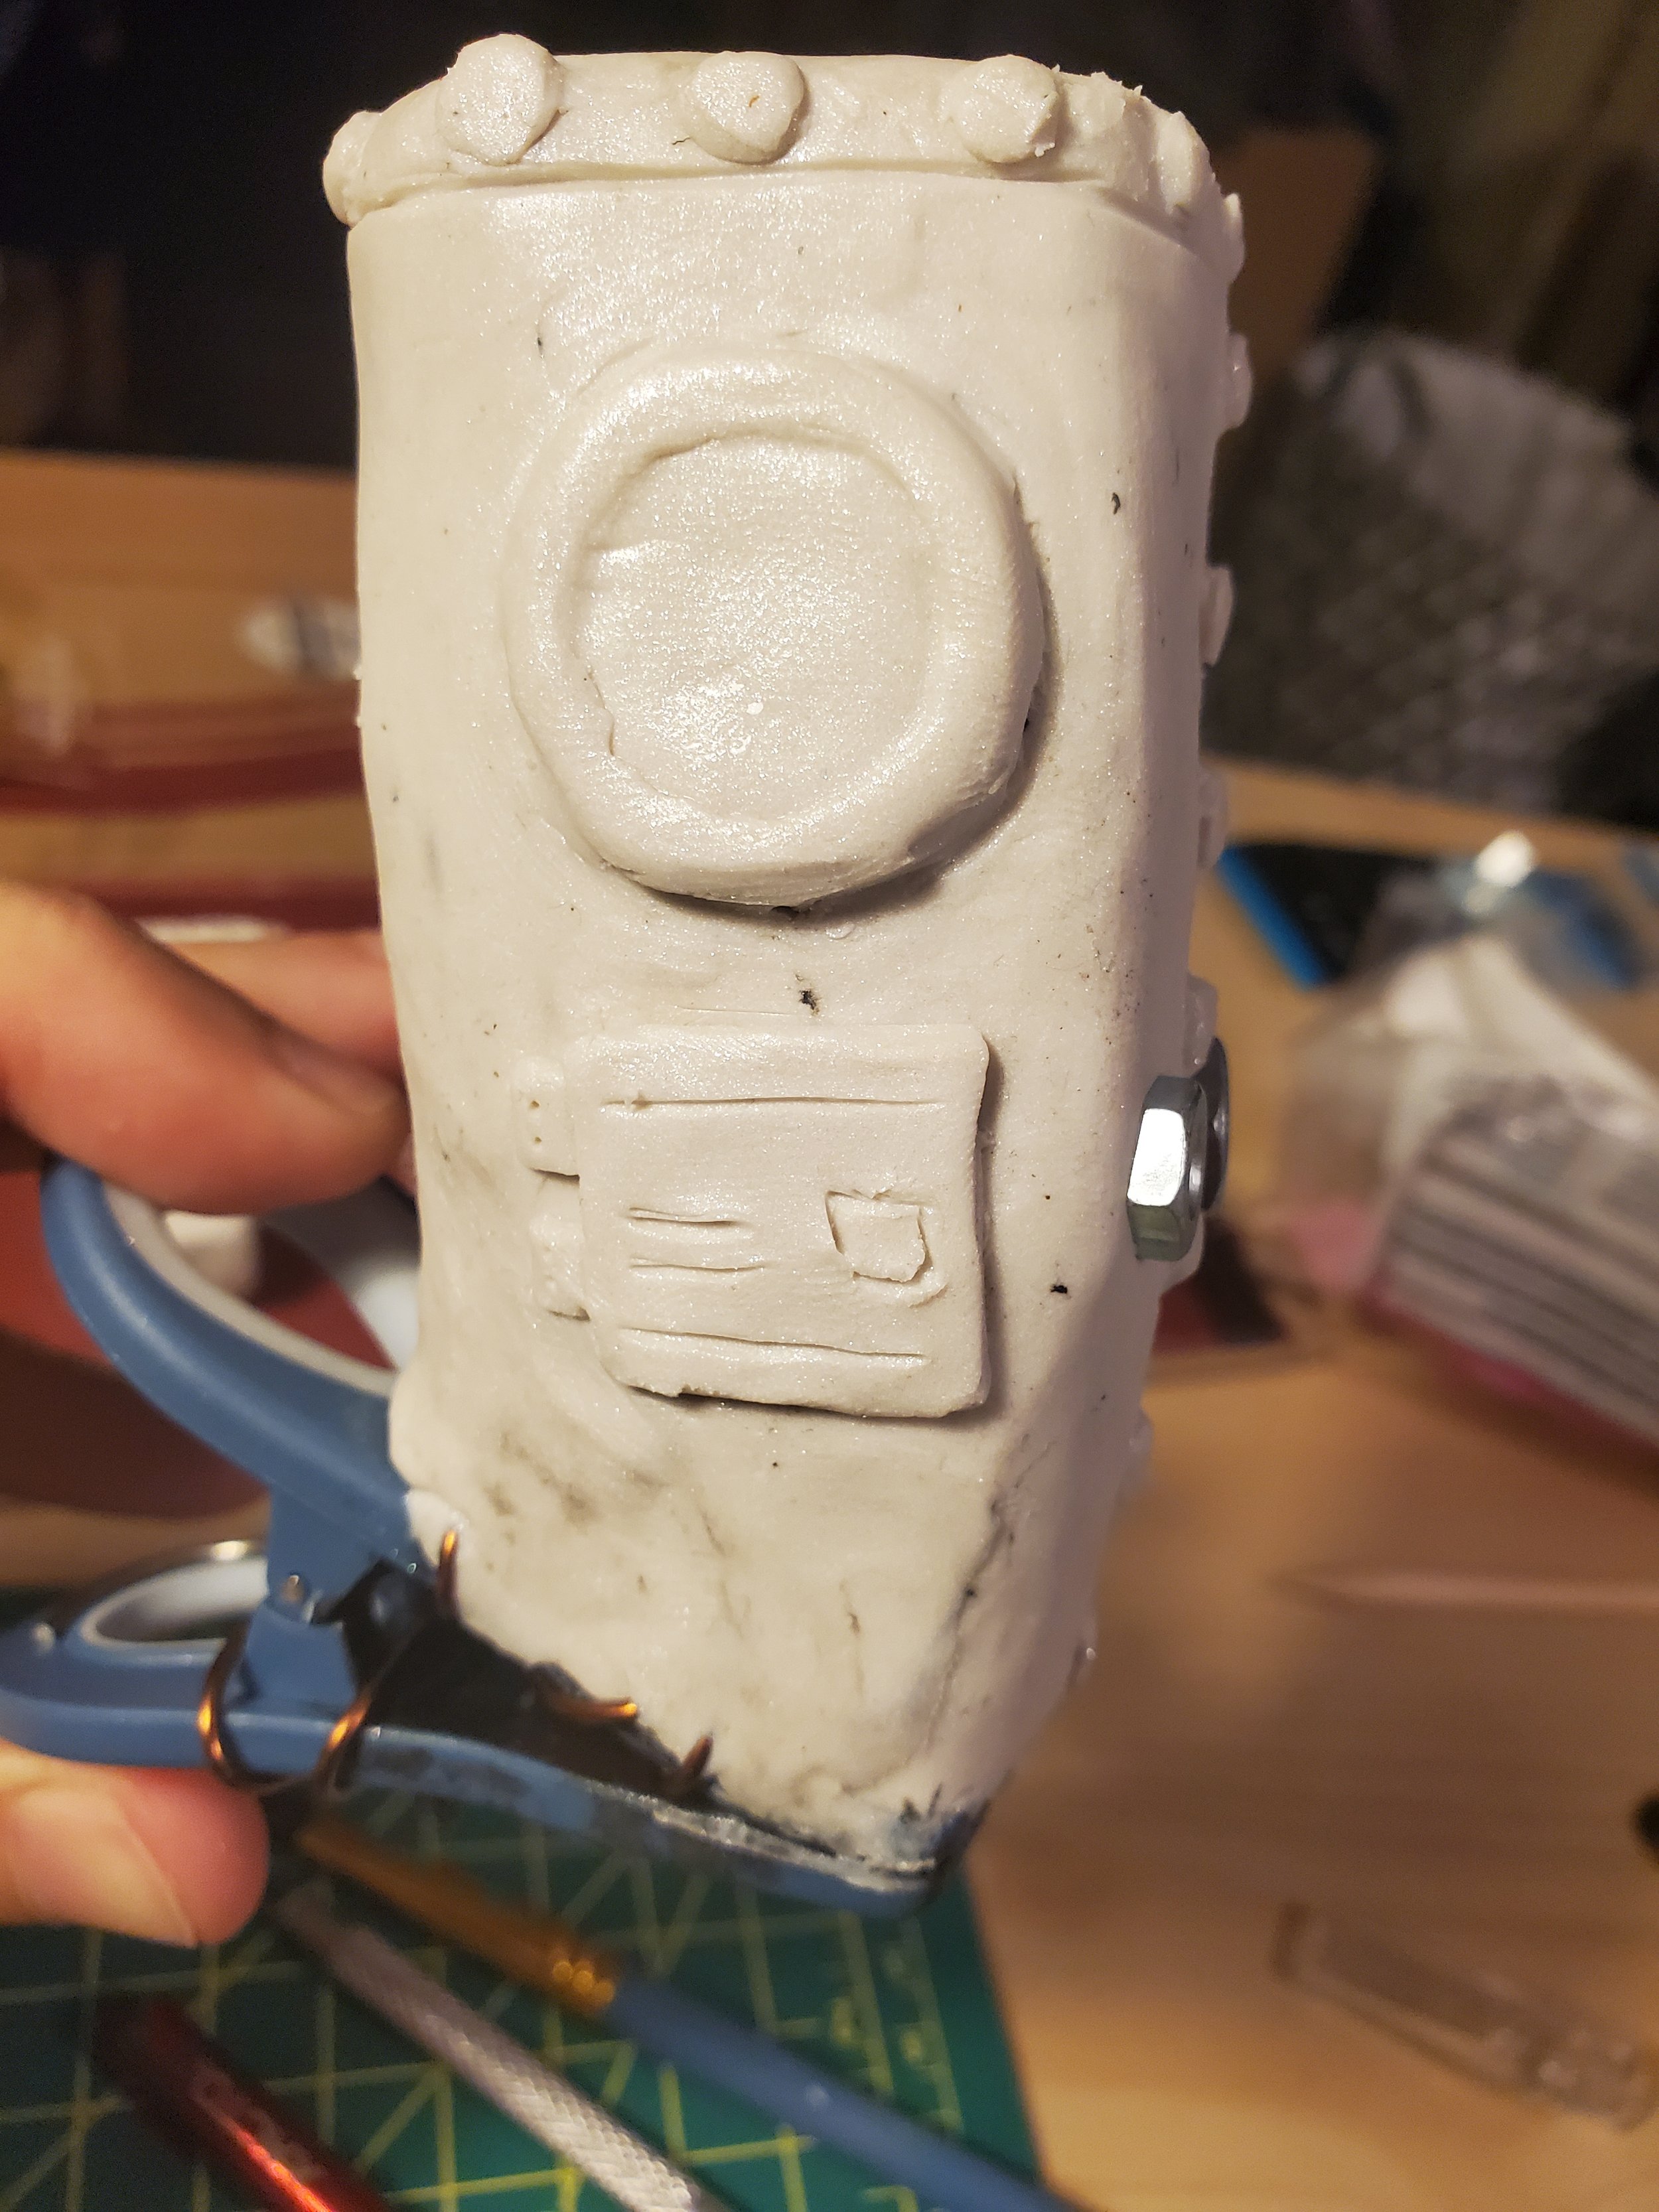
I built the puppet with Sculpey polymer clay, specifically called Sculpy III. Here are pictures of the building process:
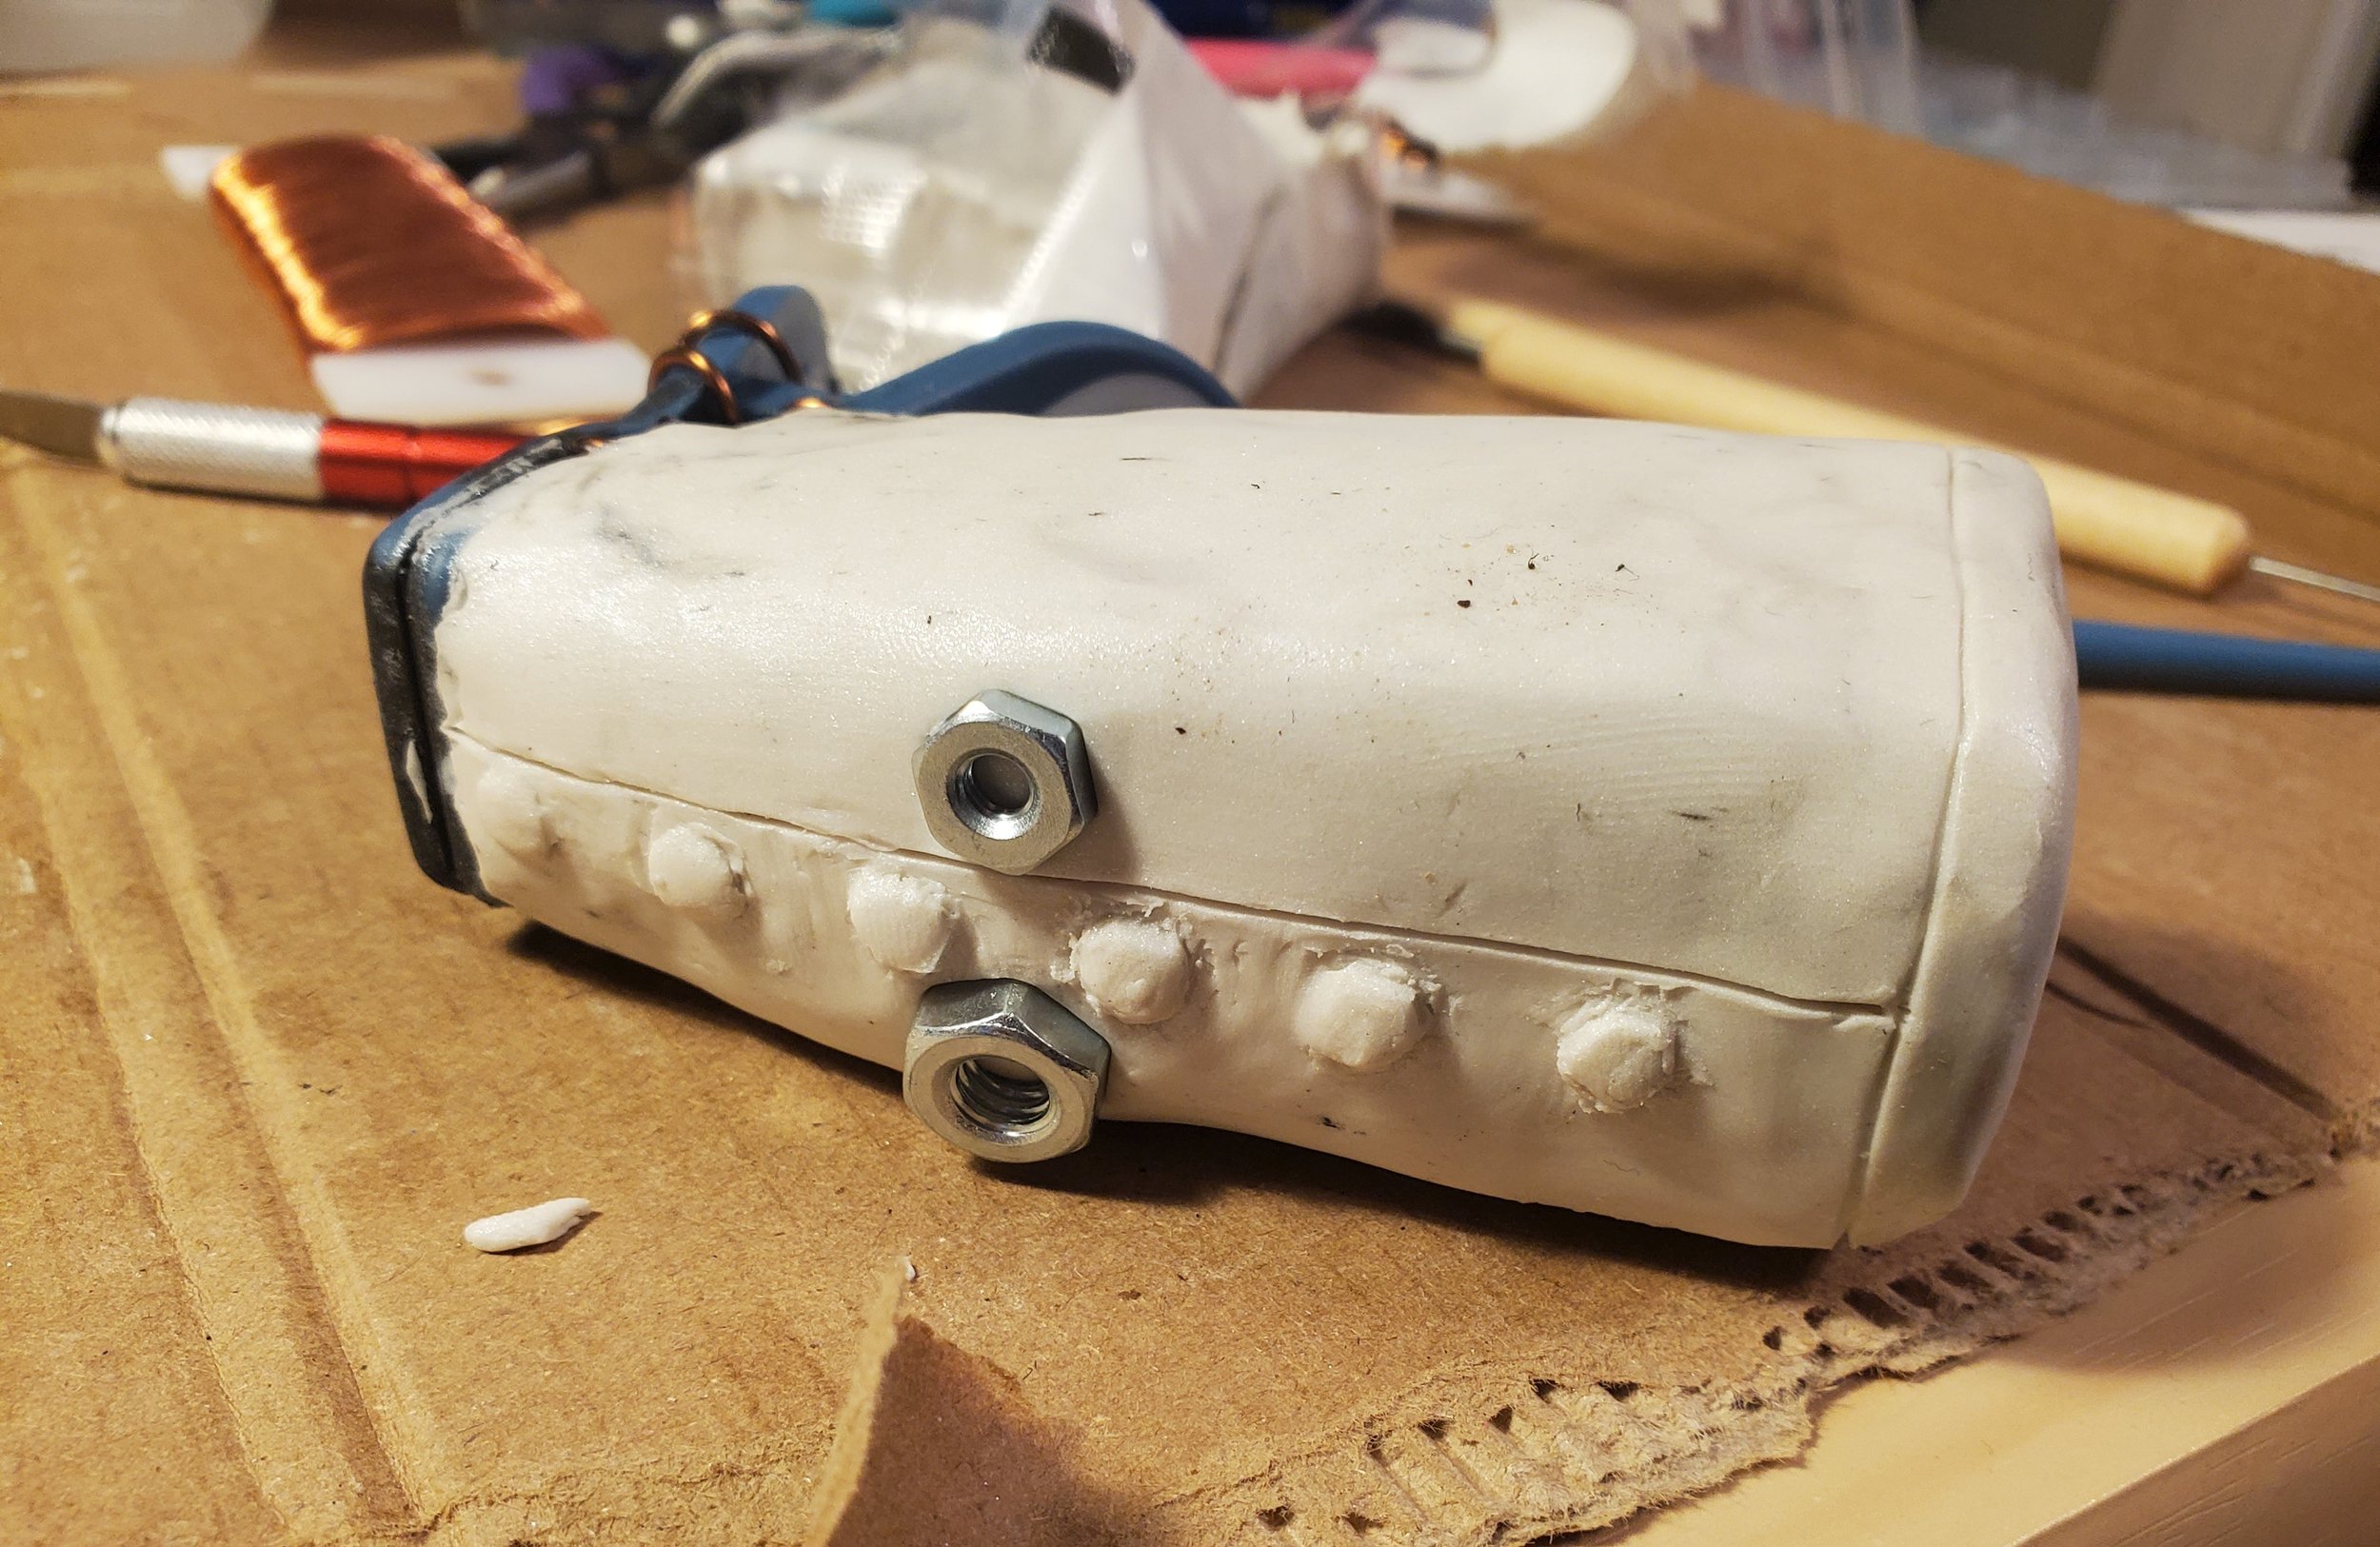
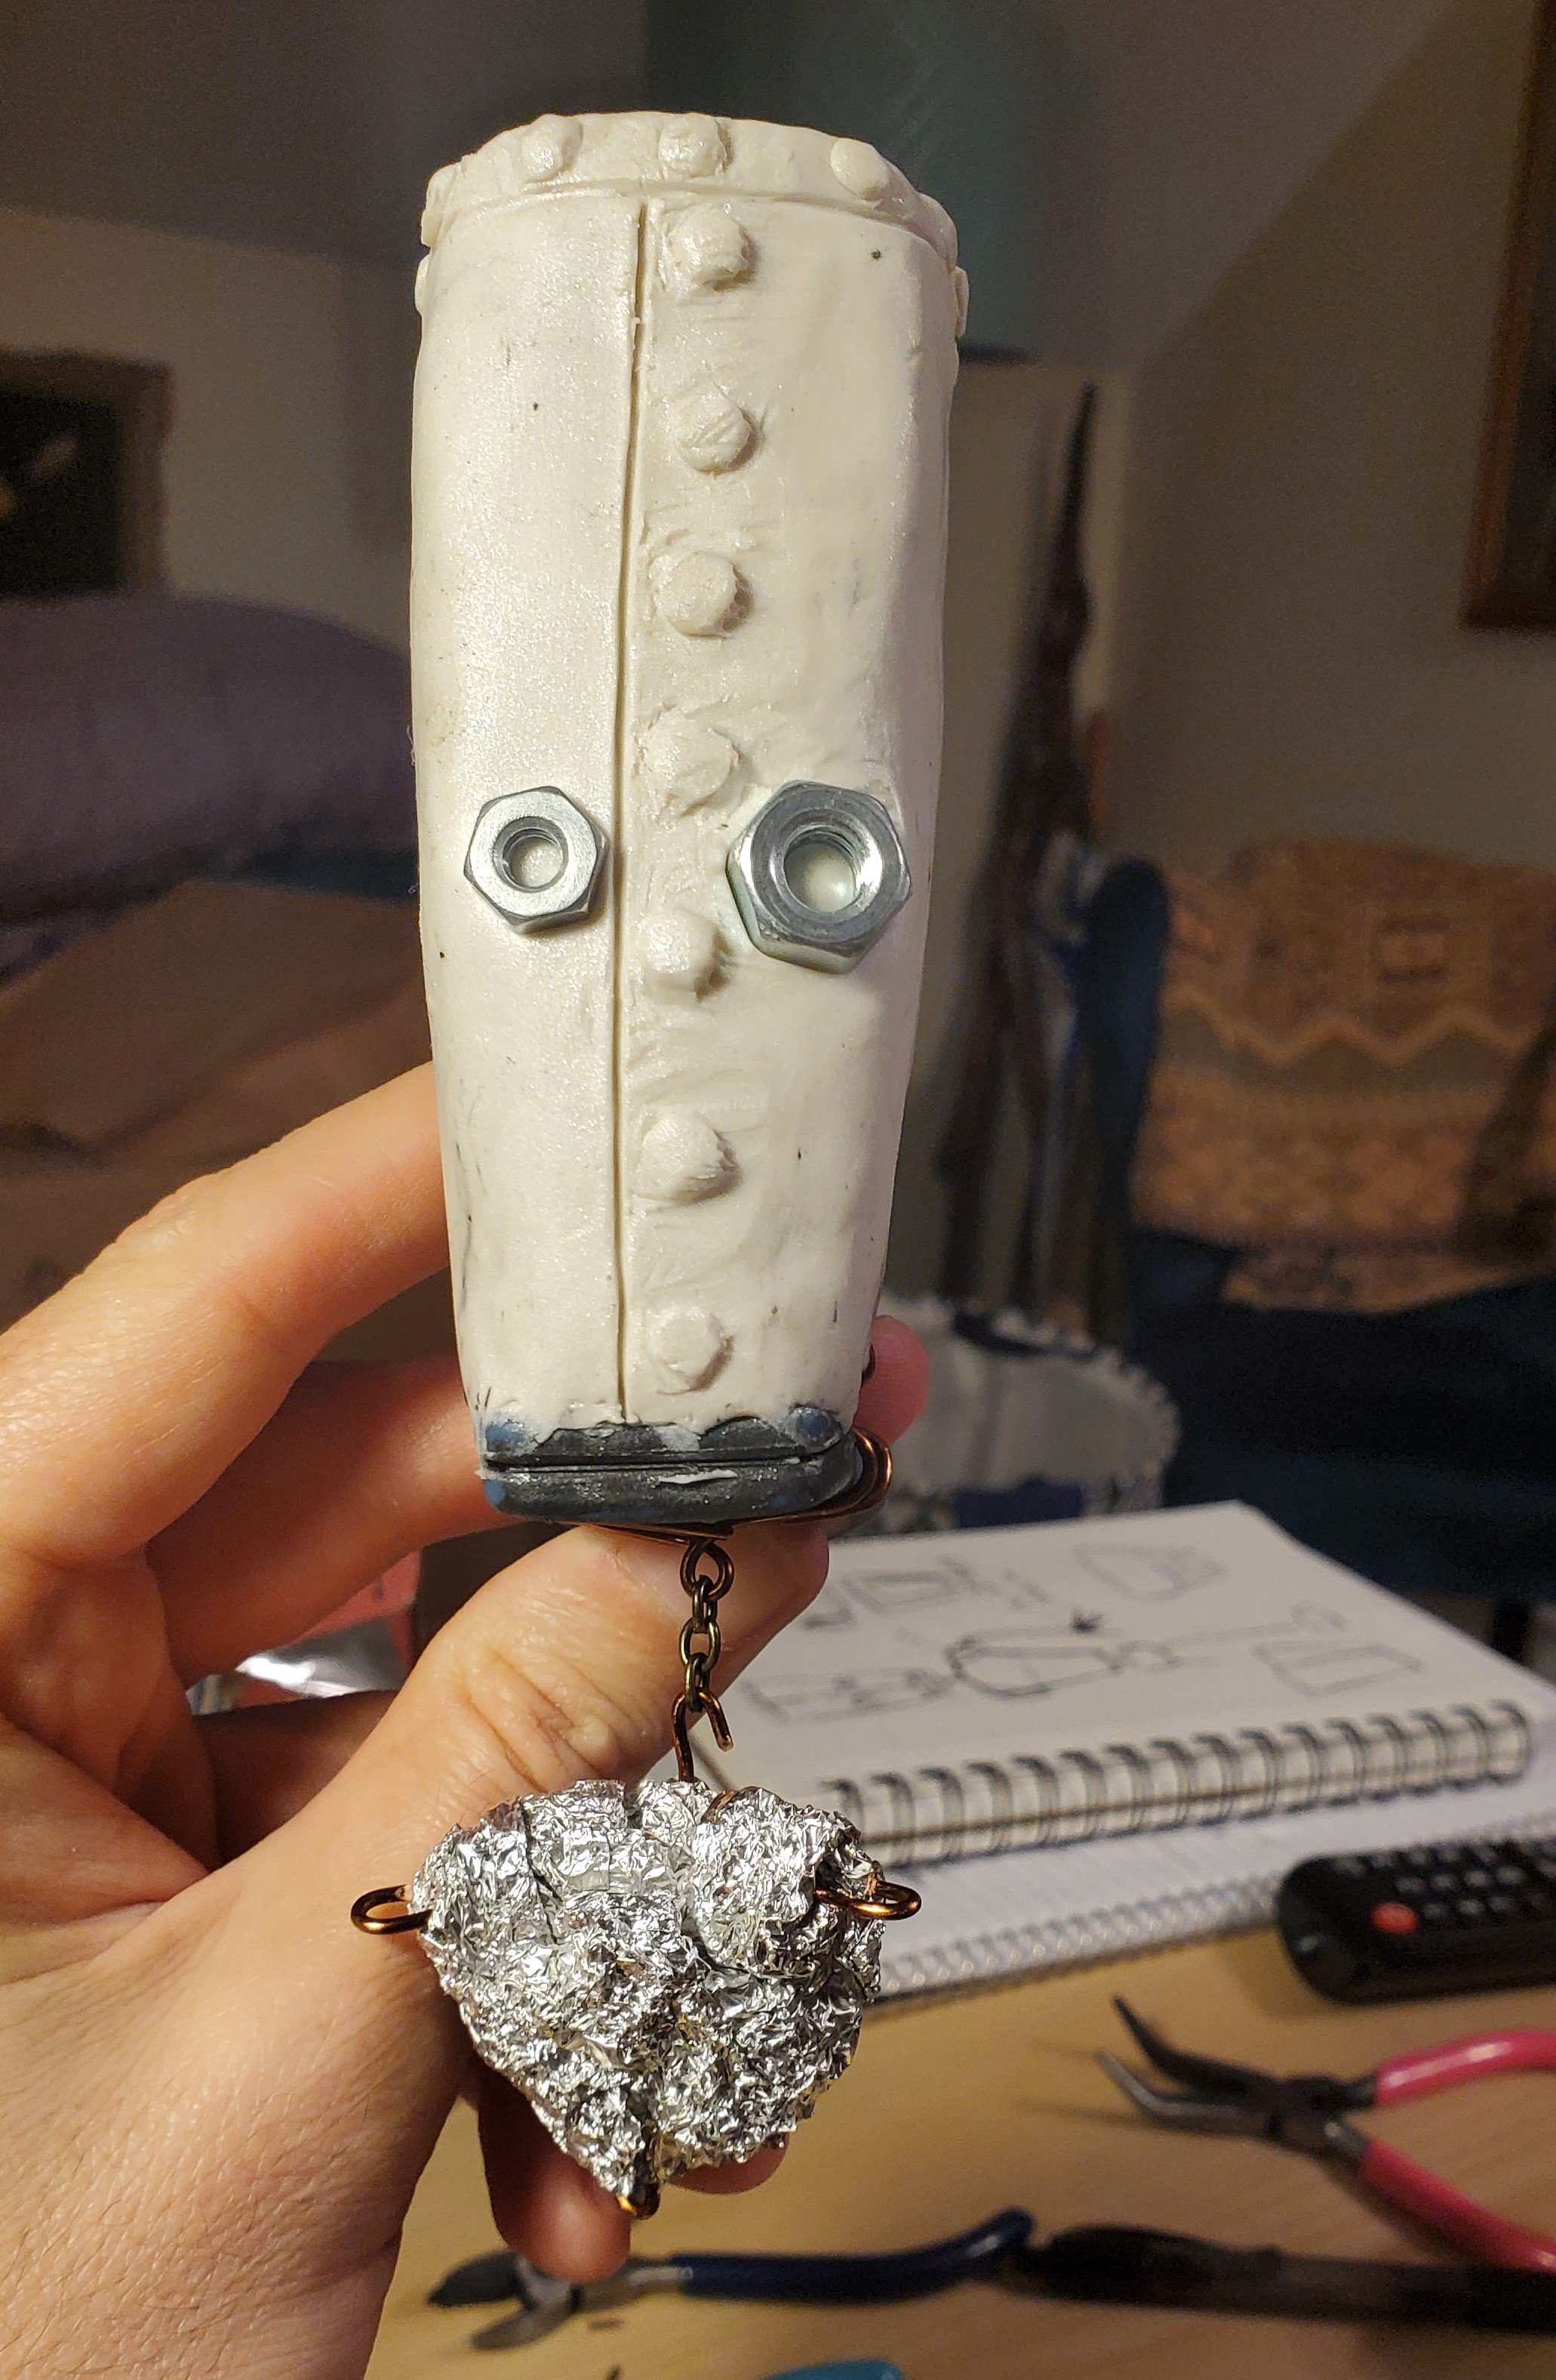
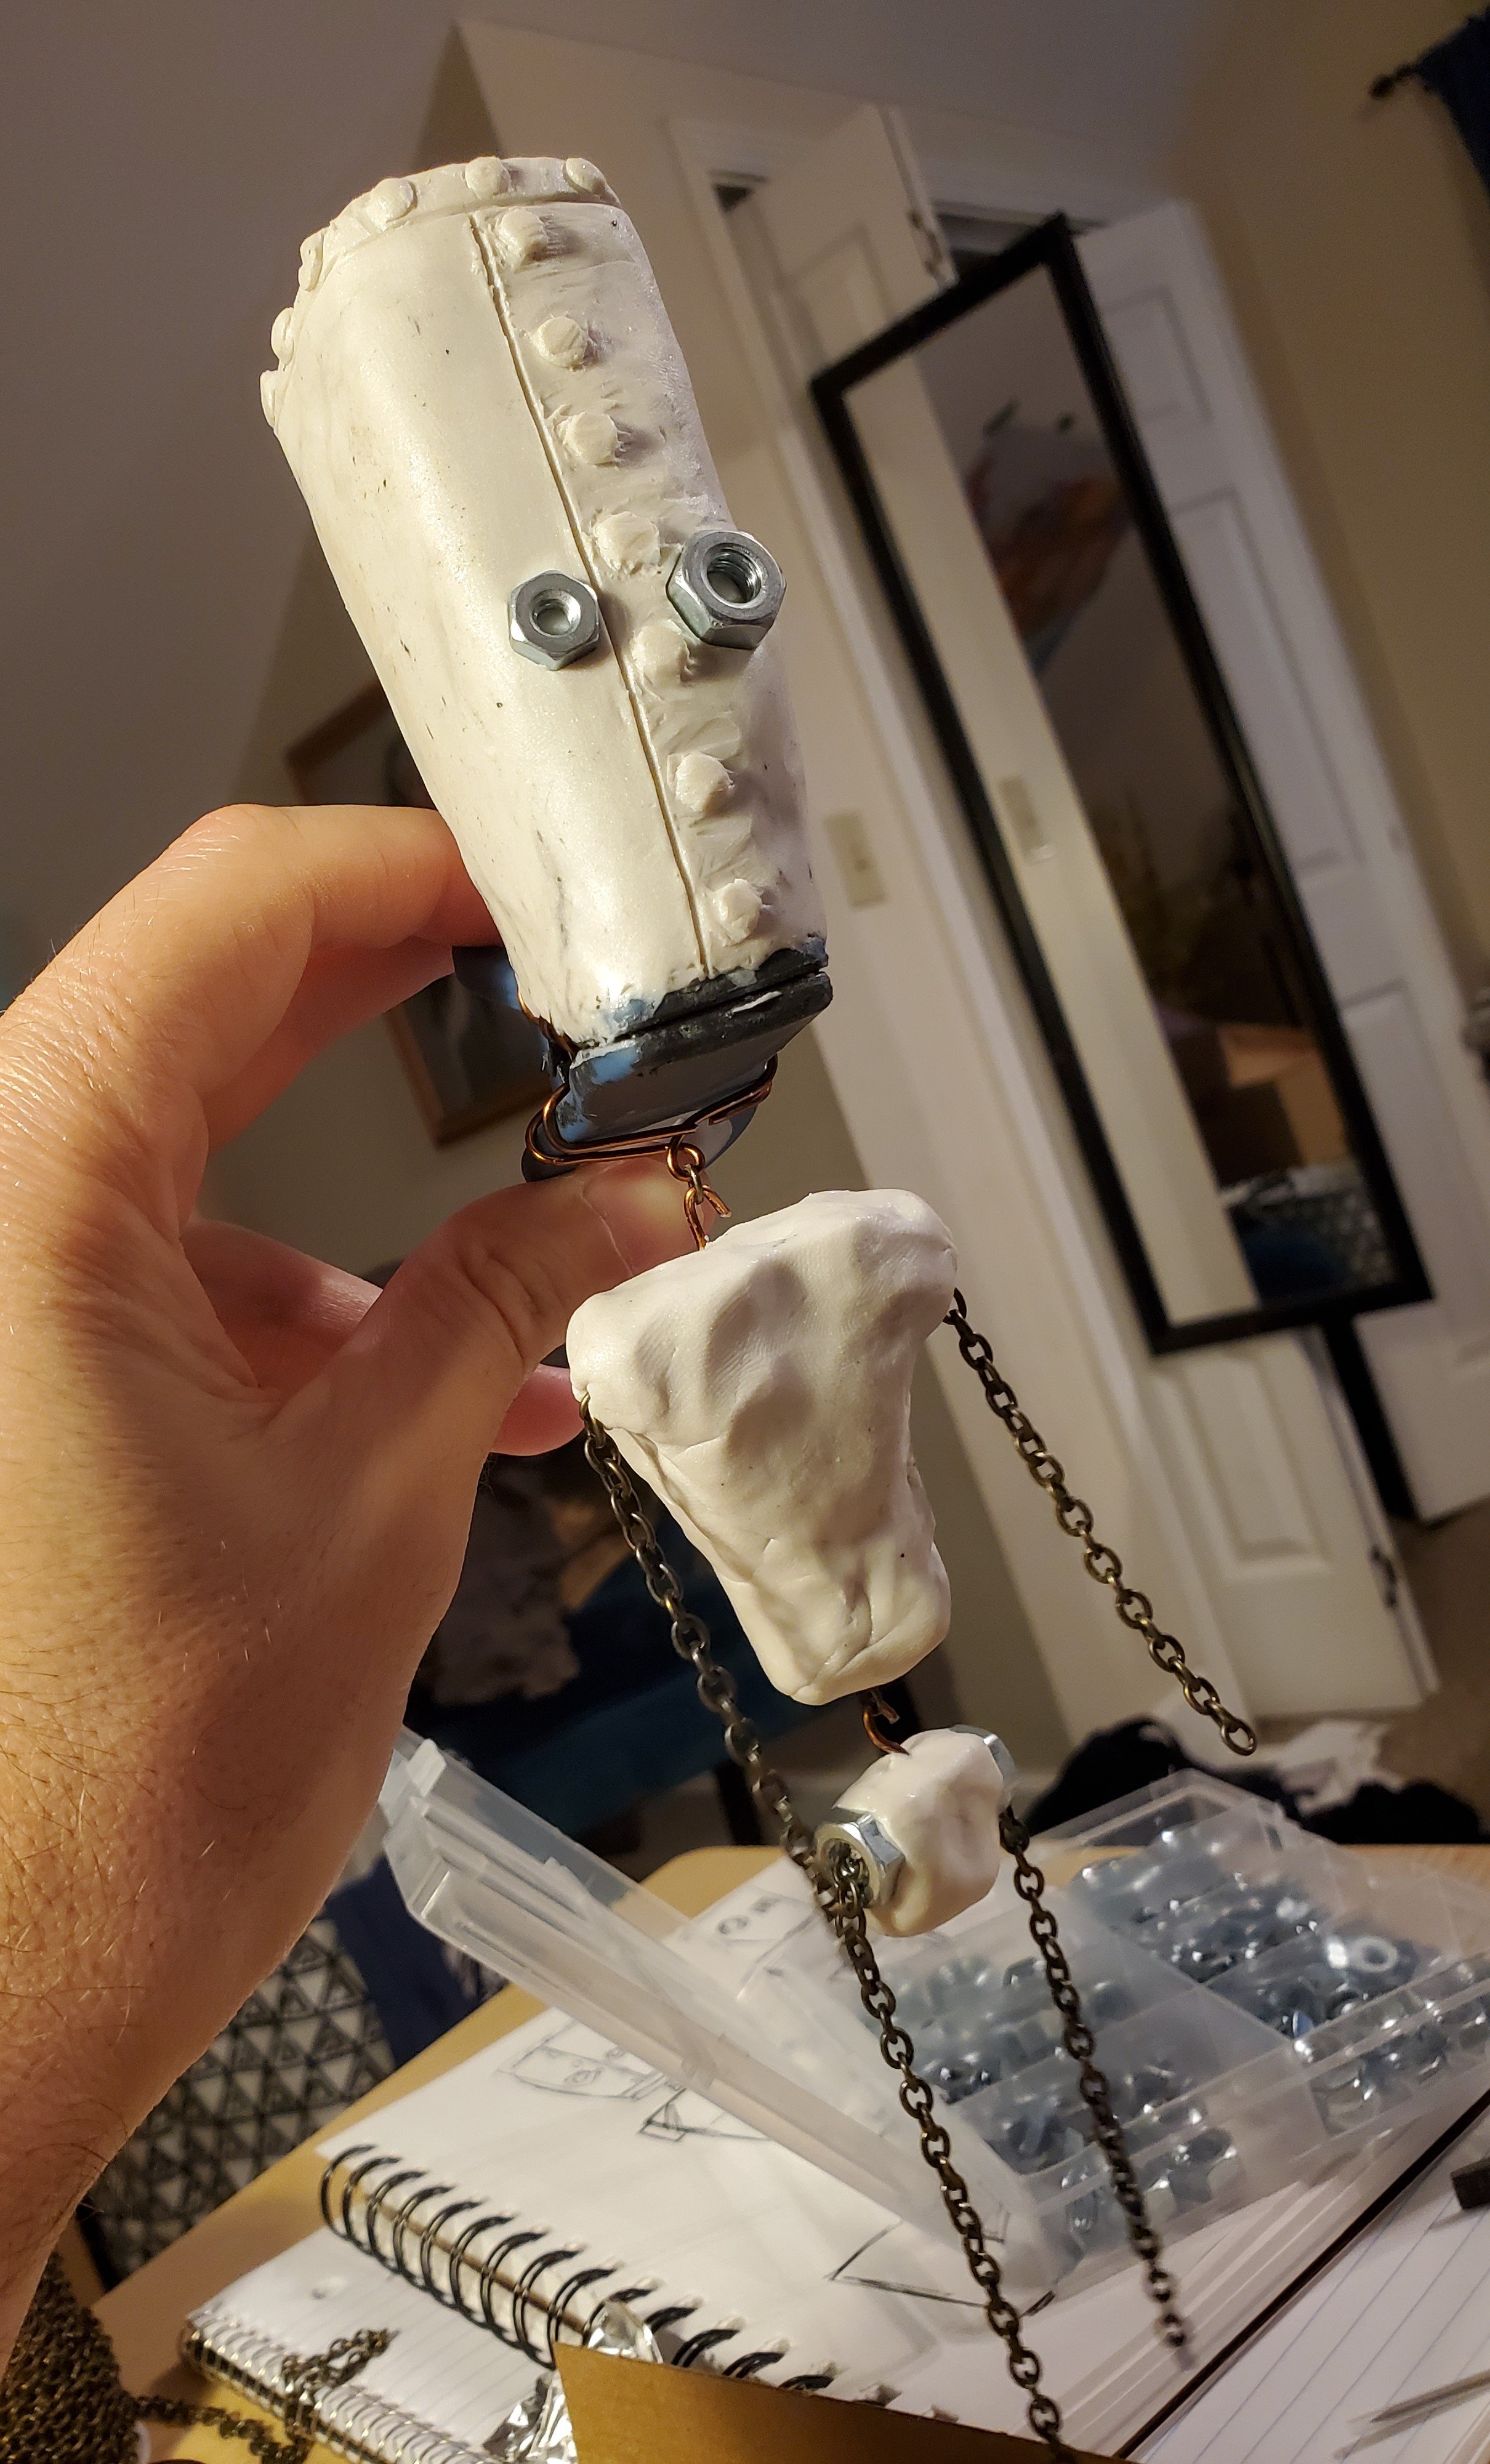
After getting the basic body down, with some detail on the robot’s head, I set out detailing the head, torso, and hips. For the hands and feet, I wanted to design them so that they didn’t need to be facing a certain way, so that if they swung around they wouldn’t seem backwards.
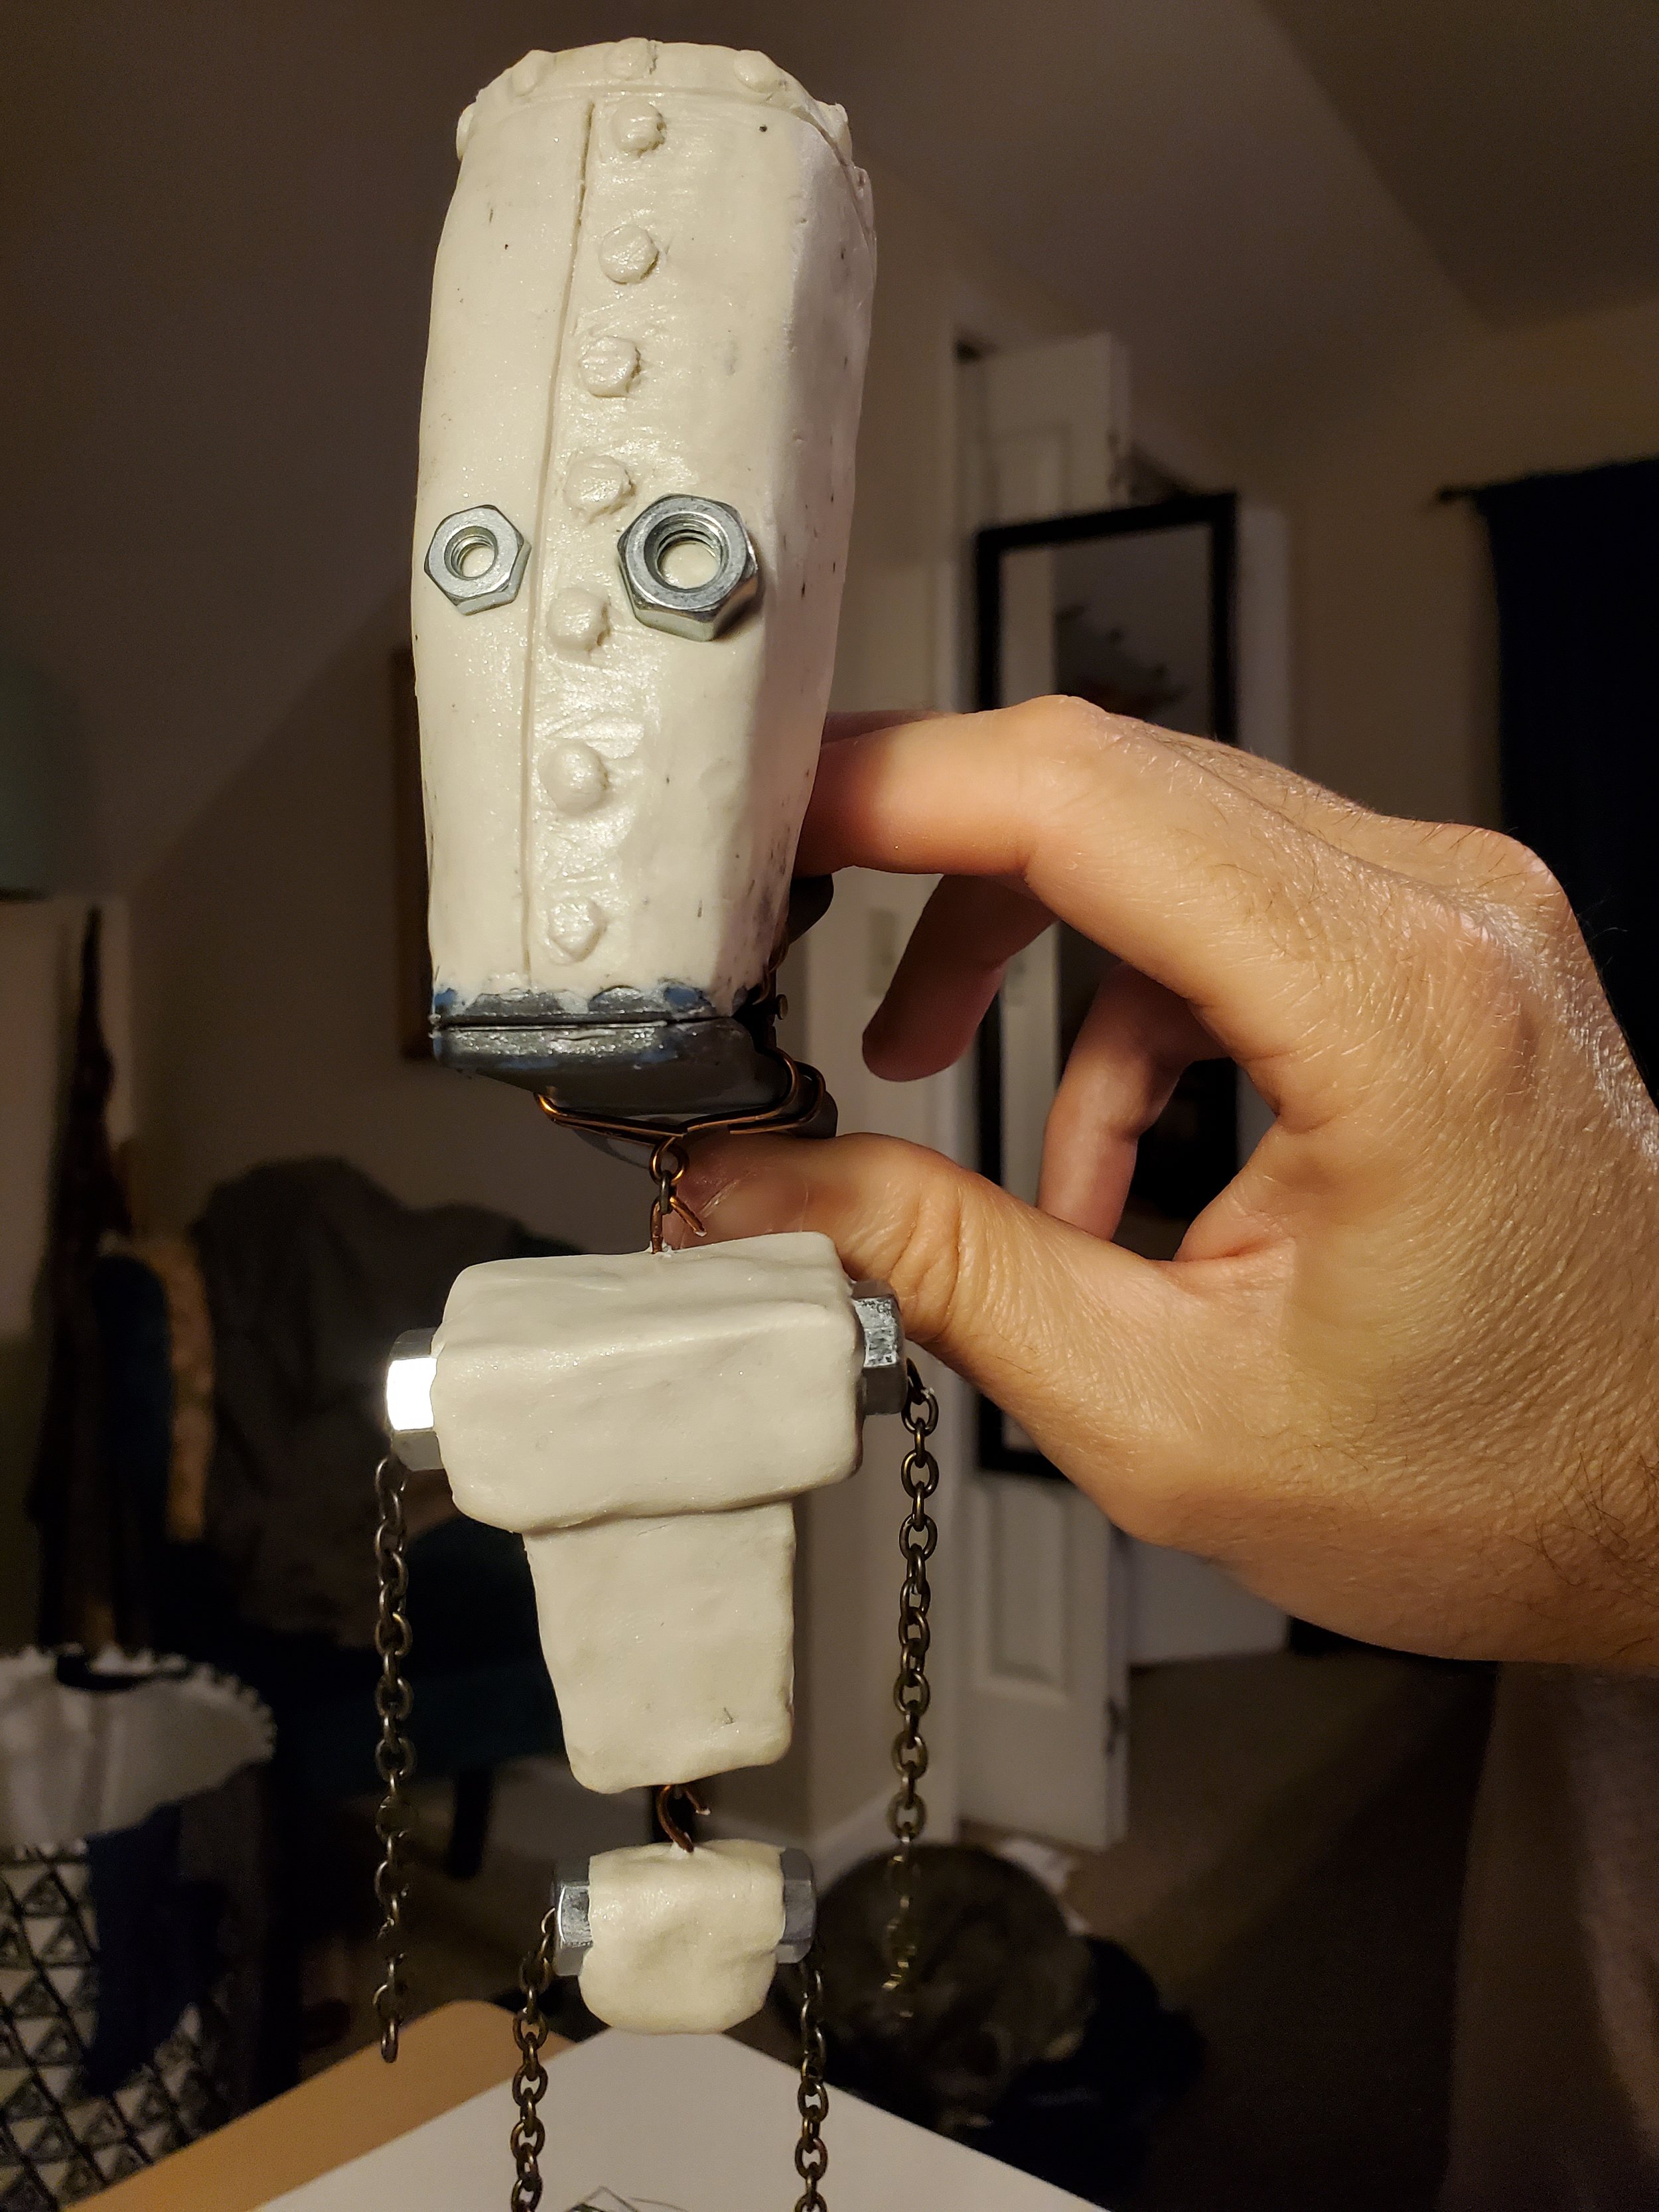
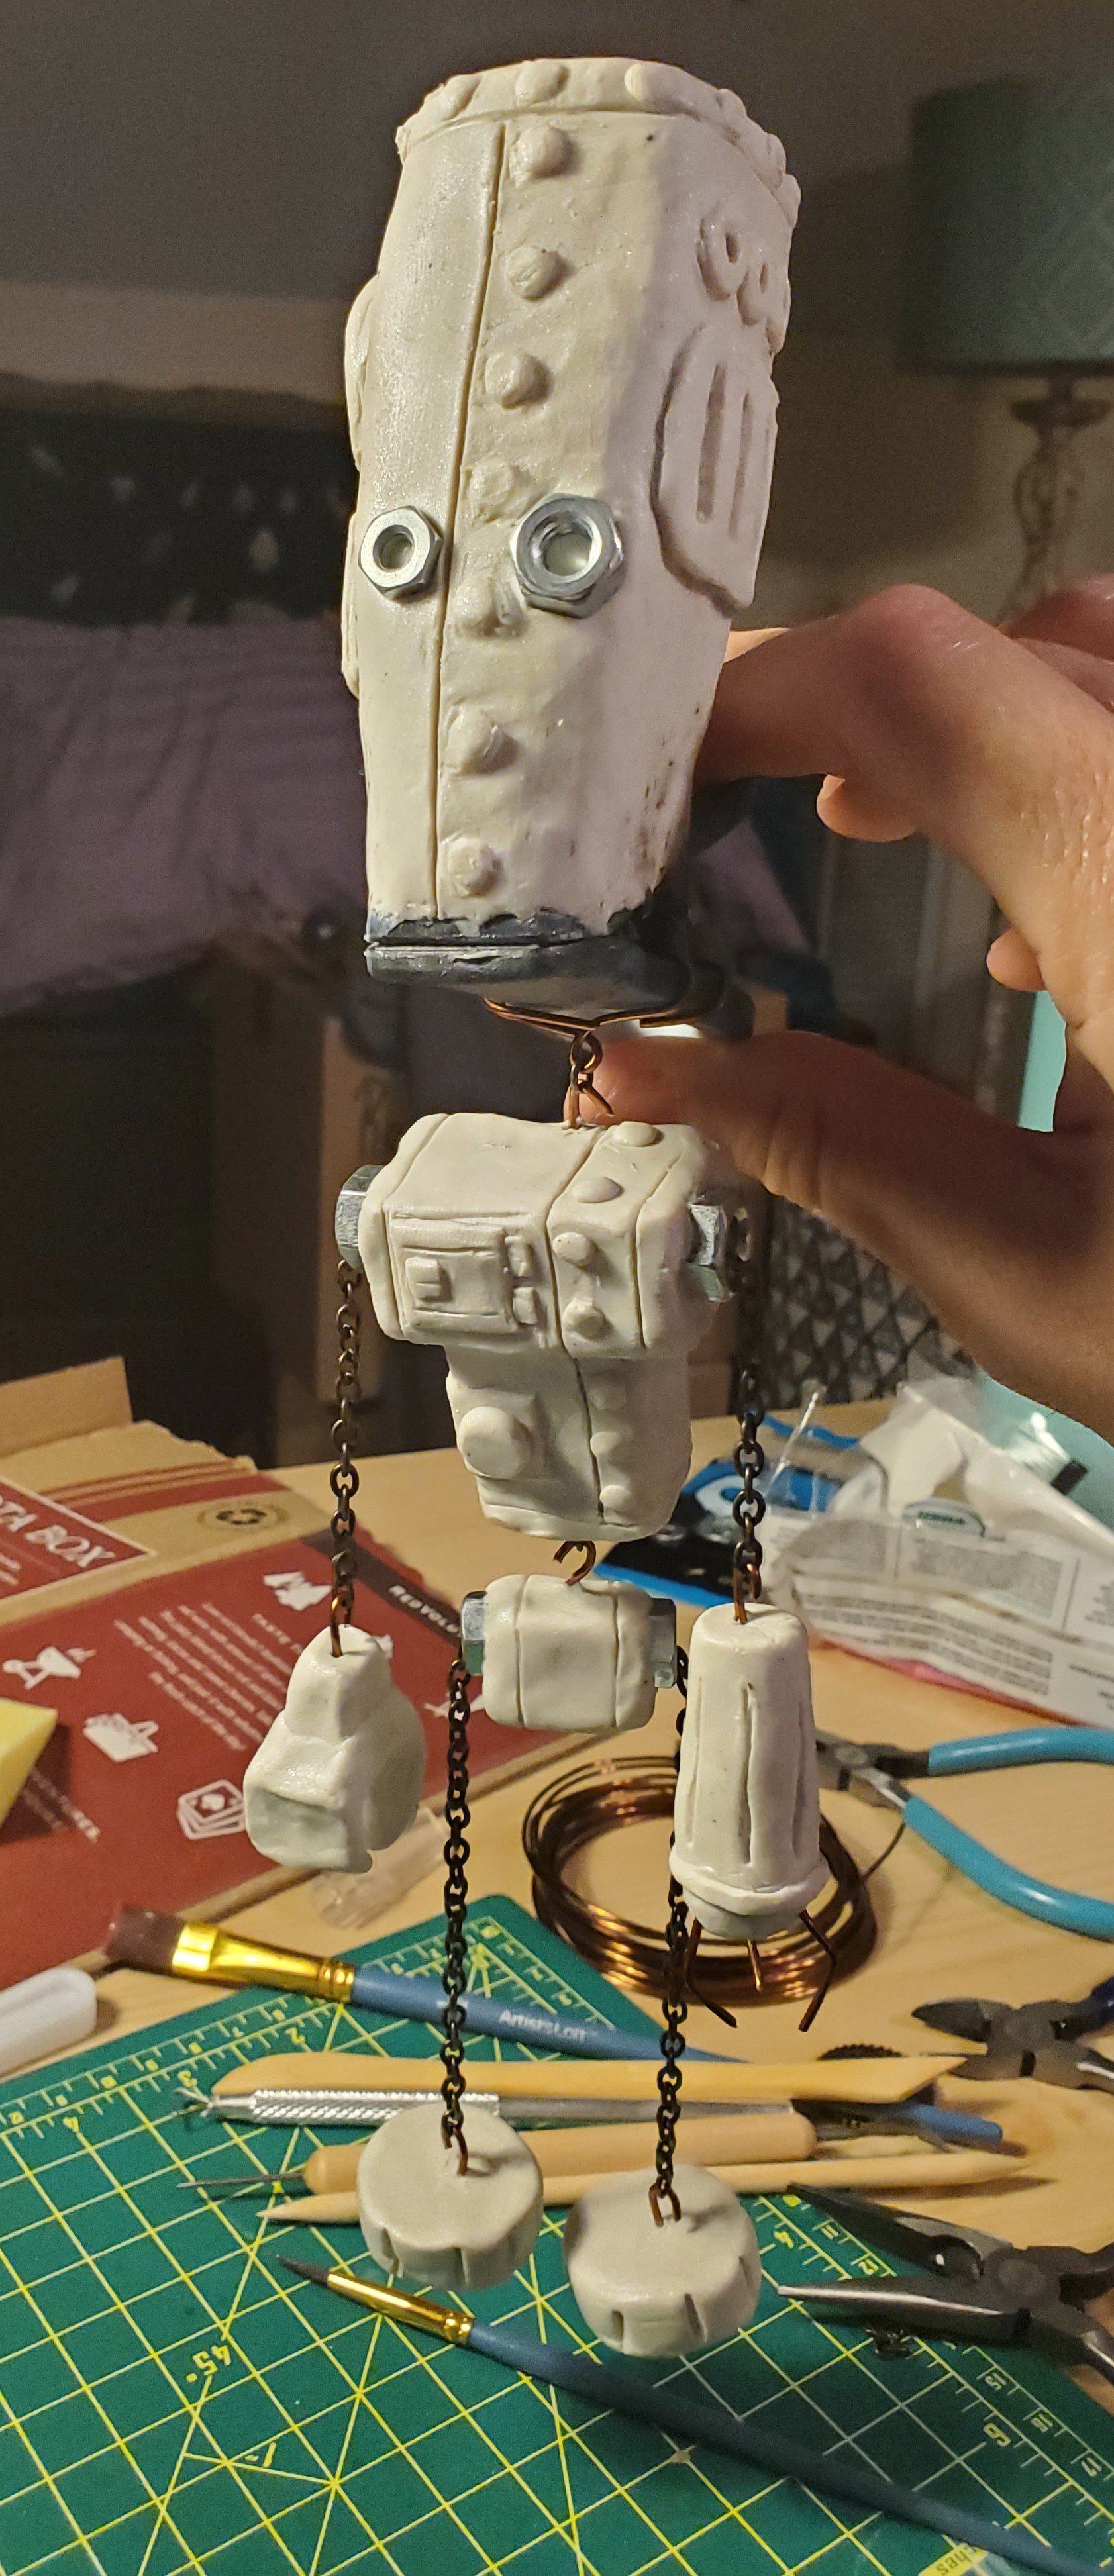
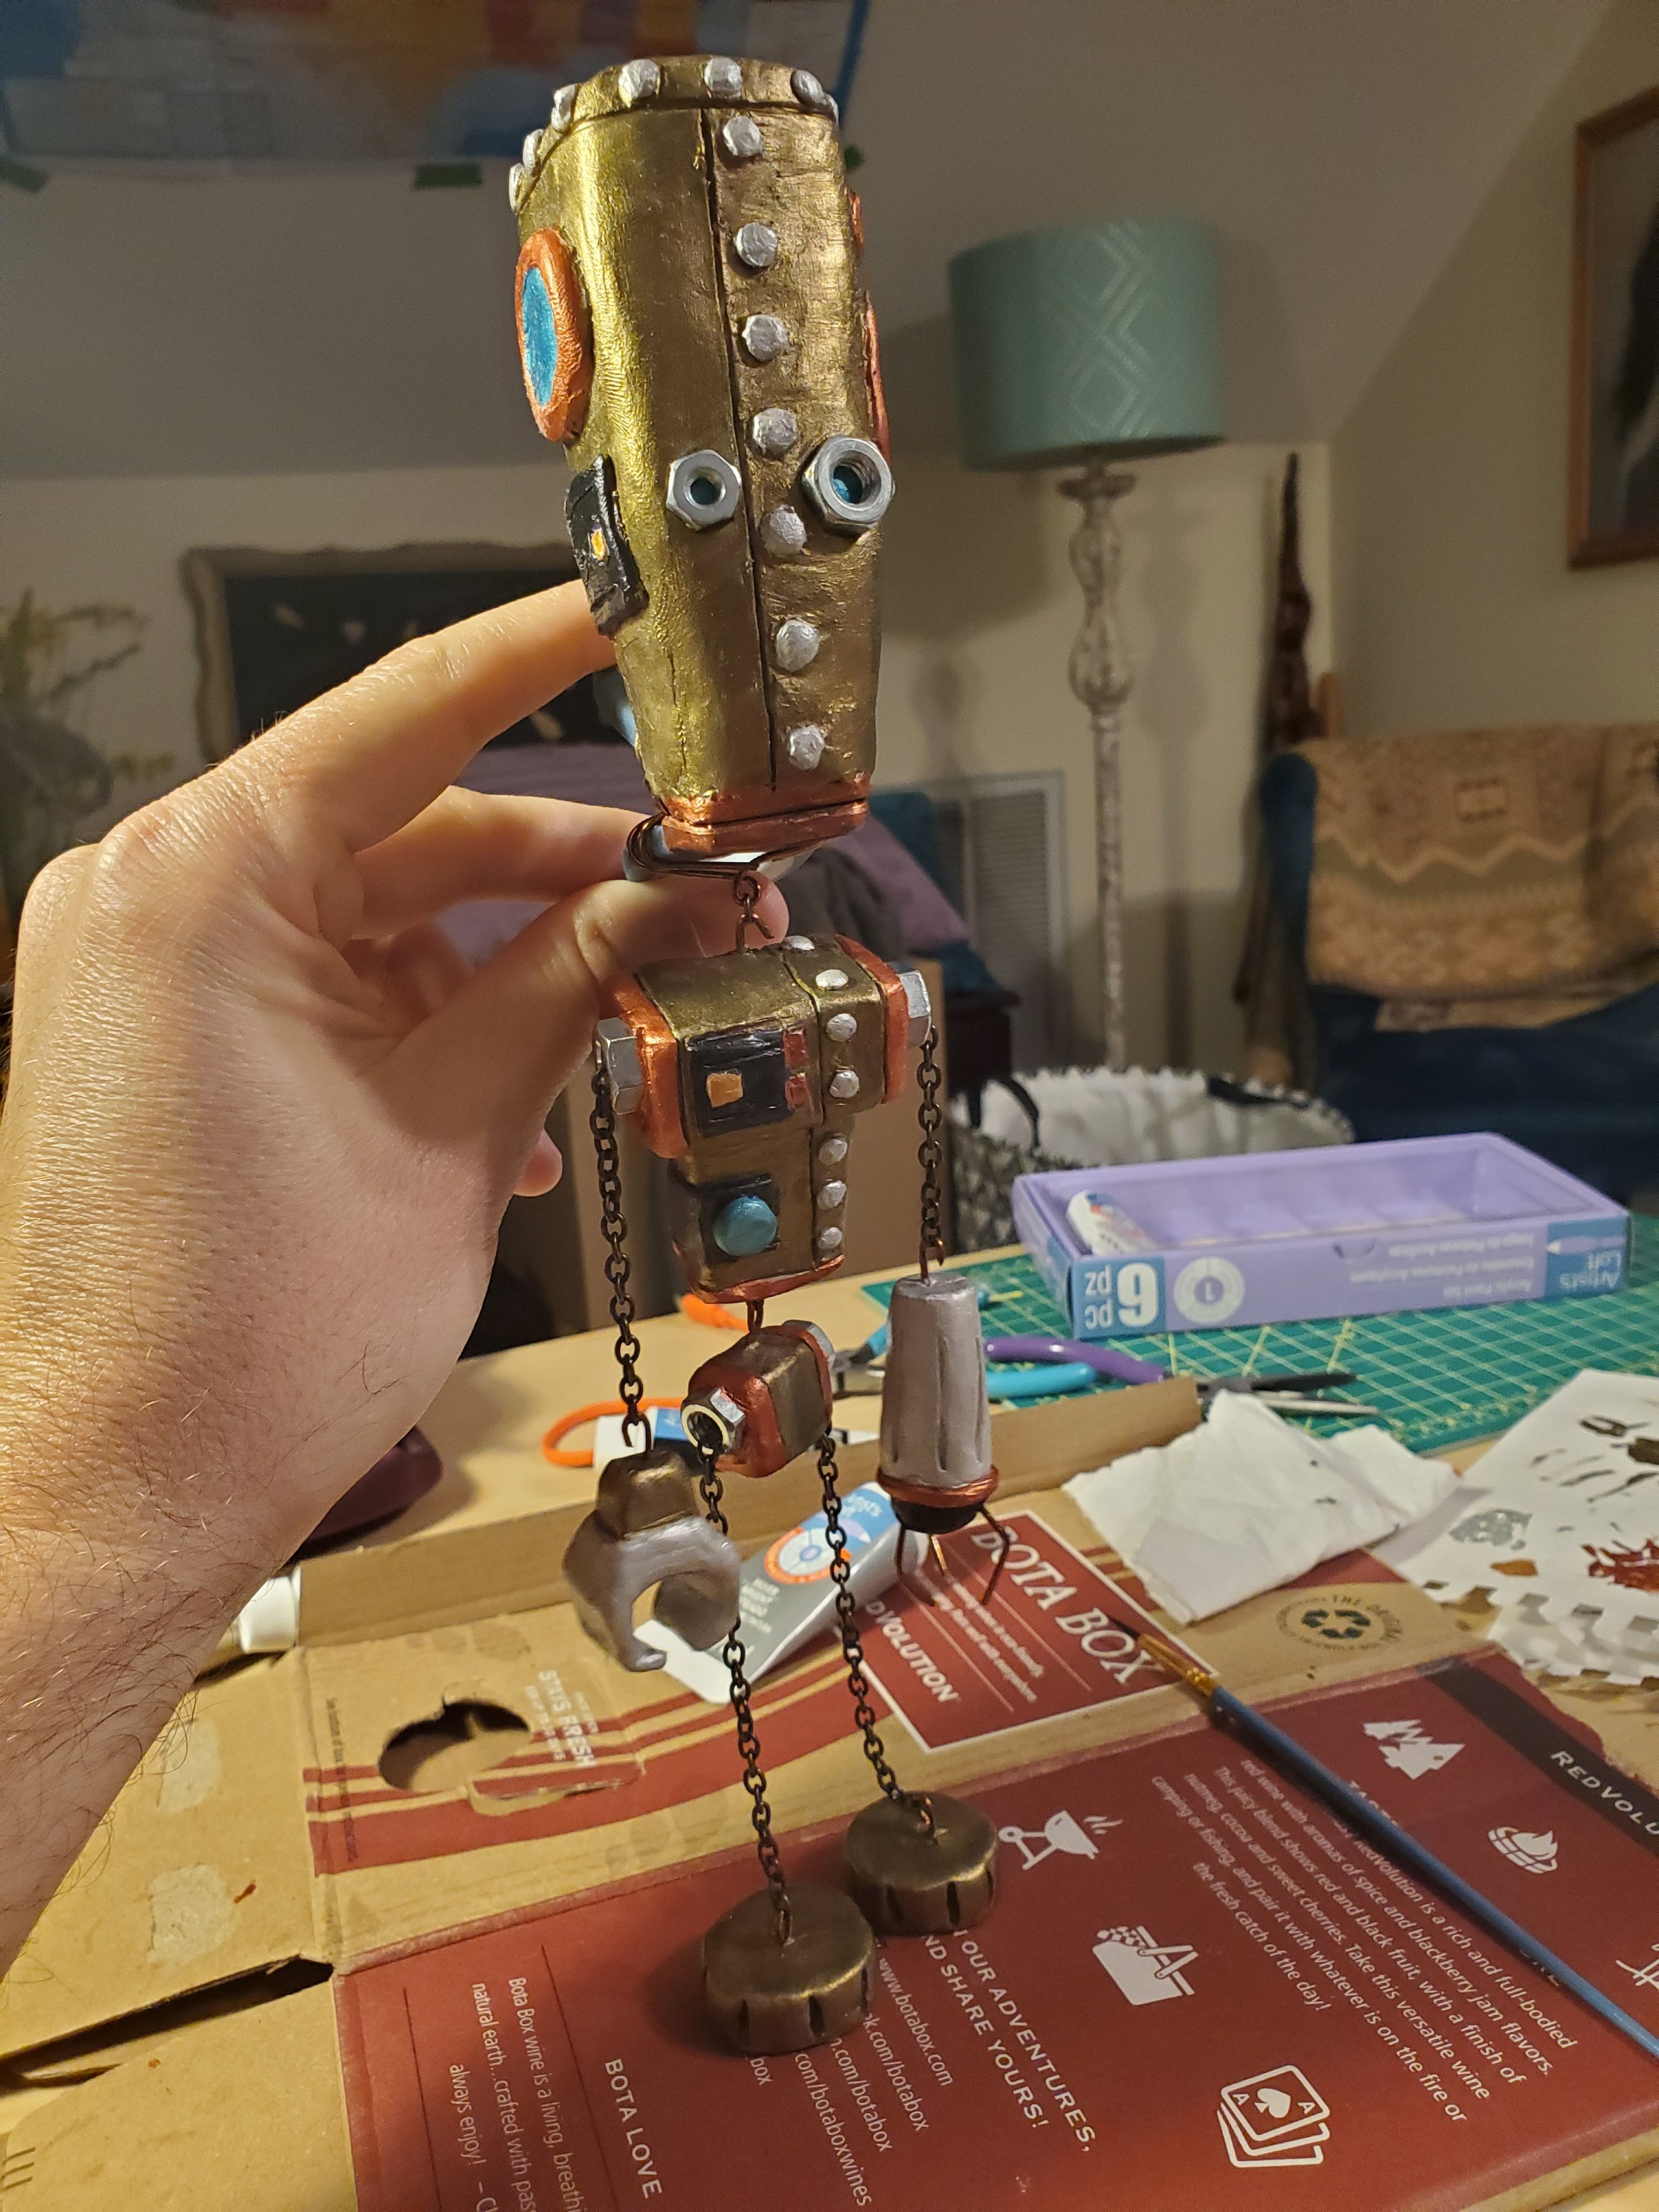
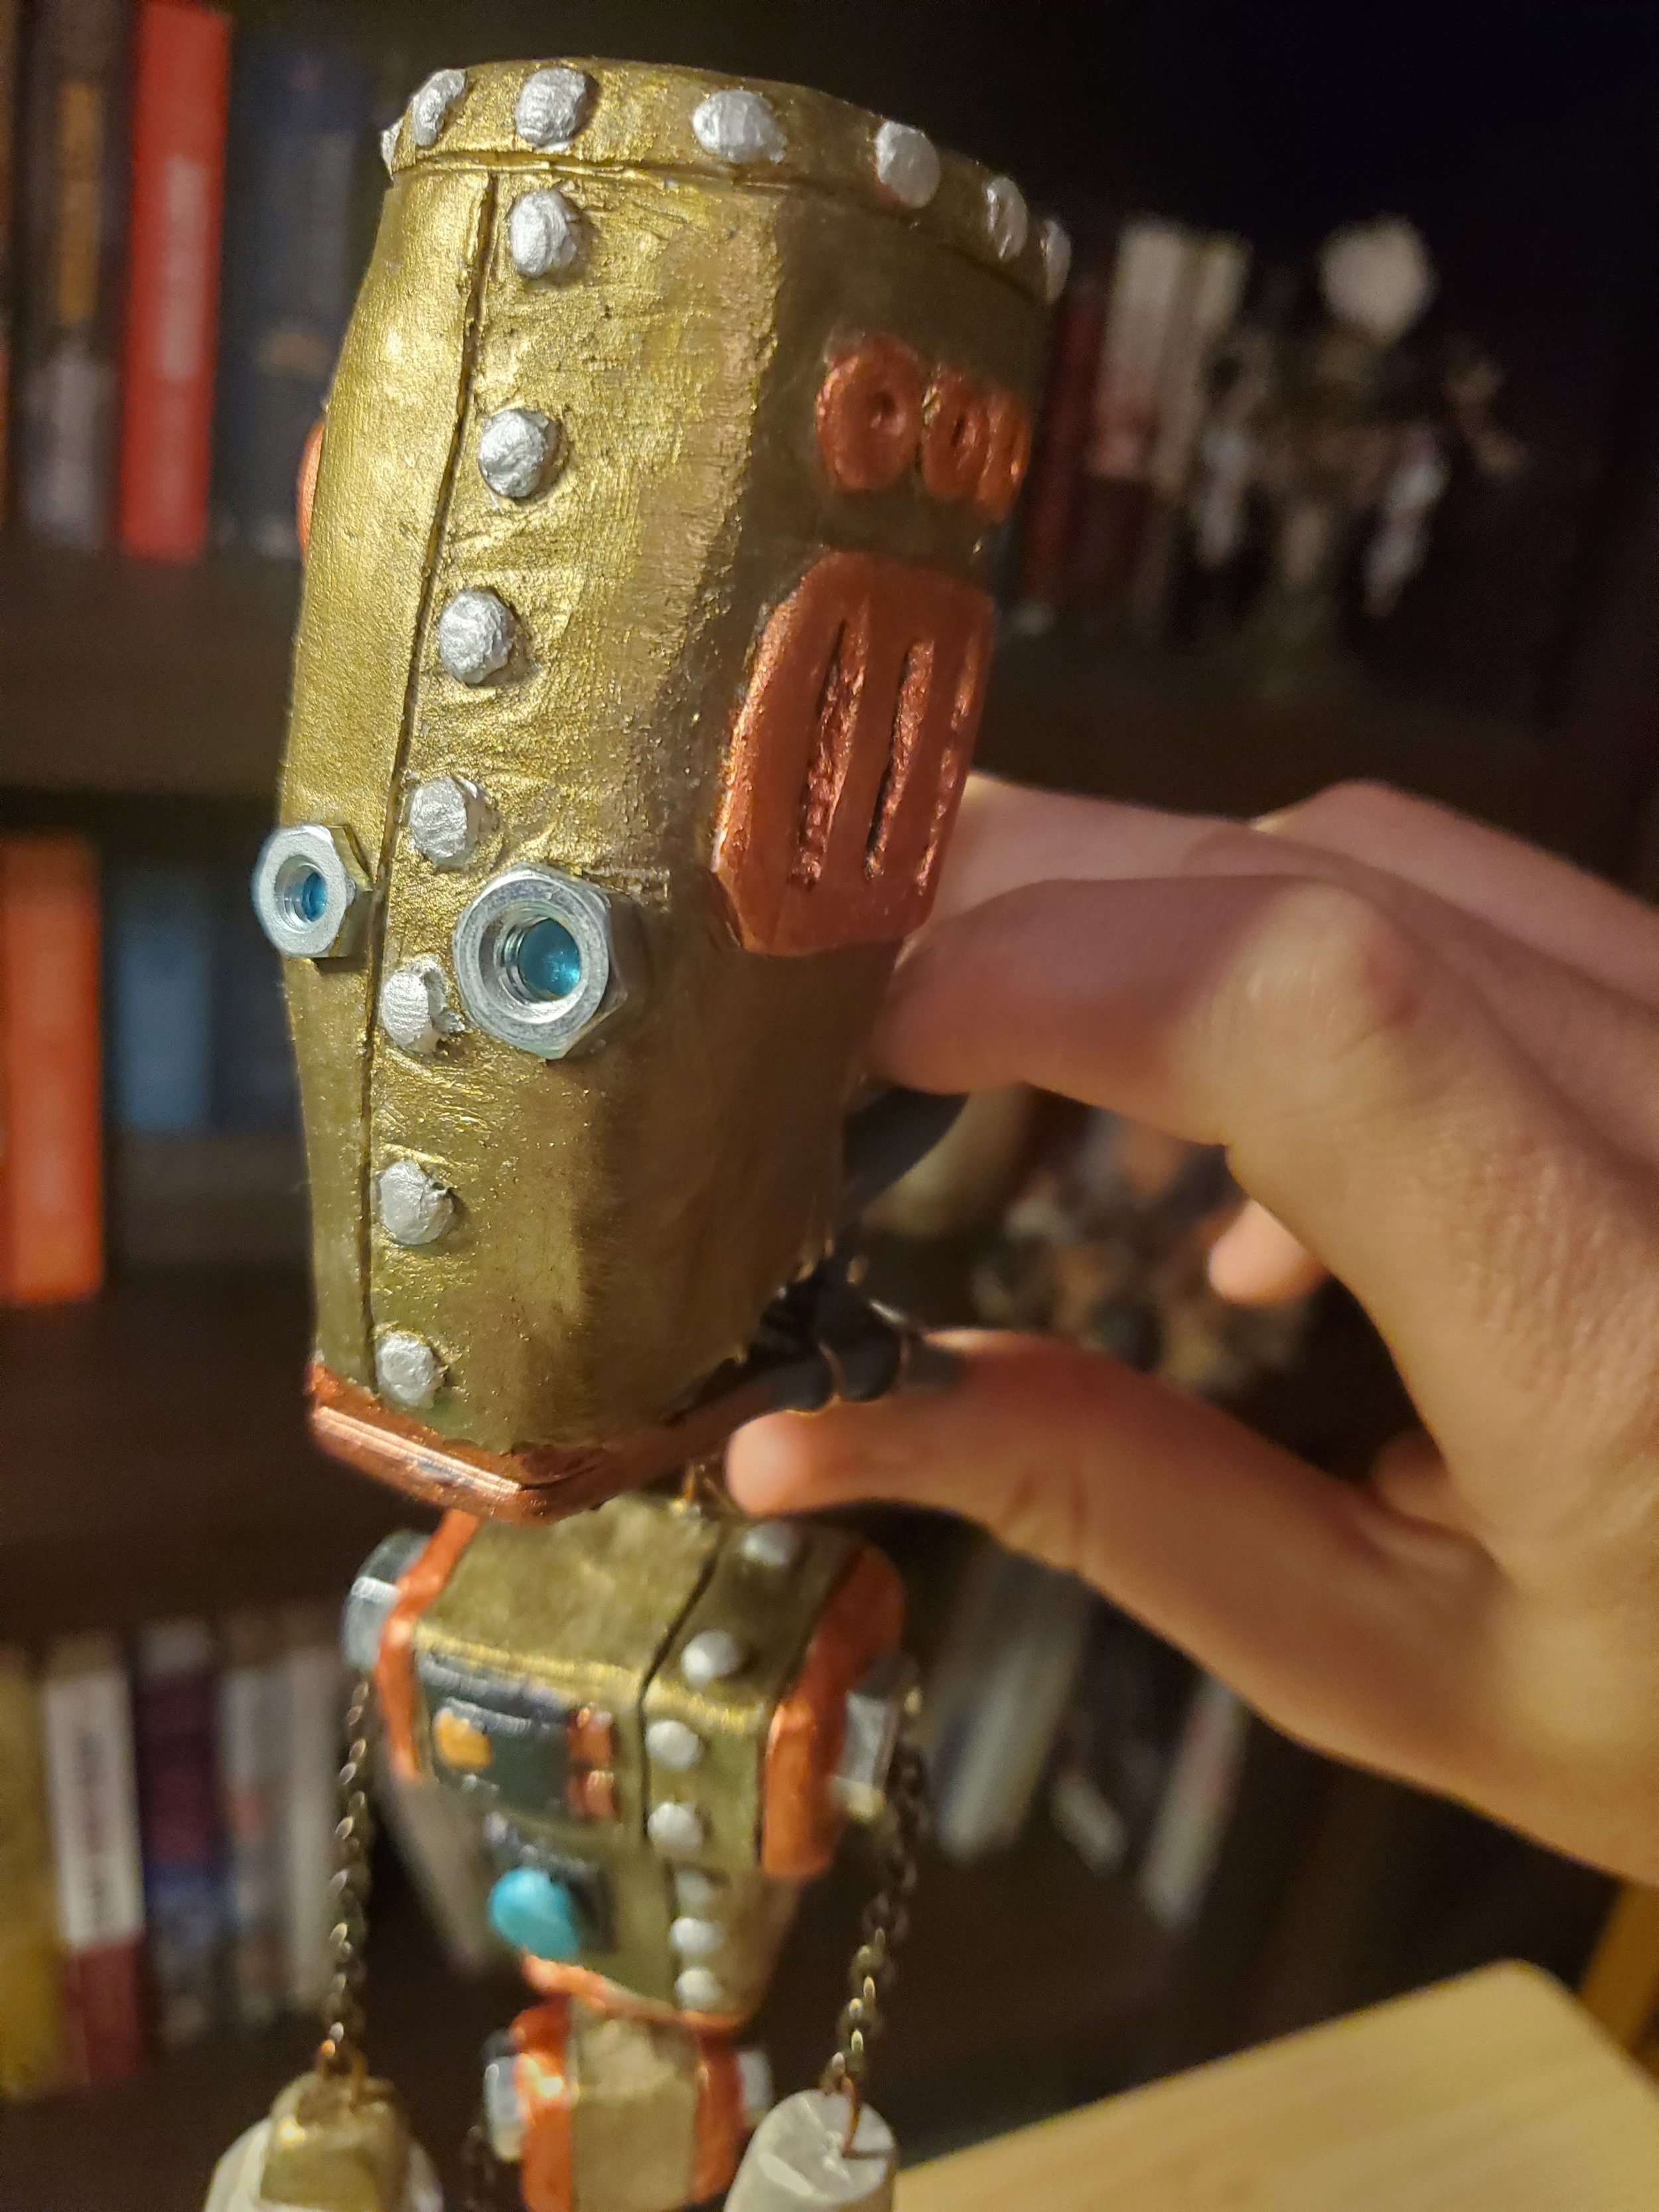
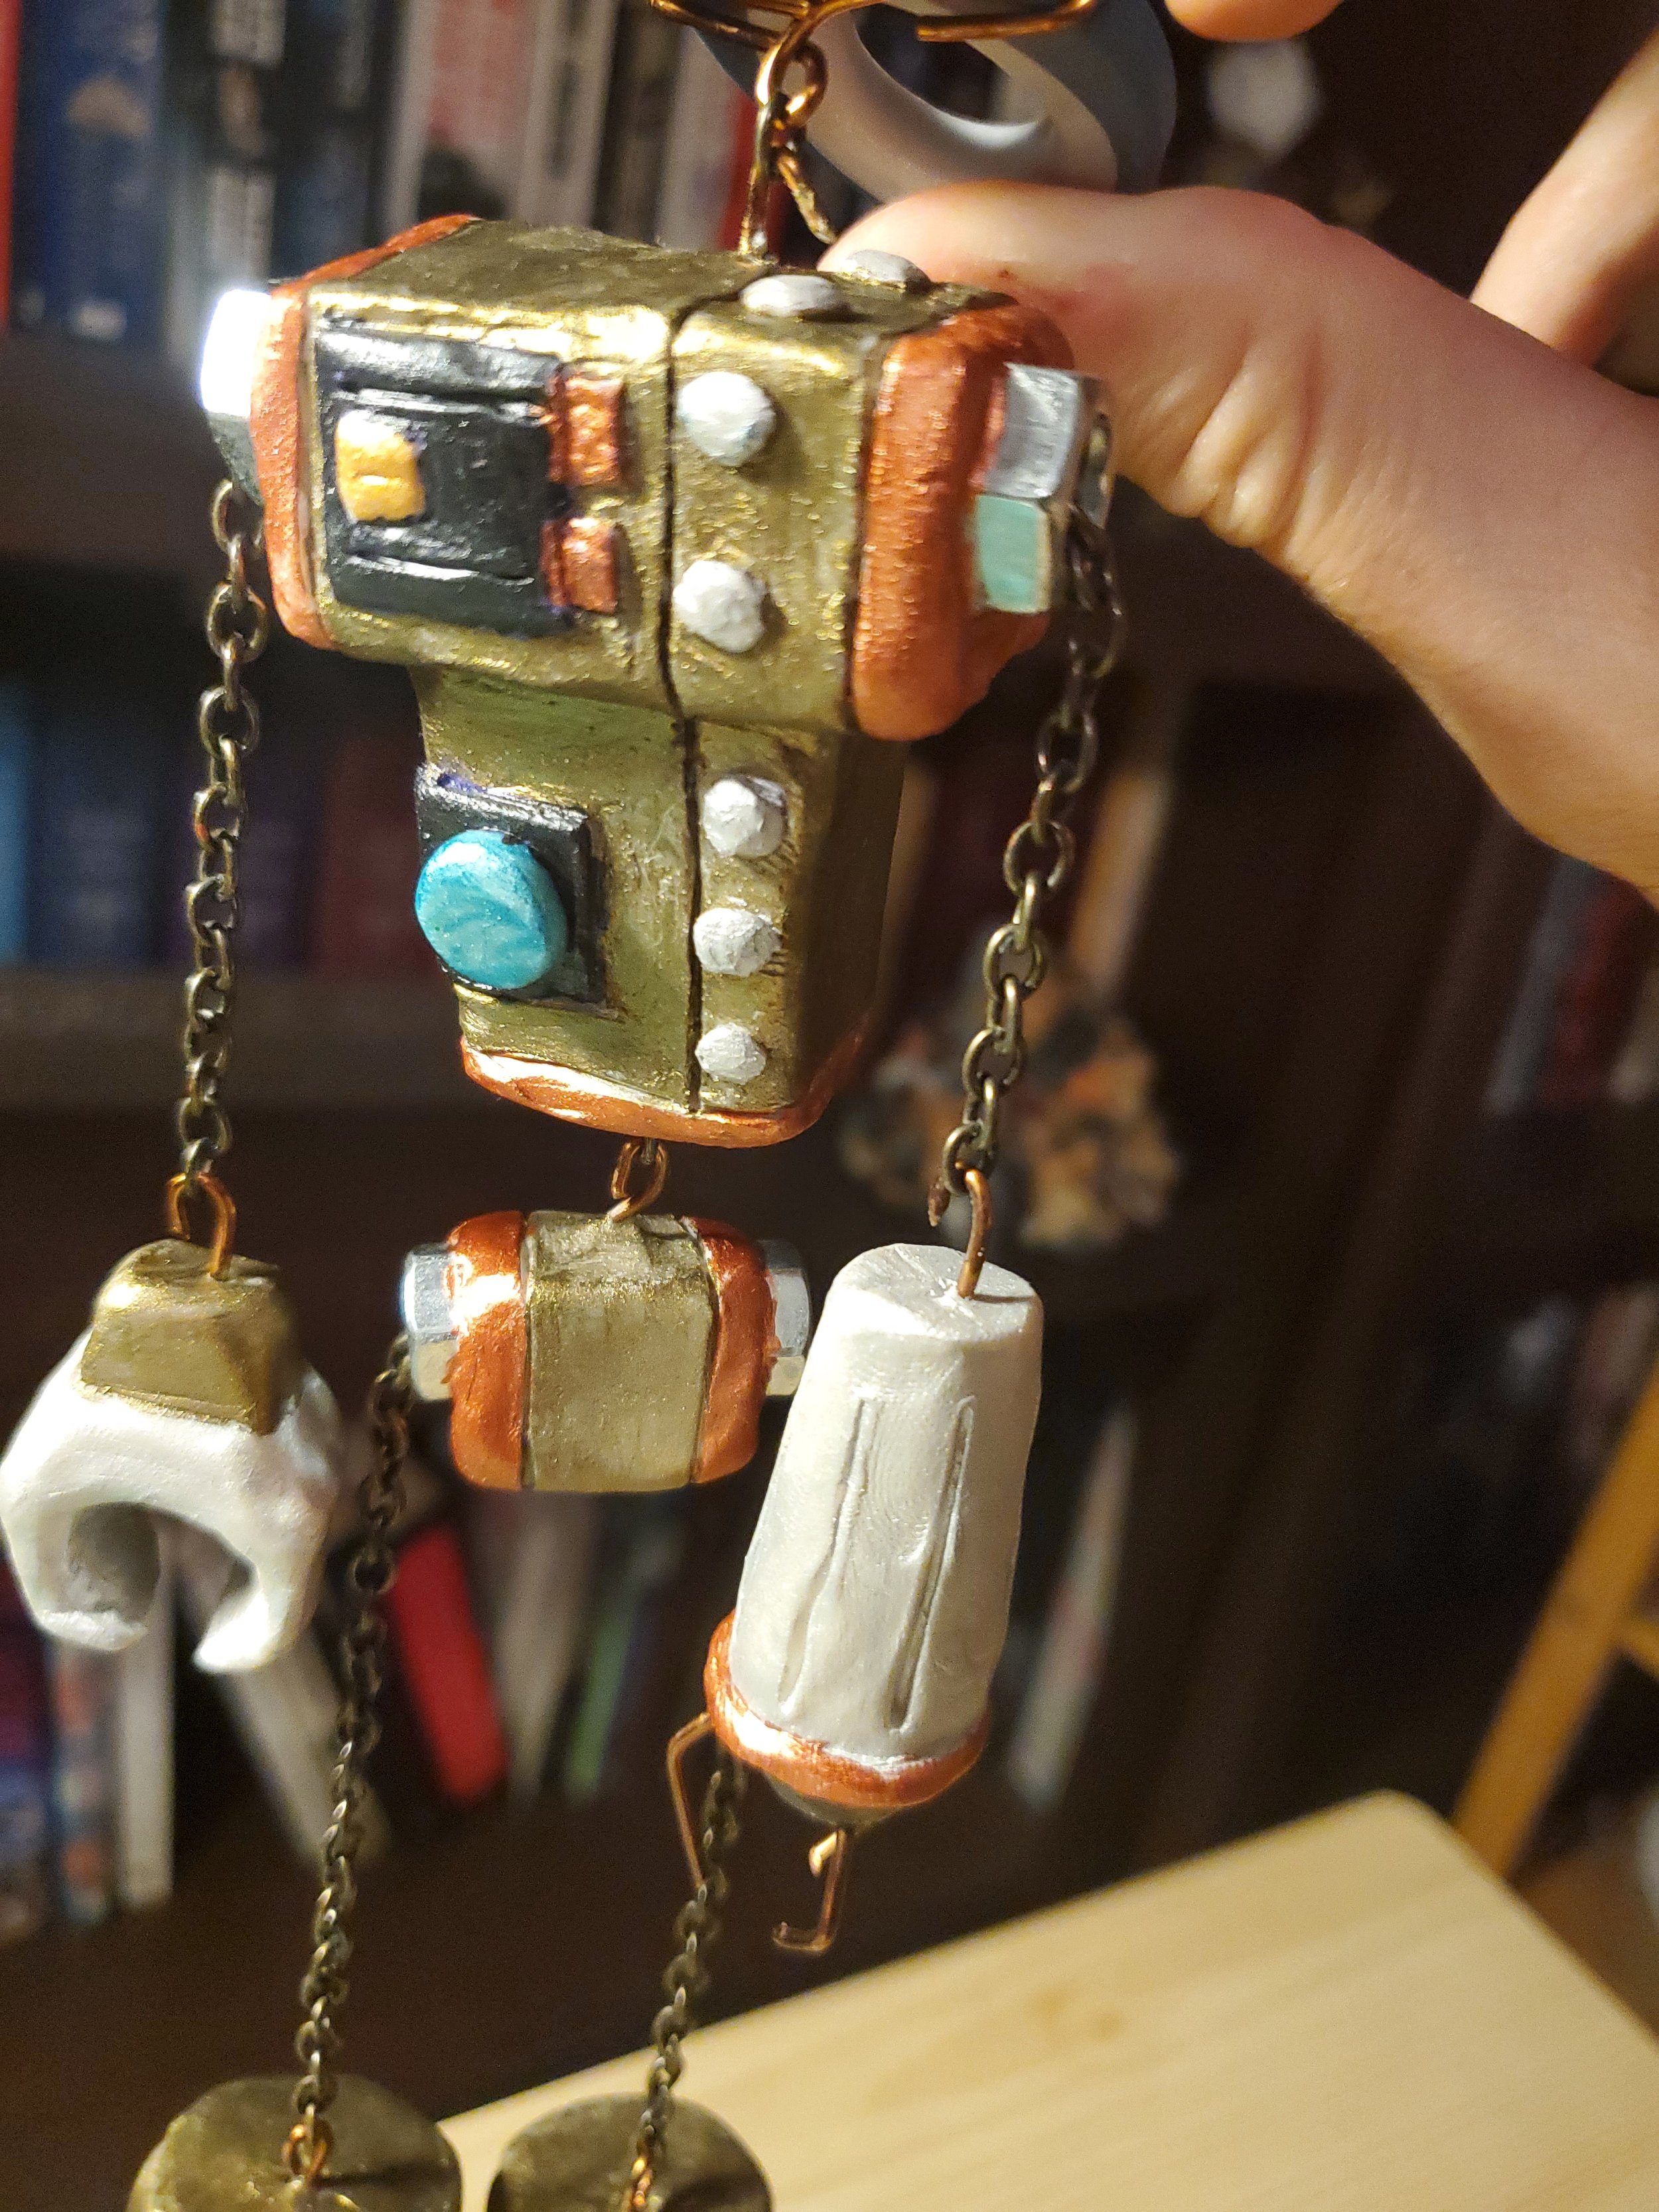
After I baked the pieces, I got out my metalic acrylic paints and painted him.
A video of my robot puppet!
The Next Steps
I’m super happy with this guy. Here are the next steps with my robot sculptures:
1 - Write robot poetry and make surreal robot videos with the puppet.
2 - Build more robots! I love making them, and I want to make smaller ones that I can eventually have for sale. I also eventually want to make a story involving 4 robots and scatter pieces of their story all over the internet. Something involving time travel, the apocalypse, and love.
Feel free to ask any questions in the comments or in an email - Andy@AndyReynolds.net
Stay inspired!
—Andy